Hired-Hand Funnel Flow Fans: 36 48 & 52 Funnel Flow Belt Drive Fan Unassembled User Manual
Page 9
Part No. 4801-5401 Rev 6/07
36" 48" & 52" Funnel Flow Fan – Unassembled
Page 9 of 12
Motor
installation
holes
Figure 19
Figure 20
Figure 21
Push motor all
the way up the
brace.
6.16 Refer to Figure 16. Fasten arms to shroud with 5/16” x 7/8” hex head bolt (1004-5000) and
5/16” x 1½” fender washer (1003-2604) from the outside of the shroud. Use 5/16” x ¾” flat
washer (1003-0103) and lock nut (1001-0103) as shown.
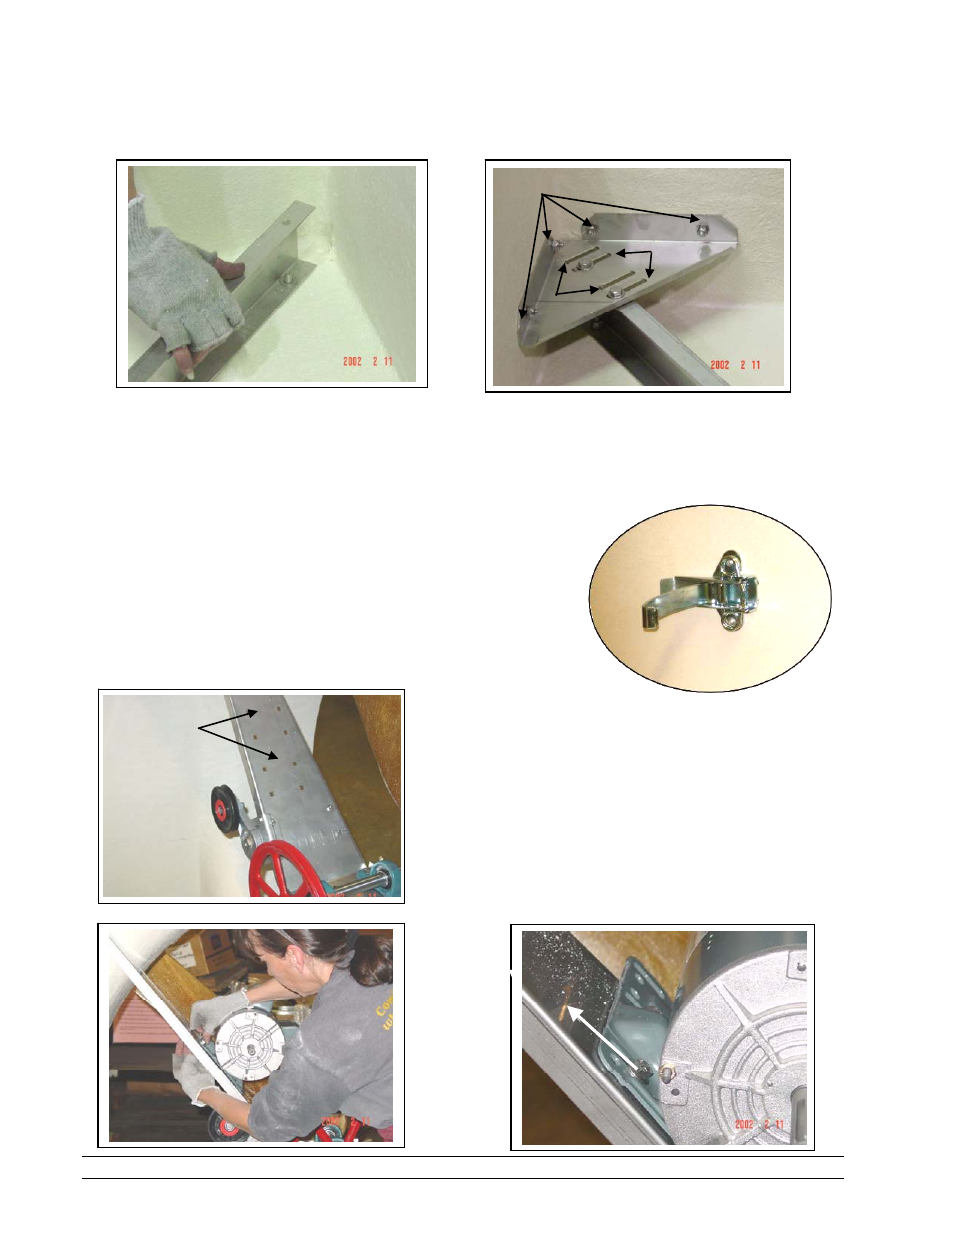
6.17 Refer to Figure 17. NOTE: The 36” fan does not require a gusset. For the 48” & 52” fans, install the
gusset (0403-4892) using the proper mounting holes using 5/16" cap screw (1004-5000), two washers
(1003-0103) and lock nut (1001-0103). Level the gusset and drill four holes through the shroud.
Fasten the gusset to the top left corner of the cabinet using six ¼” cap screws (1004-5017), twelve
5/16” x ¾” flat washers (1003-0103), and six lock nuts (1001-0103).
6.18 Remove the three Fan Alignment Jigs placed on the ends
of the fan blades in Step 14.
6.19 Install the two Tension Latches (1040-0105) and Latch
plates (0403-6756) on either side of the shroud using 3/16”
rivets (1005-1469). See Figure 18.
6.20 At this point the fan housing can be installed in the wall
before completing the rest of the installation steps.
6.21 Install the motor in the top mounting holes as
shown in Figures 19, 20 and 21 using four
carriage bolts (1002-2818), and lock nuts (1001-
0103). Before tightening bolts, push the motor all
the way up the mounting arm to give the proper
tension on the belt.
Figure 16
Tension Latch
(1040-0105)
Figure 18
Figure 17
Drill four ¼” holes in shroud.
52” mount
48” mount