Elitegroup E07EI1 User Manual
Page 42
36
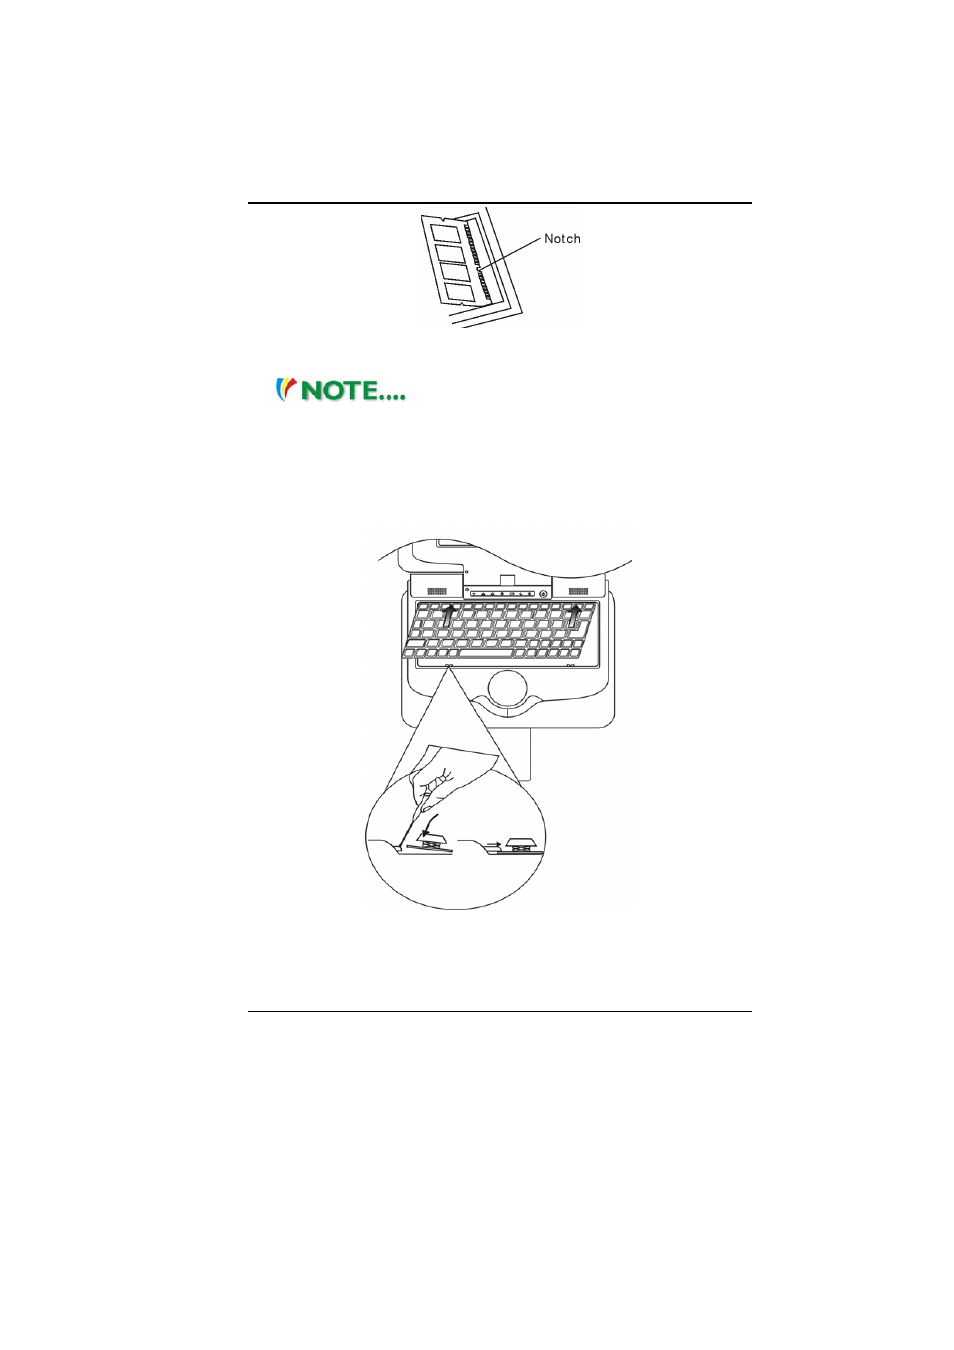
7.
Pivot the DIMM until the latches on both sides of the
socket snap into place.
Notice the notch on the DIMM. The
notches should fit nicely with the socket.
8.
Put the metal cover and the keyboard back to their
original position. Make sure the bottom edge of the
keyboard now resides under the spring-loaded latches.
You may need to use a small pin to push in the latch first,
otherwise the keyboard will not fit in.
Congratulations! You have just completed the memory upgrade.
When you boot up the computer, you should expect to see an
increase in DRAM capacity.
See also other documents in the category Elitegroup Notebooks:
- MB50II / IA ID 1 (72 pages)
- MB40II ID 9 (73 pages)
- MB40II / IA ID 8 (73 pages)
- MB40II ID 7 (71 pages)
- MB40II ID 6 (57 pages)
- MB40II ID 5 (56 pages)
- MB40II ID 4 (53 pages)
- MB40II / IA ID 3 (73 pages)
- MB40II / IA - 41II ID 2 (72 pages)
- MB40II ID 1 (73 pages)
- L41II (69 pages)
- U40-50SA (70 pages)
- U41II (65 pages)
- U10IL (84 pages)
- A900 (V2.1) (85 pages)
- A535 (117 pages)
- A531_TM5800 (110 pages)
- 755SI4 v.1 (22 pages)
- 755SI4 v.2 (17 pages)
- 755SI4 v.3 (6 pages)
- 755SI4 v.4 (7 pages)
- 755SI4 v.5 (8 pages)
- 755IN v.1 (22 pages)
- 755IN v.2 (10 pages)
- 755IN v.3 (14 pages)
- 755IN v.4 (10 pages)
- 755IN v.5 (17 pages)
- 755IN v.6 (6 pages)
- 755IN v.7 (7 pages)
- 755IN v.8 (9 pages)
- 755II1 v.1 (22 pages)
- 755II1 v.2 (10 pages)
- 755II1 v.3 (14 pages)
- 755II1 v.4 (10 pages)
- 755II1 v.5 (17 pages)
- 755II1 v.6 (6 pages)
- 755II1 v.7 (7 pages)
- 755II1 v.8 (9 pages)
- 557 (81 pages)
- 536 (71 pages)
- 532 (83 pages)
- 332 (73 pages)
- 331 (75 pages)
- 330 (73 pages)
- 331 (77 pages)