Nexo GEO D User Manual
Page 28
Page 28/97
GEO
D
RIGGING PROCEDURE
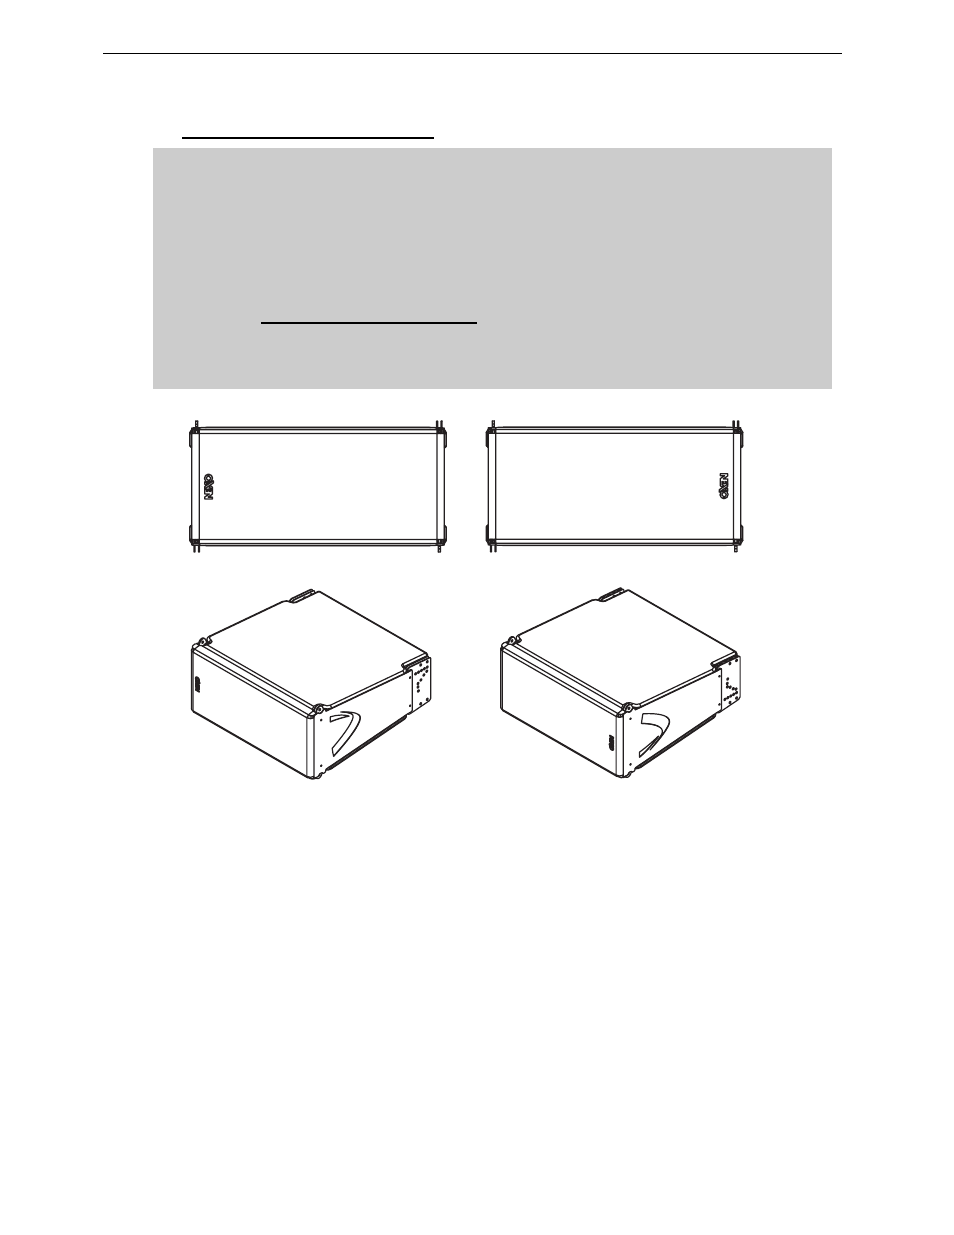
5.3.3 Bumper to first GEO D10 assembly
IMPORTANT
GEO D10 can be stacked “Left” or “Right” :
- “Left” means Nexo logo on front grid is left as seen from front;
- “Right” means Nexo logo on front grid is right as seen from front.
GEO D10 can be connected to bumper “Left” or “Right” by simply flipping the cabinets
upside down: do not reverse rigging plates
Whenever possible, NEXO recommends symmetrical designs (preferably NEXO logo
inwards in stereo configurations)
‘’LEFT’’
CONFIGURATION
’’RIGHT’’
CONFIGURATION
4 push-pins (BLGEOD, 10mm diameter x 20 mm length) connect the bottom GEO D10 to the bumper.
• Position the first GEO D10 on bumper;
• Link the GEO D10 to the bumper assembly using the four 10mm x 20mm push-pins; front
bumper connects at GEO D10 front articulation point, rear bumper connects at “LIFT” GEO D10
rigging plates holes;
• Check that all push-pins are in their locked position.