Inflating roof & end poly fourteen, Figure 1 figure 2 figure 3, Plan view of greenhouse – Poly-Tex KOOL HOUSE User Manual
Page 16
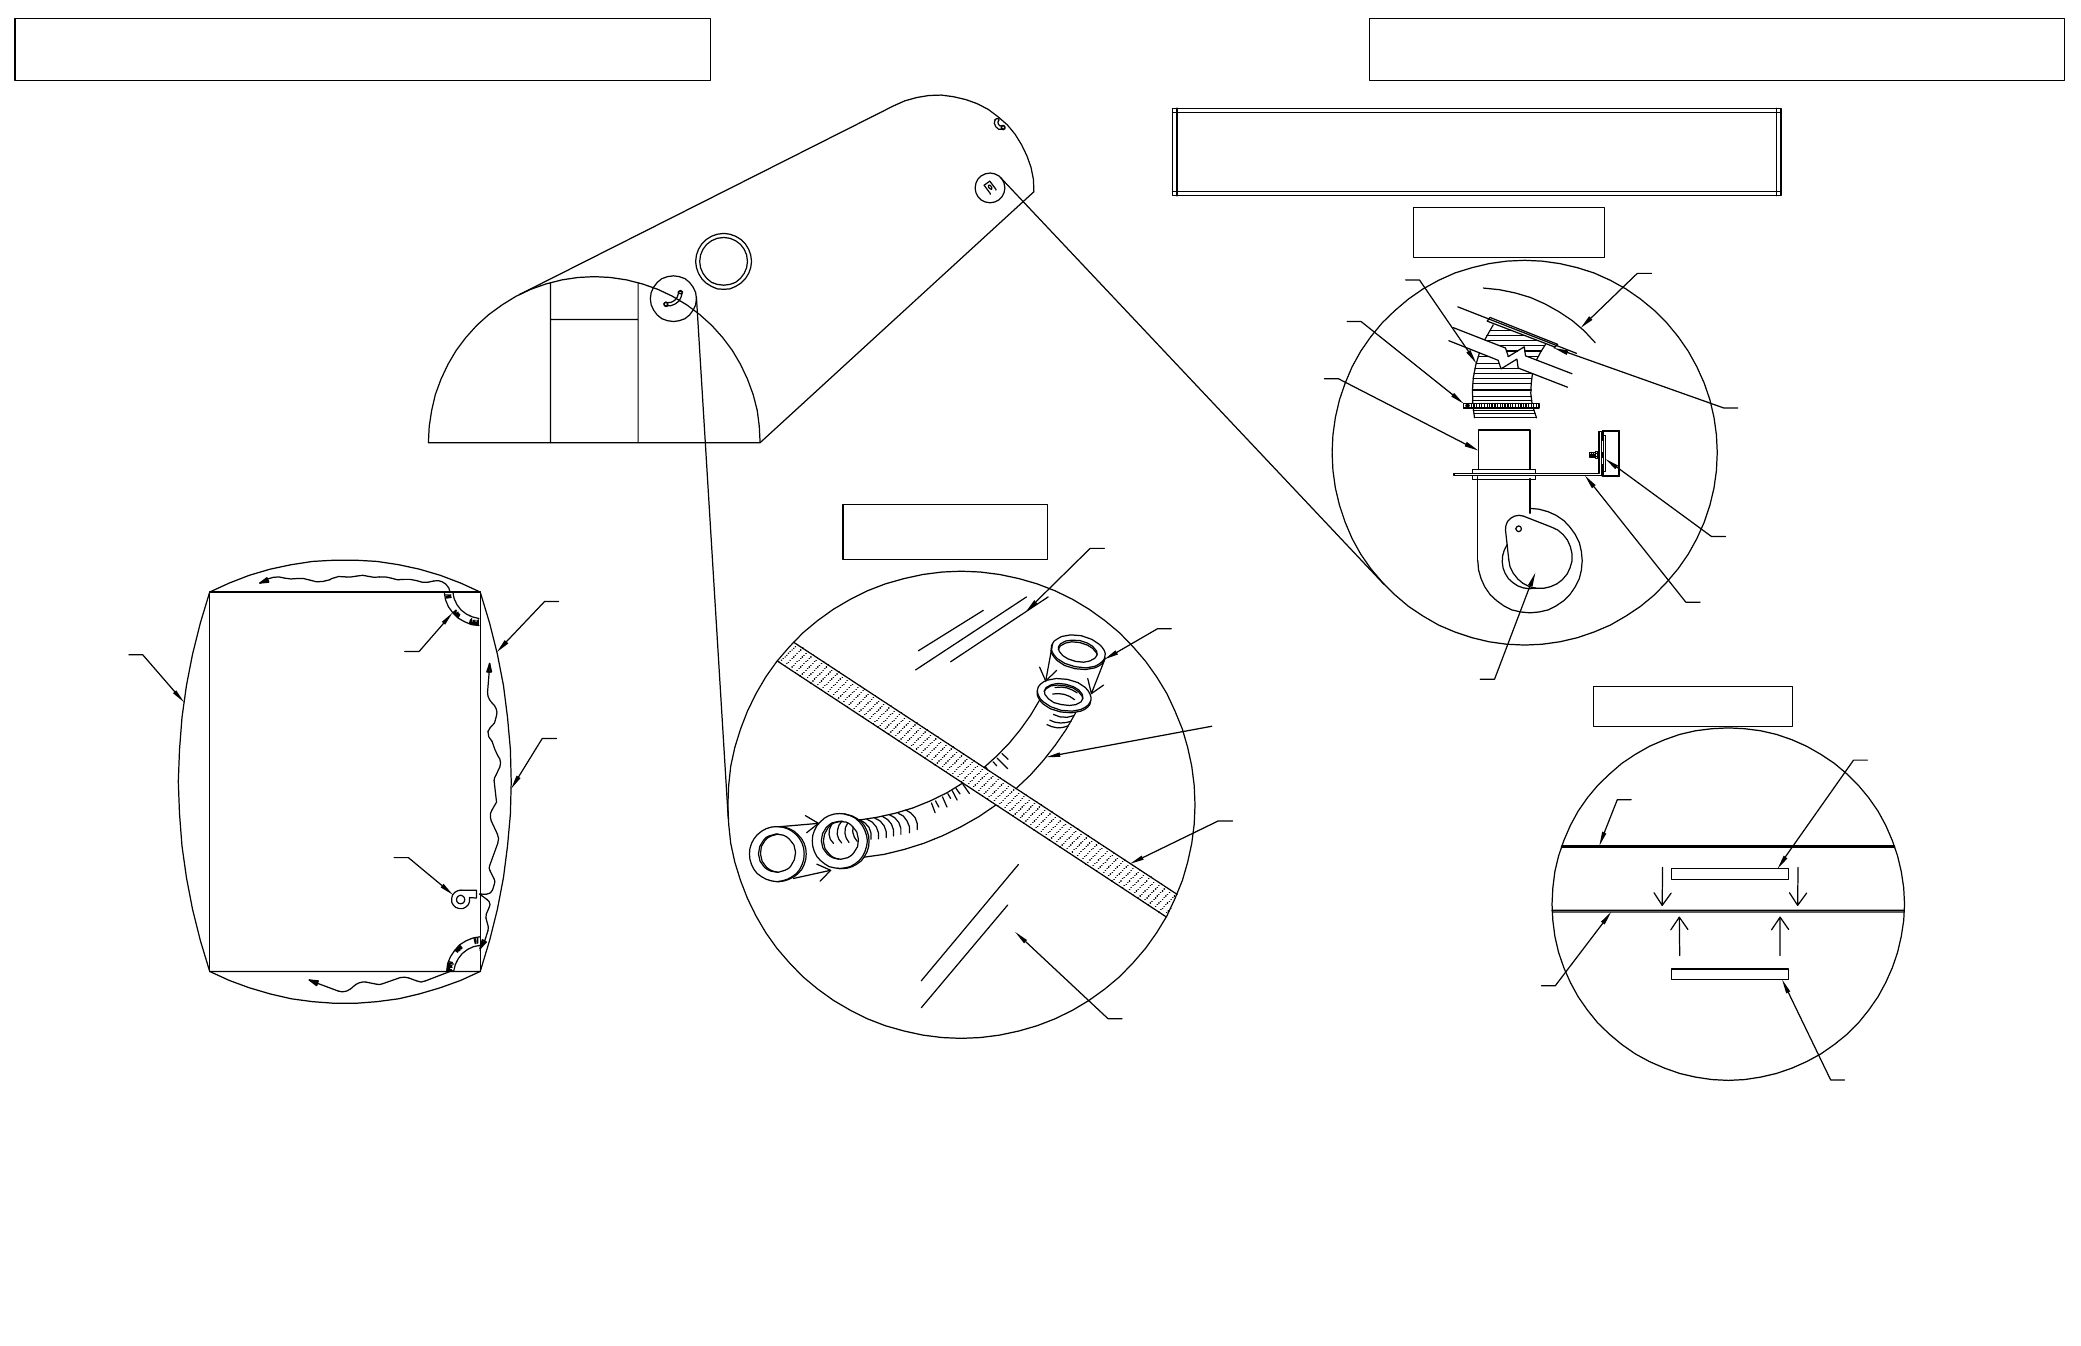
PLAN VIEW
OF
GREENHOUSE
2
*
FIGURE 1
FIGURE 2
FIGURE 3
END POLY
END POLY
NOTE: Place two strips of quality greenhouse patching tape on the inside of
the outside layer where the air from the blower hits the film. This will
prevent rapid drying of the poly and will make it last longer.
Install the inflation blower as the drawing indicates. (FIGURE 1) Location is optional, but, it must be located on a side wall. Next, install the jumper tubes approximately half way up the roof (FIGURE 2)
using the white foam gaskets provided. Four gaskets are required per jumper. One is to be located on the bottom of the inside layer. The other is located on the top of the inside layer. (FIGURE 2)
This can be accomplished by placing one gasket on the inside layer. Now cut the poly out of the gasket on the inside layer only. Use caution during this procedure. Do not cut the outside poly.
Next, insert another gasket (wax paper removed) through the center of the first gasket and stick it on top of the inside layer of poly. (FIGURE 3) You now have sandwiched the poly between the
gaskets and formed an air seal for the jumper.
Before you install the jumper, staple the gaskets together using an ordinary office stapler. Complete all jumpers and turn on inflation blower. The damper on this blower is commonly closed about half
way. Adjust damper to the desired poly tension, using an manometer as an inflation guide.
NOTE: When installing the inflation motor wire it in a fashion to ensure continuous runtime.
END WALL
POLY
END FRAME
SECTION
(POLY FASTENER
NOT SHOWN)
3" x 2'-0" JUMPER
ROOF POLY
FOAM
GASKET
DAMPER
INSIDE
LAYER
GASKET
GASKET
OUTSIDE LAYER
(2) STOP TABS
INFLATION
MOUNT
ROOF POLY
(2) AIR TRANSFER
GASKETS
3" FLEX HOSE
HOSE
CLAMP
AIR
OUTLET
ROOF
POLY
DOUBLE
POLY
ROOF &
SIDE POLY
INFLATION
BLOWER
JUMPER
TUBE
INFLATING ROOF & END POLY
FOURTEEN
REV: AC-120529 5455-91
KOOL HOUSE