Vestil LAD-RF User Manual
Page 9
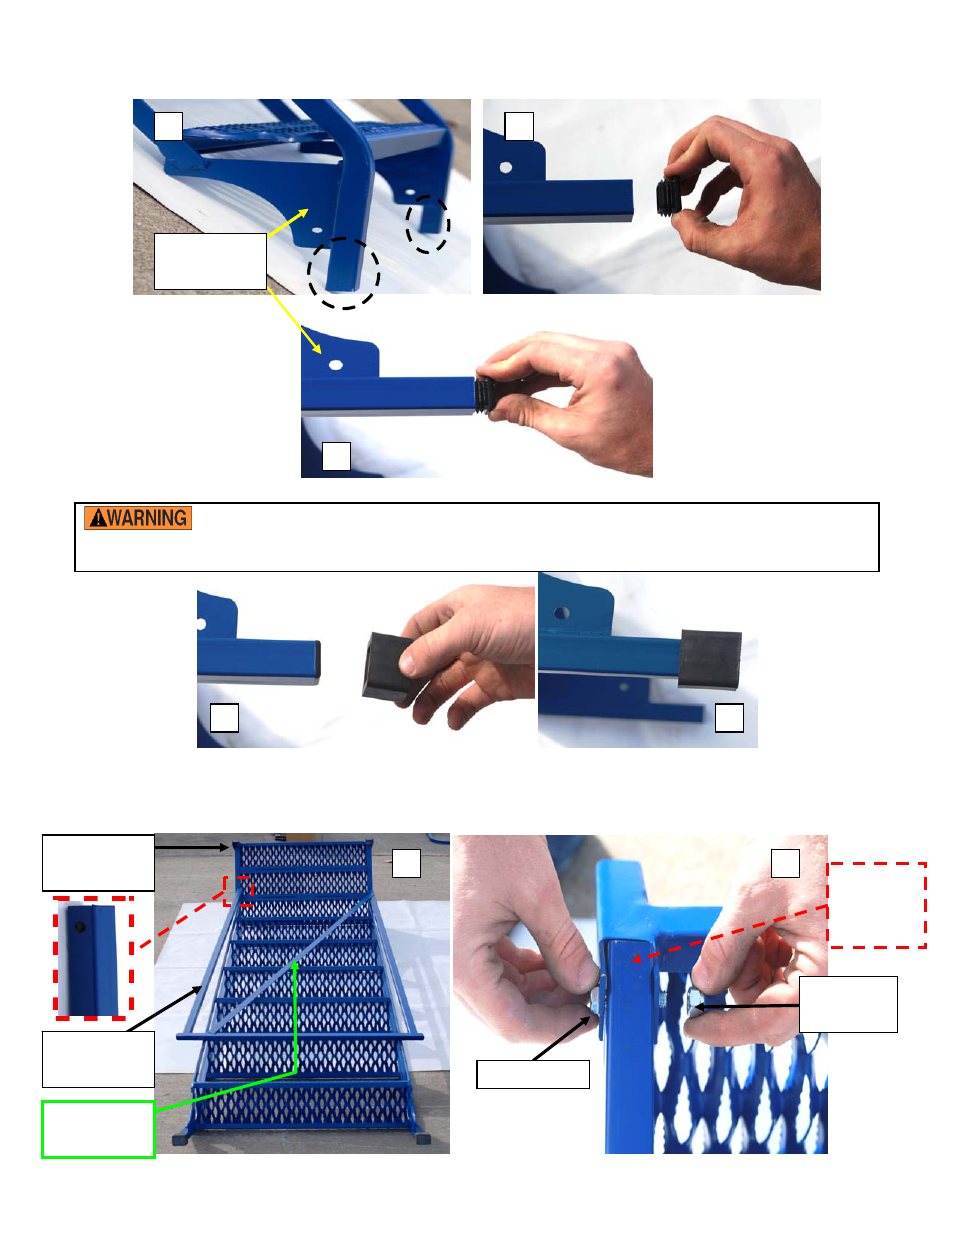
Instruction 1: Position the step weldment (1) face down. Install a plastic plug (F) into each front leg of the
step weldment (1) as shown in the photographs below. The front legs are circled in the first picture.
9
Stair frame
bracket
1
2
3
Instruction 2: Slide a square cap (E) over each front leg. Use a rubber mallet to tap the cap firmly into place.
Do not damage the plugs or the caps. Plugs prevent the front legs from penetrating through the
caps when weight is applied to the ladder. Similarly, the caps prevent the ladder from sliding. Damaged caps
and or plugs could make the ladder unsafe to use.
1
2
Instruction 3: Turn the step weldment (1) over so that the free end of the platform projects into the air. Set the
back leg weldment (2) on top of the steps. Notice that the back leg weldment has a 90º angled support piece.
Orient the back leg weldment so that the angled piece opens downward (so that you see the flat side of the
angled piece). Attach the upper end of the back legs (dashed rectangles) to the step weldment as shown.
Platform
Bracket for
back leg
Back Leg
Weldment
90º angled
support
1
2
Upper
end of
back leg
weldment
5/16in.
Lock Nut
1-1/2in. Bolt