Steelcraft Automotive 55070 GRILL GUARD User Manual
Steelcraft Automotive For the car
GRILLE GUARD
06-010 HONDA RIDGELINE
Page 1 of 4
6/14/10 Rev1(DP
)
PARTS LIST:
Qty Description
Qty Description
1
Grille Guard
1
10mm Lock Washer
1
Driver/Left Frame Mounting Bracket
2
8-1.25mm Nut Plates (06-08 models only)
1
Passenger/Right Frame Mounting Bracket
2
8-1.25mm Clip Nuts (09-10 models only)
2
Tall Top Support Brackets (06-08 models only)
2
8-1.25mm x 25mm Button Head Bolts
2
Short Top Support Brackets (09-10 models only)
2
8mm x 16mm OD x 1.6mm Flat Washers
4
12-1.25mm x 35mm Fine Thread Hex Bolts
2
8mm Lock Washers
1
10-1.25mm x 35mm Fine Thread Hex Bolt
(required for 09-10 passenger side Mounting
Bracket only)
1
5mm Wrench For Button Head Bolts
6
12-1.75mm x 30mm Hex Bolts
2
6-1.0mm x 25mm Button Head Bolts
16
12mm x 24mm OD x 2.5mm Flat Washers
2
6mm x 12mm OD x1.6mm Flat Washers
4
12mm Lock Washers
2
6mm Lock Washers
6
12mm Nylon Lock Nuts
1
4mm Wrench For Button Head Bolts
1
10mm x 27mm OD x 3mm Flat Washer
PROCEDURE:
1. REMOVE CONTENTS FROM BOX. VERIFY ALL PARTS ARE PRESENT. READ INSTRUCTIONS
CAREFULLY. ASSISTANCE IS RECOMMENDED. CUTTING IS REQUIRED.
2. Begin the installation by carefully removing the plastic splash guard under the front bumper, (Figure 3).
NOTE: There may be several two-piece plastic push-in clips holding the splash guard up to the vehicle.
Pry the center pin up with a small flat blade screwdriver to release and remove the entire clip. Pay close
attention to the type and location of all factory hardware for easier reinstallation. Once all clips have
been removed, place the splash guard on a clean and stable work surface.
3. Locate and remove the two 12mm factory bolts securing the factory driver side frame bracket to the
front cross member, (Figure 1). Also remove the 12mm hex bolt in the crossmember. Gently pull down
on the frame bracket just enough to slide the driver side Mounting Bracket between the frame bracket
and the crossmember. NOTE: Do not pull too hard or you may bend the frame bracket. If more room is
required to insert the Mounting Bracket, loosen but DO NOT REMOVE the large hex bolt securing the
frame bracket to the subframe mount, (Figure 1). Align the holes in the Mounting Bracket with the holes
in the frame bracket and reinstall the (3) factory 12mm hex bolts. IMPORTANT: On some model years,
the factory 12mm hex bolts in the frame bracket are too short to be reused for the Mounting Brackets.
(4) 12-1.25mm x 35mm Fine Thread Hex Bolts, (4) 12mm Lock Washers and (4) 12mm Flat Washers
have been provided to install the driver and passenger side Brackets. Do not tighten hardware.
4. Repeat Step 3 for the passenger side Mounting Bracket installation, (Figure 2). IMPORTANT: On 09-
10 models, replace the (1) factory 10mm hex bolt in the passenger side of the crossmember with the
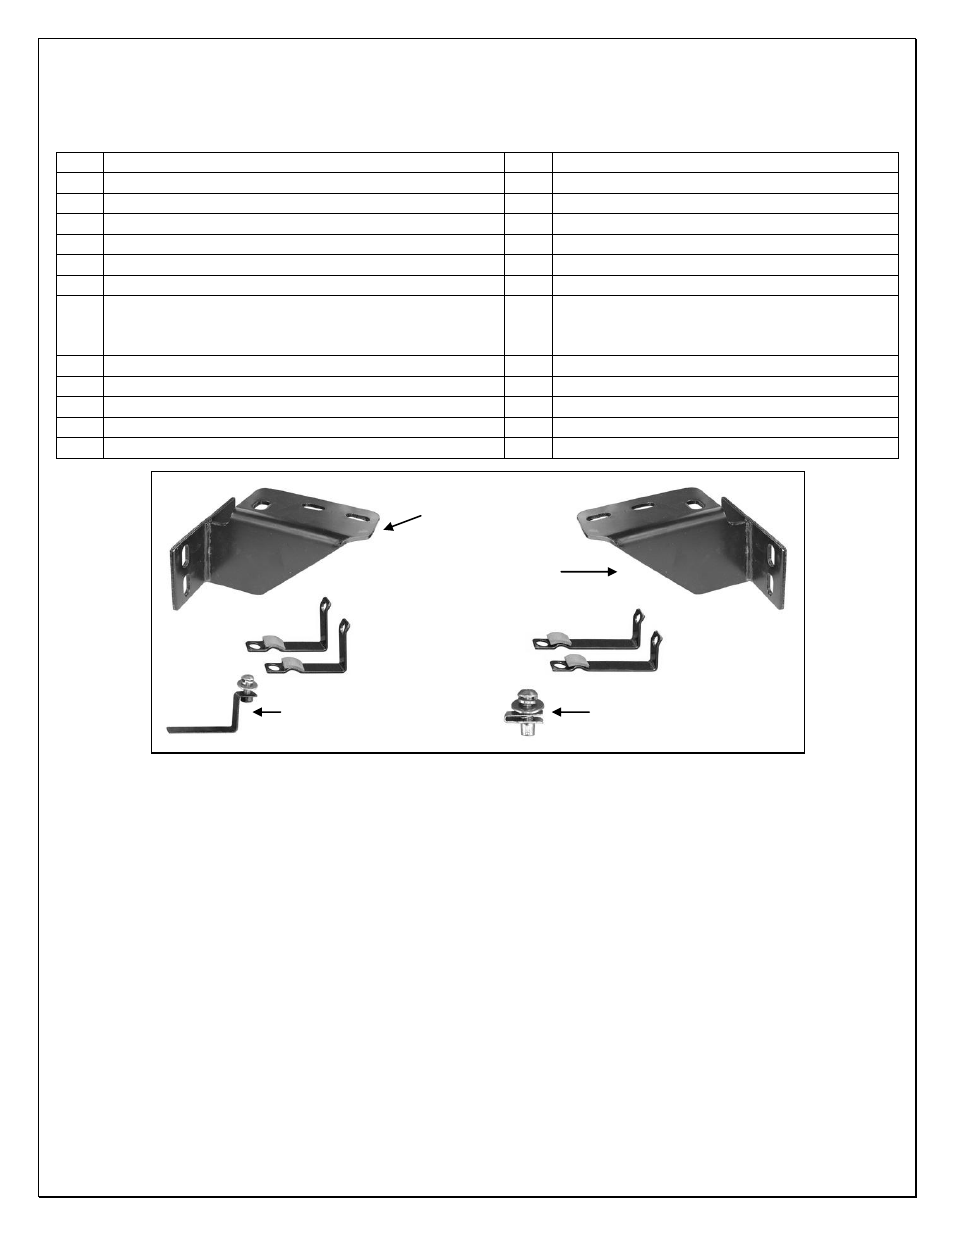
Passenger/right side Frame
Mounting Bracket
(2) 09-10 Top
Mounting
Brackets (Short)
Driver/left side Frame
Mounting Bracket
(2) 06-08 Top
Mounting
Brackets (Tall)
(2) 06-08 8mm Nut Plates
(pictured w/hardware)
(2) 09-10 8mm Clip Nuts
(pictured w/hardware)