Warning, Notice – Harrington Hoists and Cranes MCR Trolley User Manual
Page 18
18
3.2 Mounting
Location
3.2.1
WARNING
Prior to mounting the trolley (and hoist) ensure that the trolley beam and its
supporting structure are adequate to support the trolley, hoist and its loads. If necessary consult a
professional that is qualified to evaluate the adequacy of the suspension location and its supporting
structure.
3.2.2
NOTICE
See
Section 6.4
for outdoor installation considerations.
3.3 Installation
of Trolley onto Beam
3.3.1
Assemble and adjust the trolley before attempting to install the trolley on the beam.
3.3.2
Preferred Method – Sliding the trolley connected with the air chain hoist onto the traversing beam from
the beam end is the most convenient and recommended method. If the trolley can be mounted from
the end of the beam then: Remove the trolley end-stop from the beam and set the trolley on the beam
from the end. Securely re-install the trolley end stop on the beam.
3.3.3
Optional Method – If the trolley cannot be mounted from the end of the beam, complete the installation
as follows:
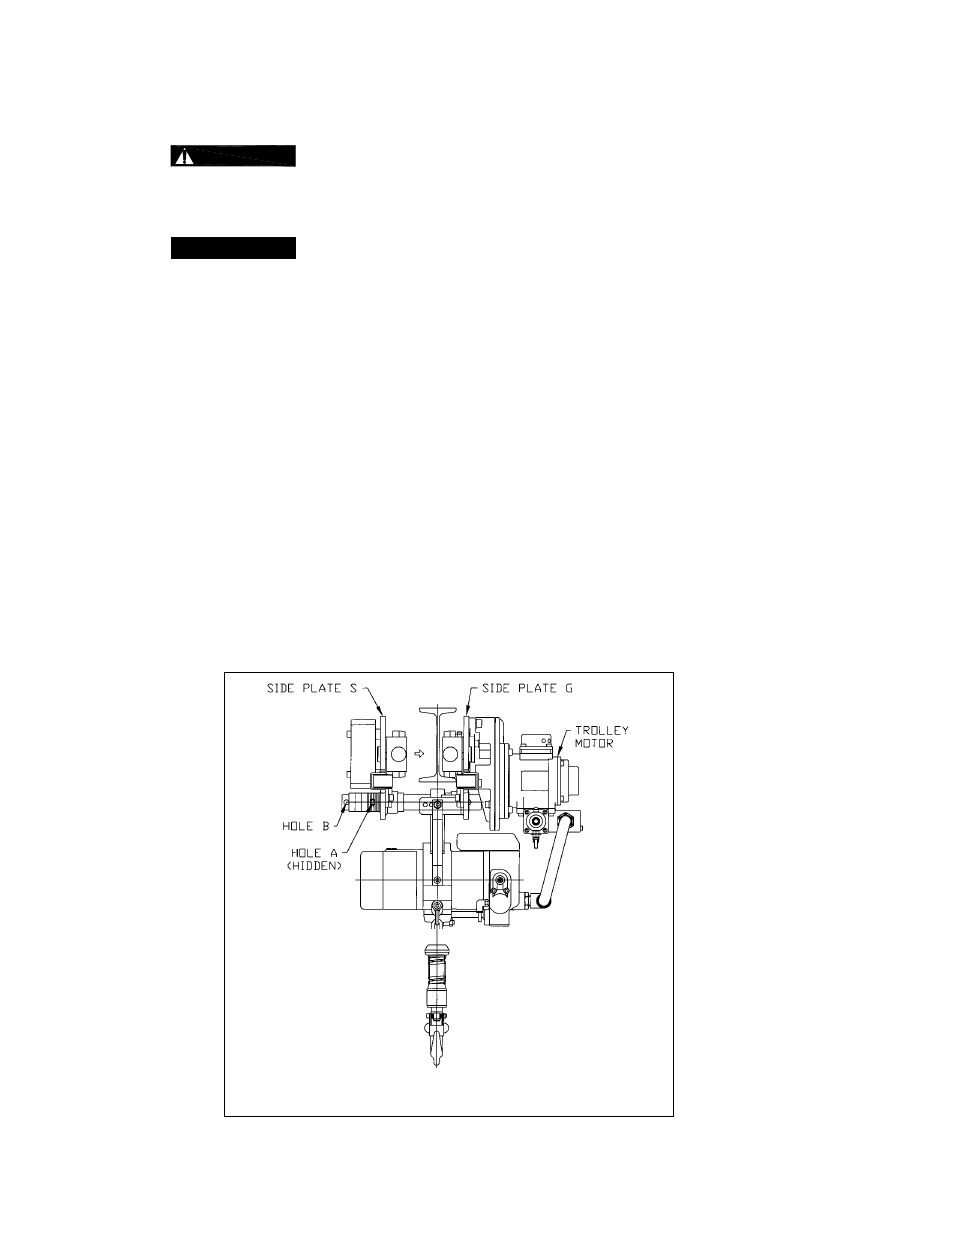
1)
Move the Shaft Stopper Pin to Hole B (see
Figure 3-8
).
2)
Spread the trolley side plates apart.
3)
Lift the trolley onto the beam so that the geared wheels (motor side of trolley) rest on the beam's
flange.
4)
Hold Side Plate G securely so that it does not come off the beam then push the side plates
together so that all four wheels rest on the beam's flange.
5)
Remove the Shaft Stopper Pin from Hole B and re-install in Hole A (see
Figure 3-4
). Bend the Split
Pin securely. Never use trolley with Shaft Stopper Pin in Hole B. Hole B is ONLY used when
installing the trolley on the beam.
Figure 3-8
Optional trolley installation method