User’s guide for tempo sata pro expresscard/34 – Sonnet Technologies Tempo SATA Pro ExpressCard_34 User Manual
Page 7
7
User’s Guide for Tempo SATA Pro ExpressCard/34
Figure 9
Figure 10
Windows Drive Formatting
If you intend to format drives connected to the Tempo SATA Pro
ExpressCard/34 using Windows drive formatting tools, you may find
much more information by using “format volume” as the search item
in Windows Help. The procedure listed below describes the process
of formatting and configuring drives under Windows Vista; steps for
formatting under Windows 7 and XP Professional are very similar
.
1. Turn on your storage system, start Windows, log in, and then click
Start > Control Panel.
2. In the Control Panel window, double-click Administrative Tools. If
you are using Windows Vista or Windows 7 and have not disabled
User Account Control (UAC), a UAC window will appear; click
Continue.
3. In the Administrative Tools window, double-click Computer
Management.
4. In the Computer Management window, click Disk Management
under Storage to launch the Disk Management application.
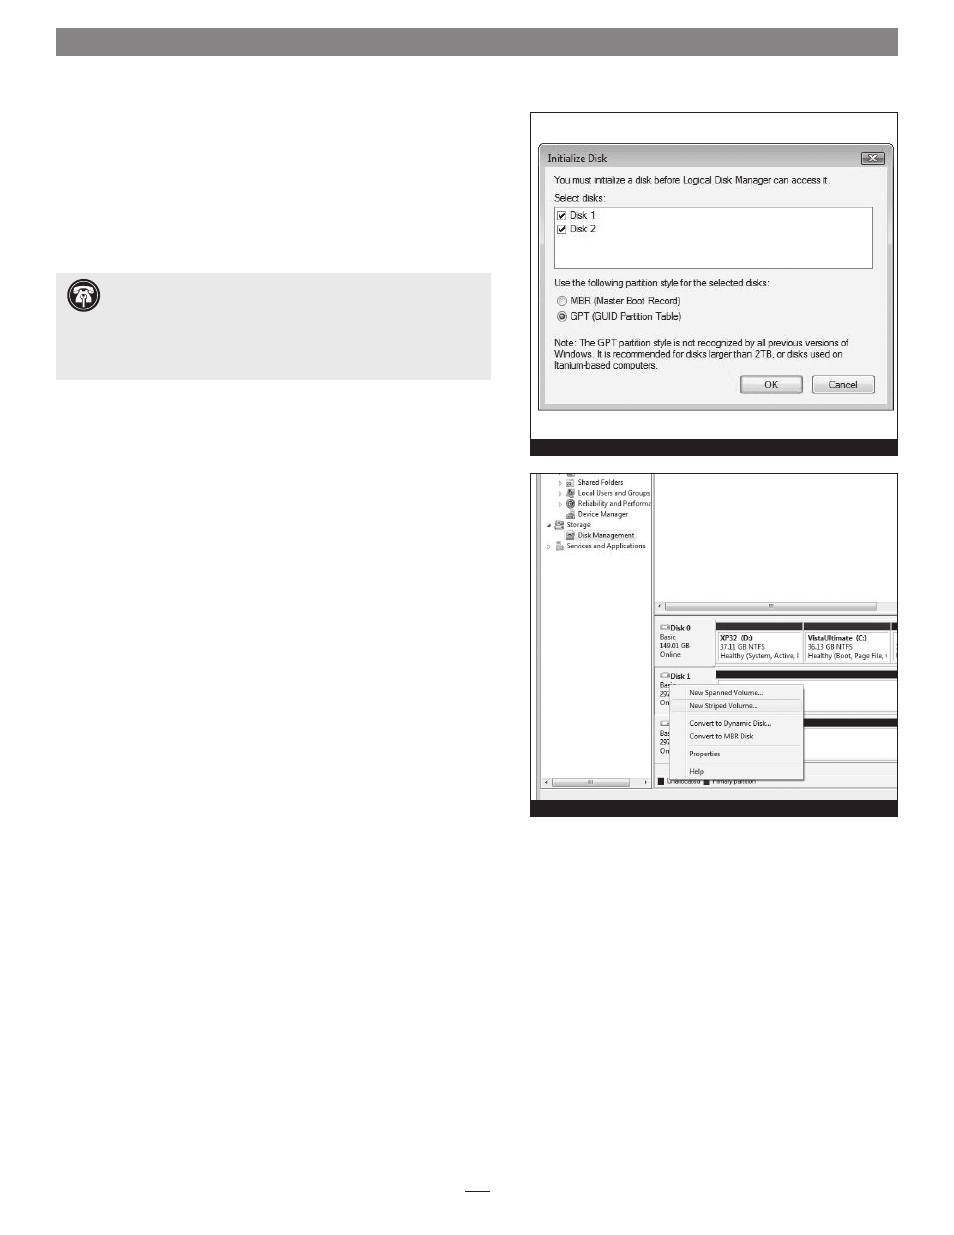
5. If an Initialize Disk window appears or if disks are described as not
initialized, select a partition style for the attached drive(s), and then
click OK; the drive will be initialized
(Figure 9). Repeat as necessary
with other drives attached to the Tempo card.
6. Right-click the field next to the name field of one of the attached
drives and select the formatting type you wish to use for it. Repeat as
necessary with other drives attached to the Tempo card
(Figure 10).
7. Depending on the formatting type you chose, a New Partition
Wizard may appear; follow the onscreen instructions to complete
formatting of the drive(s). Once the drives are finished being
formatted, they are ready to use.
Support Note:
Hard drives originally formatted for use with
Intel-based Mac computers using the GUID partition table cannot
be formatted using the following instructions as is, and must be
reformatted first using your computer’s Command Prompt application.
Follow the instructions listed on http://tomch.com/wp/?p=50 before
following the steps below.