User’s guide for tempo sata pro expresscard/34 – Sonnet Technologies Tempo SATA Pro ExpressCard_34 User Manual
Page 6
6
User’s Guide for Tempo SATA Pro ExpressCard/34
Figure 6
Figure 7
Figure 8
drives connected
to Tempo card
Mac OS X Drive Formatting—Individual Drives (Not in a
RAID Set)
This section describes the process of formatting (initializing) individual
hard drives connected to Tempo SATA Pro ExpressCard/34 using Disk
Utility under Mac OS X Version 10.5; the process is nearly identical
under Mac OS X Versions 10.6 and 10.4. If you intend to create a Mac
OS-formatted RAID set with the drives attached to the Tempo card, go
back to “Mac OS X Drive Formatting—RAID Sets” on the previous page.
1. Turn on your storage system, and then turn on your computer.
During startup, one or more messages referring to unreadable
volumes will be displayed; click Initialize… to launch Disk Utility.
After Disk Utility launches, click the Initialize button in each
remaining message window.
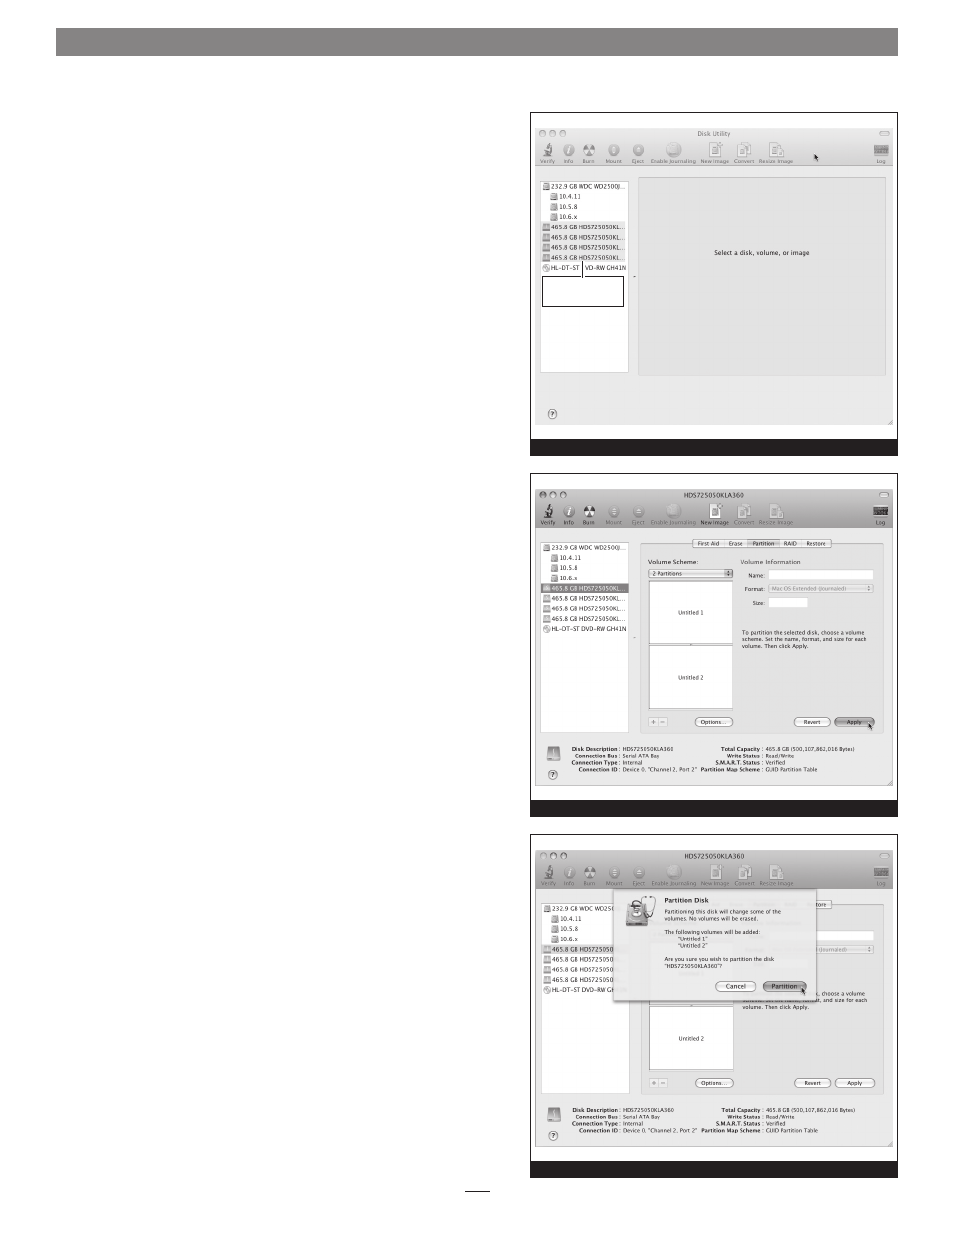
2. If it is not already open, launch Disk Utility (Figure 6). Note that
all drives attached to the Tempo card may be identified in the
information window by their custom icon with the Sonnet S logo.
3. Select one of the drives you want to format by clicking the drive
symbol or the “name” of the drive; a set of tabs will appear in the
right pane. Click the Partition tab, and then click on the drop down
menu beneath “Volume Scheme:” to select a number of partitions
for the volume; you may optionally choose to partition each drive
to create two or more smaller “virtual” drives
(Figure 7).
4. Click to highlight a partition, and then type a name in the Name
field; repeat for each partition
(Figure 7). After formatting, each
partition will appear in the Finder window as a drive.
5. Click Apply (Figure 7).
6. When the Partition Disk window appears, click the Partition
button
(Figure 8). If necessary, repeat steps 3–5 to partition any
other drives connected to the Tempo card. When partitioning and
formatting are complete, close the Disk Utility application; you can
now use your drive(s).