Insert back panel, Attaching panels, Adjust height and add trim cover – Salamander Designs Synergy System SA/MD/W User Manual
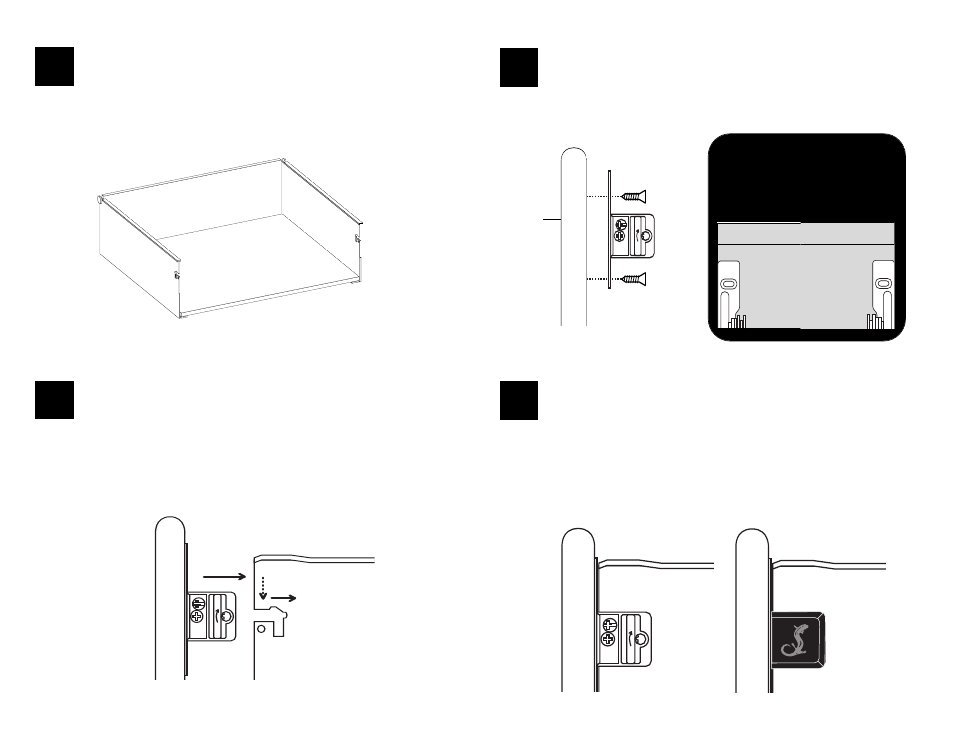
Page 4: Add fixing hooks to drawer face
R
R
L
5
Insert Back Panel
Drop the back panel into place, rounded edge up, matching pilot holes
with holes on the brackets and attach black screws from behind.
Drawer Face
7
Attaching Panels
Slip the fixing hooks into the slots on the sides of the drawer. Apply downward
pressure to the drawer face until it stops. Then push the face in farther until it
audibly and physically locks into place.
8
Adjust Height and Add Trim Cover
NOTE:
The upper screw on the sides of the drawer fixing hook is used to
adjust the height of the drawer if necessary. Loosen the lower screw and
adjust height of drawer face by turning the upper screw. Tighten lower
screw to lock in place Snap the two plastic covers with the Salamander
Logo over screw assembly.
Add Fixing Hooks to Drawer Face
6
REAR OF DRAWER FACE
NOTE:
The two fixing hooks that attach to
the front panel are different. Each
Bracket is marked “R” or “L”.
Adjustment screws on the fixing hook should face outside of the drawer box.