Programming, Operation – Robertshaw 9720 User Manual
Page 29
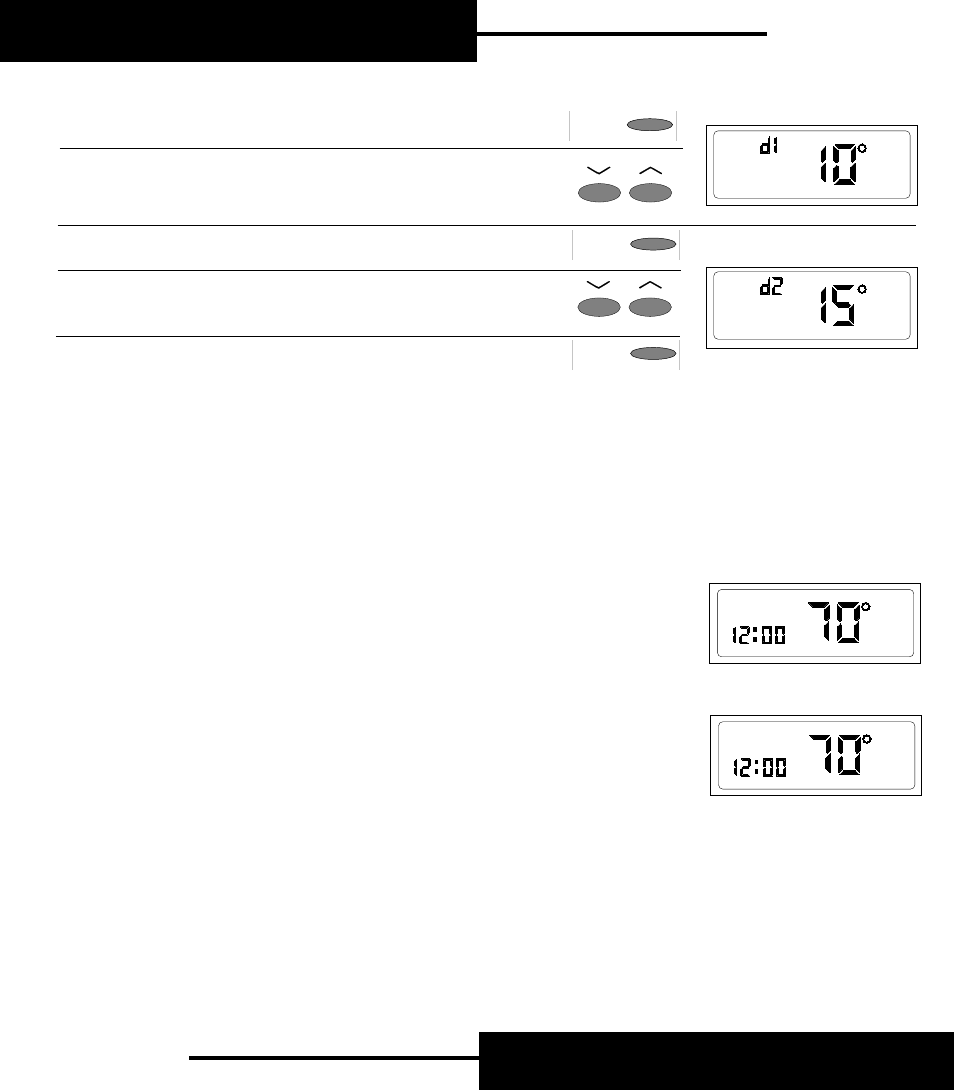
5. Press SET button. The first stage temperature differential (1˚F)
will appear on the display as 10˚.
6. Press either
∨ or ∧ button to change the first stage temperature
differential. The differential may be adjusted from .5˚F (05˚), 1˚F
(10˚), 1.5˚F (15˚), or 2˚F (20˚). (If your system cycles too often,
increase the temperature differential setting.)
7. Press SET button. The second stage temperature differential
(1.5˚F) will appear on the display as 15˚.
8. Press either
∨ or ∧ button to change the temperature
differential. The differential may be adjusted from 1.5˚F (15˚),
2˚F (20˚), or 3˚F (30˚).
9. Press SET button.
NOTE: If SYSTEM button is in COOL, the display will show ":60." This
is the residual cooling fan delay. If desired, press either
∨ or ∧ button
to adjust the fan delay to ":00", ":30", ":60", or ":90" seconds. Then,
press set button.
12
SET
SET
SET
PROGRAMMING
29
If your room temperature rises above the COOL setpoint programmed
temperature setting, the thermostat will activate the COOL program. If the
temperature continues to increase, the thermostat will turn on the COOL mode
and COOL will slowly flash in the display, indicating that it is in operation. When
the room temperature decreases to meet the COOL program setpoint
temperature, the thermostat will stop the cooling system. COOL will be
indicated in the display as active, but will not flash.
If the room temperature decreases below the HEAT setpoint programmed
temperature setting, the thermostat will activate the HEAT program. If the
temperature continues to decrease, the thermostat will turn on the heating
system and HEAT will slowly flash in the display. This indicates that the heating
system is currently in operation. When the room temperature increases to meet
the HEAT program setpoint temperature, the thermostat will stop the heating
system. HEAT will be indicated in the display as active, but will not flash.
NOTE: AUTO (Auto Changeover) operation can only be selected using the
SYSTEM button while in PROGRAM mode. If the AUTO program feature is not
functioning properly, see "CHANGING DIP SWITCH SETTINGS" to make sure
AUTO CHANGEOVER was selected during installation.
NOTE: To change your current dead band setting, you must change a dip switch
located on the back of the thermostat. See “CHANGING DIP SWITCH
SETTINGS” section to change the dead band setting to either 3˚ or 5˚. Changing
a dip switch setting will require resetting the thermostat to register the new
selection. This will erase previously entered program.
MON
COOL
PM
AUTO FAN
AUTO
P R O G R A M
MON
PM
HEAT
AUTO FAN
AUTO
P R O G R A M
OPERATION