Aerobell m rotary atomizer - maintenance – Ransburg Aerobell M Rotary Atomizer 78101 User Manual
Page 34
LN-9237-00.1
Aerobell M Rotary Atomizer - Maintenance
30
30
30
30
30
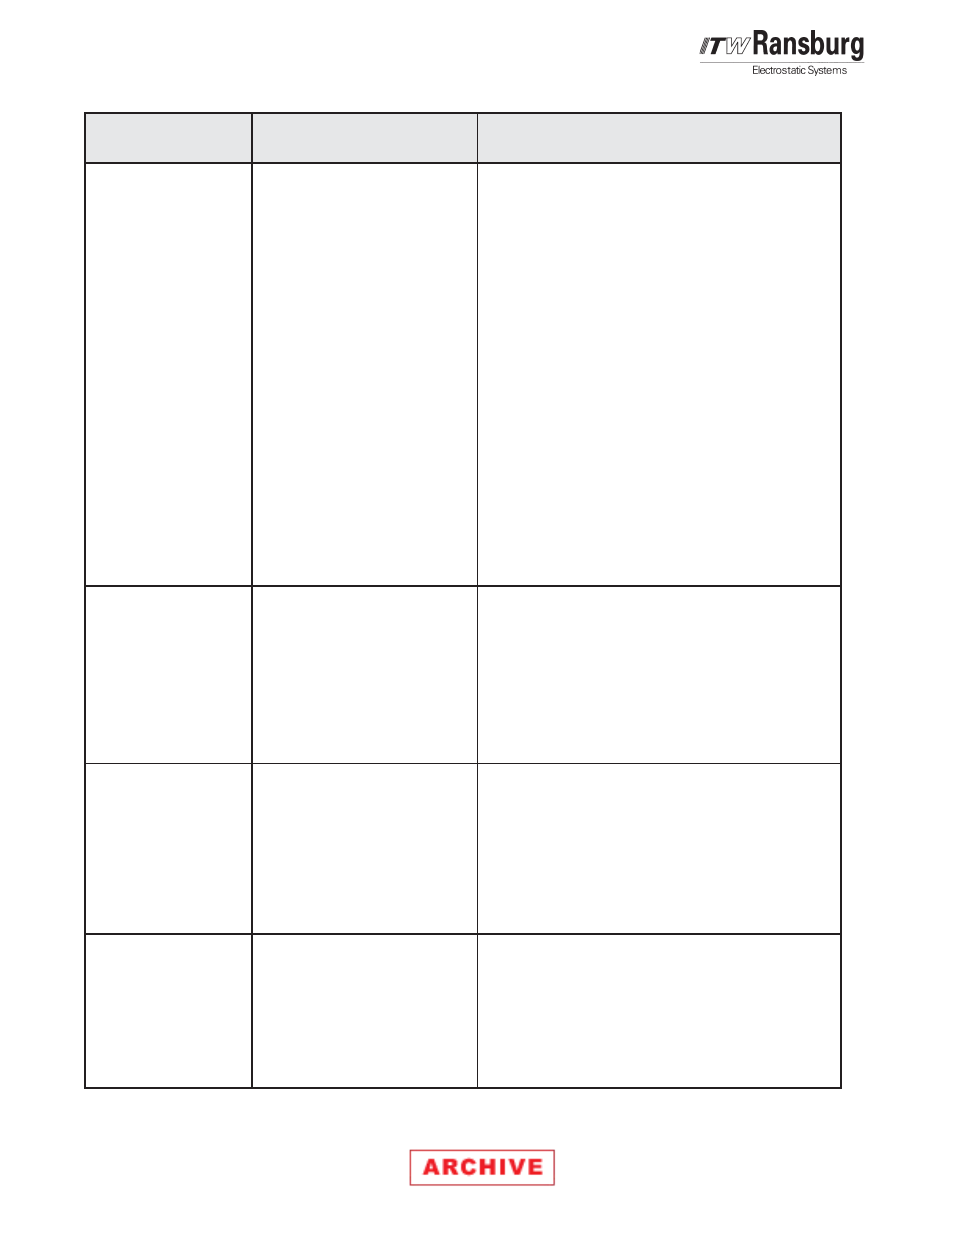
Figure 15: Troubleshooting Guide (Continued)
Figure 15: Troubleshooting Guide (Continued)
Figure 15: Troubleshooting Guide (Continued)
Figure 15: Troubleshooting Guide (Continued)
Figure 15: Troubleshooting Guide (Continued)
General Problem
General Problem
General Problem
General Problem
General Problem
Possible Causes
Possible Causes
Possible Causes
Possible Causes
Possible Causes
Corrective Action
Corrective Action
Corrective Action
Corrective Action
Corrective Action
Low Transfer
Efficiency (or light
coverage)
No Turbine Air
Speed Feedback Fault
No Fluid Flow
1.
Low or no high voltage
2.
Poor grounding of parts
being coated
3.
Excessive turbine speed
4.
Excessive shaping air
5.
Excessive target distance
1.
Turbine drive air not
present
2.
Bearing air return signal not
present
3.
Brake air is activated
1.
Damaged fiber-optic cable
between atomizer and
control panel
2.
Connection at the fiber-op-
tic
transmitter is loose
3.
Fiber-optic transmitter failure
1.
Turbine is not rotating
2.
Fluid regulator does not
actuate
1.
Verify high voltage at bell cup edge. Normally,
a high voltage setting of 100kV is appropriate
for most applications.
2.
Verify that parts being coated are properly
grounded (the electrical resistance between
the
part and ground must not exceed 1 me-
gohm).
3.
For optimum transfer efficiency and spray
pattern control, the bell rotational speed should
be set at the minimum required to achieve
proper atomization of the coating material.
4.
Shaping air should be set at the minimum
volume required to gently direct the spray
pattern toward the part being coated. Exces-
sive shaping air will cause some atomized
particles to "blow by" the part or bounce back
onto the atomizer.
5.
The recommended target distance is between
10 and 14 inches (see "Target Distance" in the
"Operation" section of this manual).
1.
Verify supply air pressure.
2a. Verify bearing air return signal.
b. Increase bearing air supply pressure to 90 psig
(±10 psig)
3.
Remove brake air signal (turbine air and brake
air must be interlocked to prevent both from
being used simultaneously).
1.
Repair or replace fiber-optic cable.
2.
Reinstall fiber-optic cable and tighten the com-
pression nut.
3.
Replace fiber-optic transmitter.
1.
Verify rotation of turbine (the paint valve air pi-
lot
must be interlocked with the turbine speed
feed-
back signal to ensure that paint
does not flow
into the air bear-
ing).
2a. Verify fluid supply.
b. Verify that air pilot signal is present.