Ransburg, No. 2 process electric motor version - maintenance, Ground resistor removal – Ransburg No. 2 Process Handgun Electric Motor User Manual
Page 38
No. 2 Process Electric Motor Version - Maintenance
Ransburg
34
AH-13-01.1
If any such damage is found the resistor housing
(Item 5) needs to be replaced. Contact an au-
thorized Ransburg representative to replace the
resistor housing if damaged.
After two to four resistors failing, the
resistor housing may be permanently con-
taminated and require replacement.
DO NOT OVERTIGHTEN the screw when
securing the resistor. The ceramic resistor
will be damaged.
9. Place a new O-ring (Item 2) onto resistor seal
(Item 3). Apply a thin coating of petroleum jelly to
the O-ring and insert the resistor seal (side with
hole first) into the front end of resistor housing
(Item 5). Push the resistor seal (Item 3) into re-
sistor housing until it contacts the resistor (Item
4). Insert the contact brush (Item 1).
10. Install cable assembly and motor assembly
onto the rear of the barrel. See “Cable Assembly
Replacement” procedures in the “Maintenance”
section.
Ground Resistor Replacement
(Refer to Figure 23)
1. Remove the cable/motor assembly per steps
1 and 2 of “Cable Assembly Replacement” in the
“Maintenance” section.
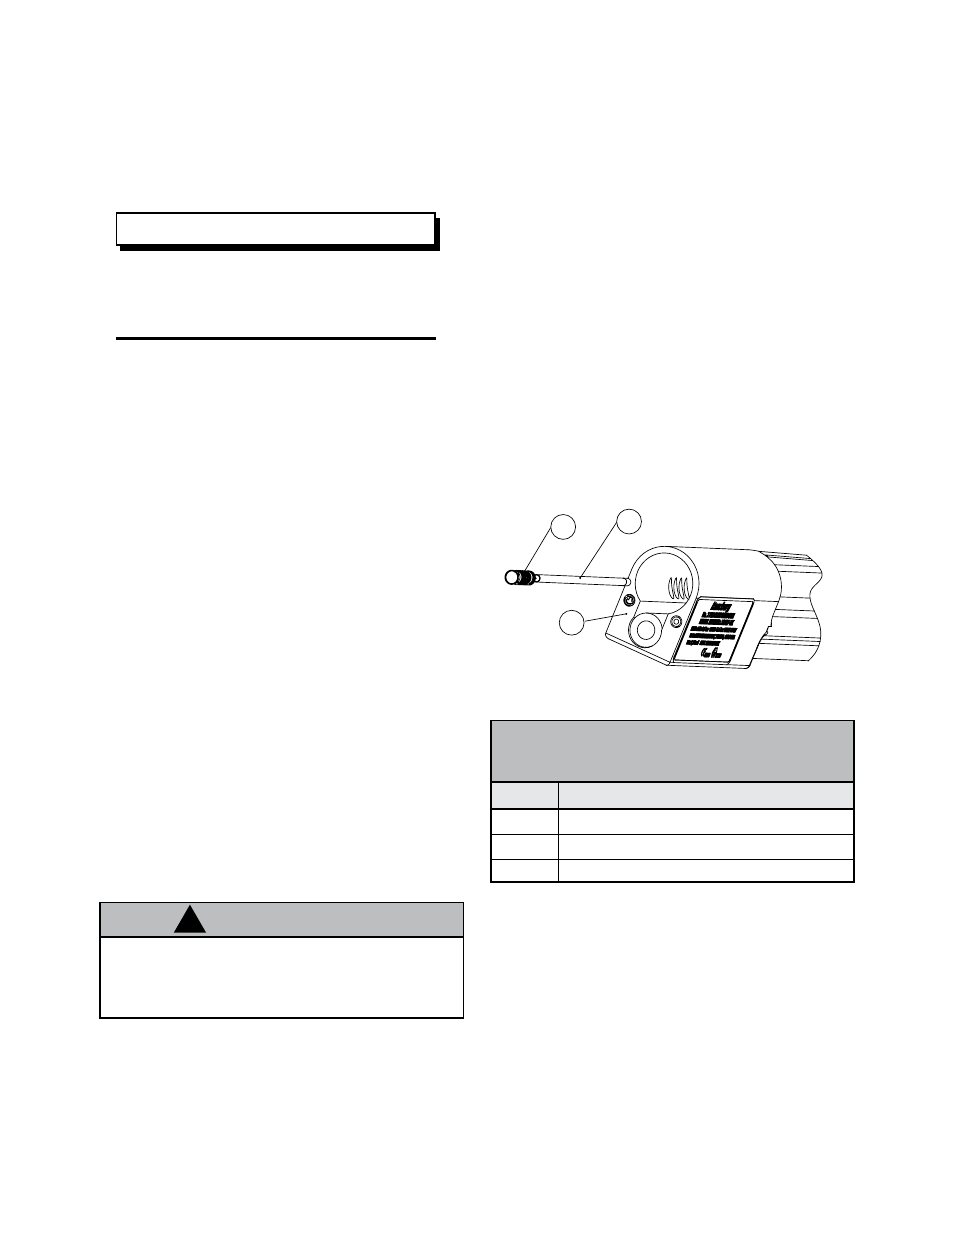
Figure 23: Ground Resistor Removal
2. Tilt the Barrel (Item 3) so the rear opening is
down. The resistor (Item 1) and the spring (Item
2) should fall out of the drive shaft.
3. Measure the resistance of the resistor (Item 2)
using a MegOhm meter with leads placed end to
end. The resistance should be between 11,000 to
9,000 MW. If the resistor is outside of this range,
it must be replaced, or there is a large hole in the
center of the spray pattern.
C A U T I O N
!
NOTE
Item #
1
2
3
GROUND RESISTOR REMOVAL
(Figure 23)
Description
Spring
Ground Resistor 10,000 MΩ
Barrel
5. Measure the resistance of the resistor (Item 2)
4 using a MegOhm meter with leads placed end
to end. The resistance should be between 550
to 500 MΩ. If the resistor is outside of this range,
it must be replaced.
6. Fill the inside diameter of a new resistor (Item
4) with dielectric grease. Hold the nozzle of the
grease tube to the hole on one end of the resistor
and slowly squeeze the grease into the resistor
until it protrudes from the opposite end of resistor.
Coat the outside surface of the resistor lightly with
the dielectric grease .
7. Insert the resistor (Item 4) into the front of the
resistor housing (Item 5) with the inked end (black)
of the resistor toward the front of the barrel (Item 6).
8. At the front end of the barrel (Item 6) use a
screwdriver to hold the resistor (Item 4). At the
back of the barrel insert the washer (Item 7) and
screw (Item 8) into the resistor housing (Item 5).
With a long screwdriver screw the screw into the
resistor.
3
2
1