Hauler Racks HKAS5-1 User Manual
Page 3
Page 3 of 5
HAULER RACKS, INC.
7109 31
st
Avenue North
Minneapolis, MN 55427-2848
WWW.HAULERRACKS.COM
Toll Free: 1-800-843-5445
Phone: 763-546-5620
Fax: 763-546-0933
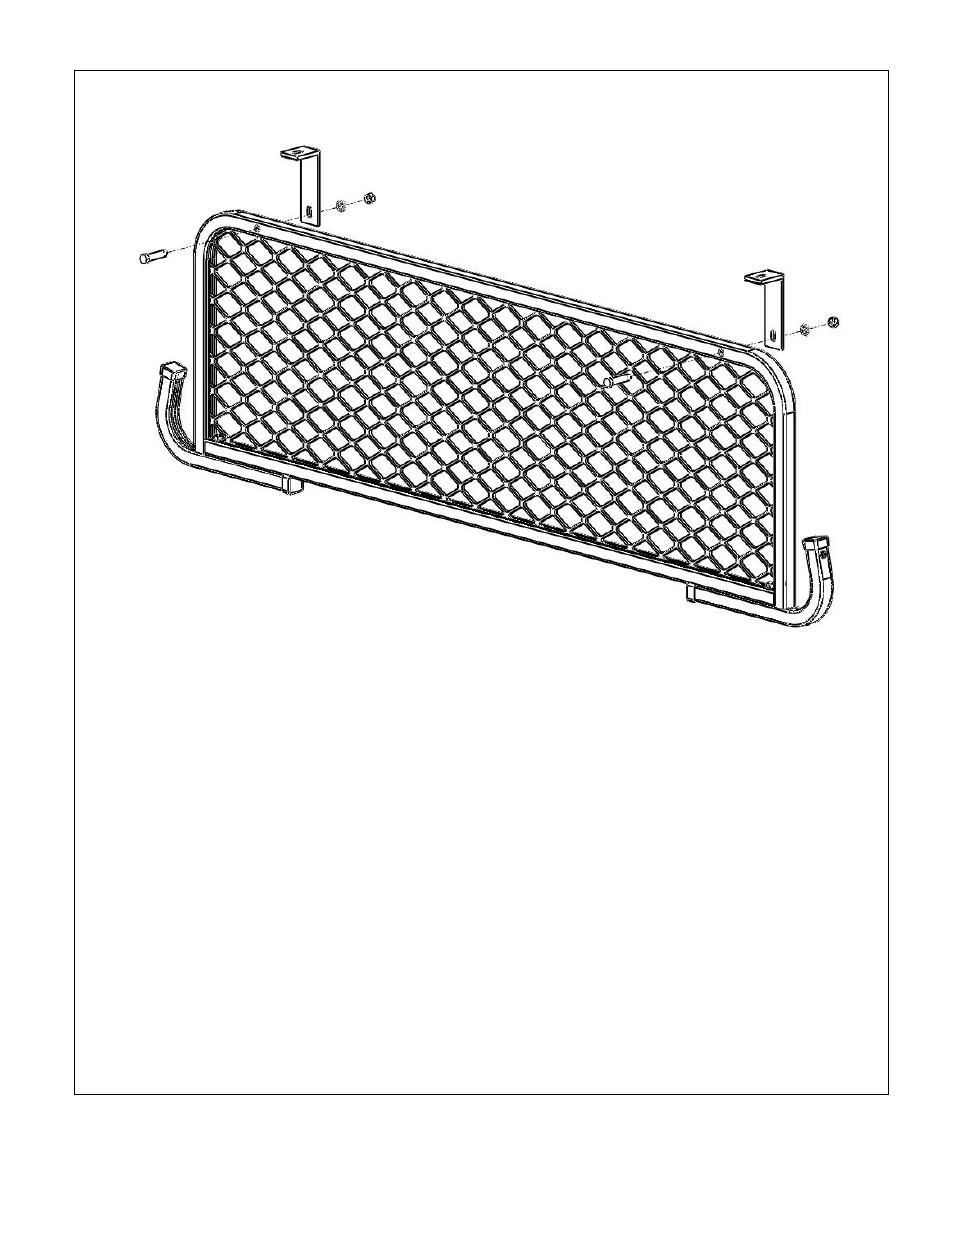
3. Upper ‘L’ Braces to Screen assembly
Secure the screen ‘L’ mounts to the screen assembly as shown using (2) 3/8”-16 x 1-3/4” hex bolts, 3/8” split lock washers and 3/8”-16 hex
nuts.
4. Installing additional hardware into existing rack.
NOTES:
1.
Installing the Headknocker Accessory into a preexisting assembled rack will require the partial disassembly of the front crossbar /
leg section on the vehicle. The front of the rack will need to be supported due to the front legs will be disassembled.
2.
Depending on the current rack configuration on the vehicle, the Headknocker Accessory rack may interfere with the existing HD
braces. To determine if this may occur, place the assembled Headknocker Accessory Rack up to the vehicle rack examine for
clearance by each HD brace. If the Headknocker Accessory rack interferes with the HD braces, the HD braces and hardware
should be removed.
Starting on one side of the rack;
Unbolt and remove the HD brace. Set aside hardware and HD brace.
Unbolt and remove the bracket(s) which connect the leg to rail and/or crossbar and set aside.
Remove the bolts from the crossbar and leg that held the HD brace and set aside.
Slide a 3/8”-16 x 1” hex bolts into the outer channel of the crossbar and move past where the HD brace bolt was removed earlier.
Slide a 3/8”-16 x 2-1/2”” hex bolt into the center channel of the leg and move past where the HD brace bolt was removed earlier.
Reinstall the bolts that were removed from the crossbar and leg that held the HD brace that were set aside.
Install and bolt the bracket(s) which connect the leg to rail and/or crossbar.
Reinstall the HD brace.
Repeat for other side of rack.