General Tools and Instruments DCS660 User Manual
Page 9
Notes:
1. Make sure your hands are completely dry before opening the battery compartment.
2. Take extra care to properly secure the cover of the battery compartment after installing
batteries. The battery compartment is one of three places where water could enter the
SeaScope660, potentially causing permanent damage. The other two places are the
connection between the camera-tipped probe and the grip, and the waterproof door
protecting the Video out and USB jacks and MicroSD card slot. The remainder of this
section explains the proper procedures for maintaining water tightness at these points.
ATTACH PROBE
The yellow probe must be attached to the grip or the LCD will show a blue screen.
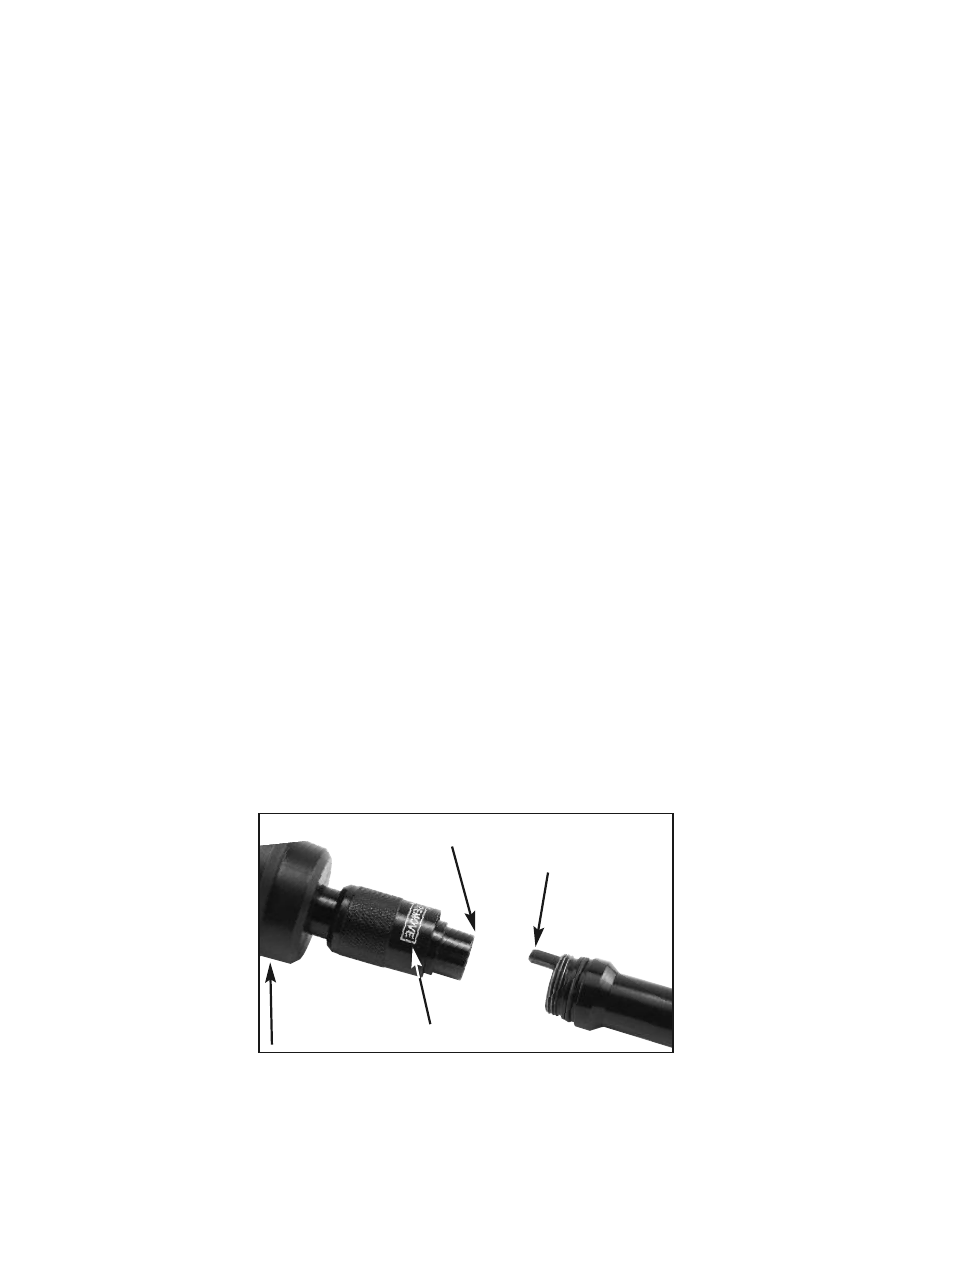
To attach the probe,
1. Slide the metal collar of the grip’s coupling back until it touches the rubber boot on the
grip’s housing.
2. Line up the alignment key on the probe connector with the flat on the coupling (see
photo below).
3. Push the two ends together until they mate.
4. Tighten the connection by turning the collar in the opposite direction of the “REMOVE”
arrow on the collar. Double-check the tightness of the connection; if it is not tight, water
may enter the system later and ruin it.
To detach the probe, perform the attachment procedure in reverse. To loosen the connection
between the two components, turn the collar in the direction indicated by the REMOVE arrow.
9
Flat on
grip coupling
Alignment key on
probe connector
Rubber boot
Metal collar