General Tools and Instruments DCS660 User Manual
Page 10
ATTACH VIDEO CABLE (OPTIONAL)
If you wish to view real-time captured by
the SeaScope660’s probe on an NTSC- or
PAL-format television, insert the mini-plug
end of the supplied video cable into the
Video jack on the right side of the monitor
(Fig. 1, Callout 1). Plug the yellow RCA
connector at the other end of the cable
into the television’s “Video In” jack.
However, be aware that using the video
cable exposes the DCS660 monitor to water
damage because doing so requires leaving
the waterproof door on the right side of the
grip open. With the video cable attached, you
can still use the probe to perform underwater inspections. But if you accidentally “dunk” the
unit, it will be permanently damaged. Such “accidental damage” is specifically NOT covered by
the SeaScope 660's limited warranty (see p. 19).
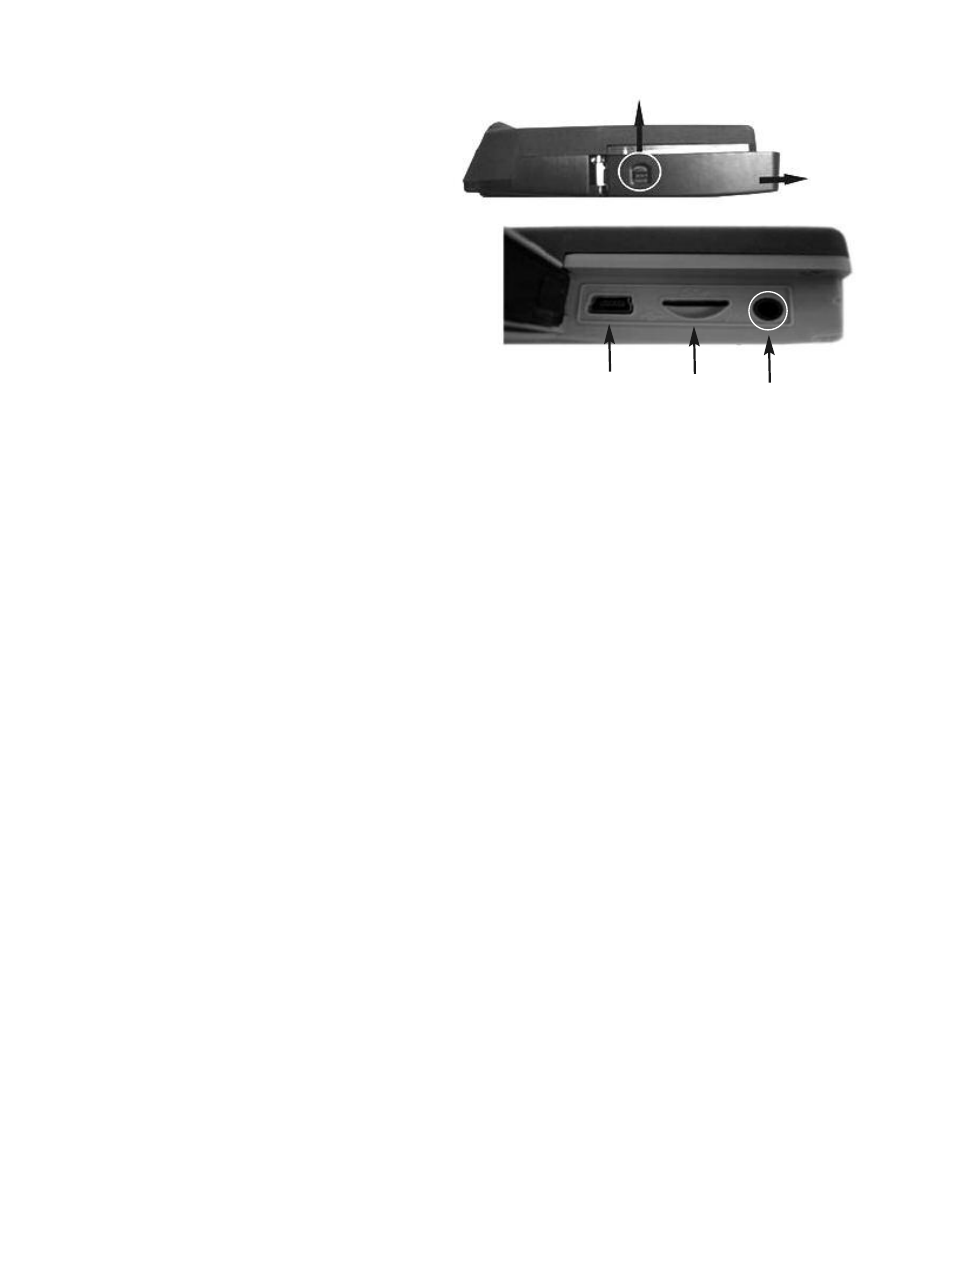
To access the Video jack, open the waterproof door covering it (see top photo above) by using
your thumb to push the spring-loaded latch on the door up. Without removing your thumb, use
it to slide the door to the right. Once you see the metal of the door’s hinge at left, use your
index finger to flip the door open and expose the Video jack (see lower photo above), mini-USB
jack and MicroSD card slot.
When you are done using the video cable to view inspection video on an external monitor,
remember to swing the door shut. The door is only secure and waterproof when you hear its
spring-loaded latch click.
INSTALLING ACCESSORIES
The SeaScope660 comes with three accessories (see left photo on next page) in a Ziploc bag
that attach to the camera-tipped end of the probe. Each accessory has a specific purpose:
• The 45° mirror lets the probe see around corners.
• The pickup hook lets you retrieve otherwise inaccessible items seen by the probe—
for example, a wedding ring accidentally dropped down a sink drain.
• The magnetic hook lets you retrieve lost or dropped metal objects—nuts and bolts,
for example—located by the probe.
To attach an accessory,
1. Hold its metal stem with your thumb and index finger.
2. Slide the accessory—plastic clasp first—past the camera head at the probe tip until
the clasp is in the channel 1/4 in. from the end of the probe.
3. Squeeze the clasp until you hear a click (see top right photos on next page), indicating
that the two halves have joined.
10
Push latch up
Video jack
Mini-USB
jack
MicroSD
card slot
Slide door
to the
right