Experiment 9: elastic-kinetic energy – PASCO ME-9215B Photogate Timer User Manual
Page 25
012-06379B
Photogate Timer
21
®
EQUIPMENT NEEDED:
-Photogate timer
-Air Track with one glider
-Weight hanger with weights
-Flag (see Procedure 1 below)
-Spring (with a low spring constant)
Introduction
It takes work to stretch or compress a spring. Suppose a spring has a natural (unstretched) length
L
0
, and a spring constant k. If that spring is stretched or compressed to a new length, L = L
0
± x,
the work required is given by the expression 1/2 kx
2
. If the energy stored in the spring is then used
to accelerate an object, the kinetic energy of the object, 1/2 mv
2
, will be equivalent to the work that
was originally stored in the spring. In this lab you will investigate this equivalency between the
work stored in a stretched spring and the kinetic energy it can impart to an object.
Procedure
c
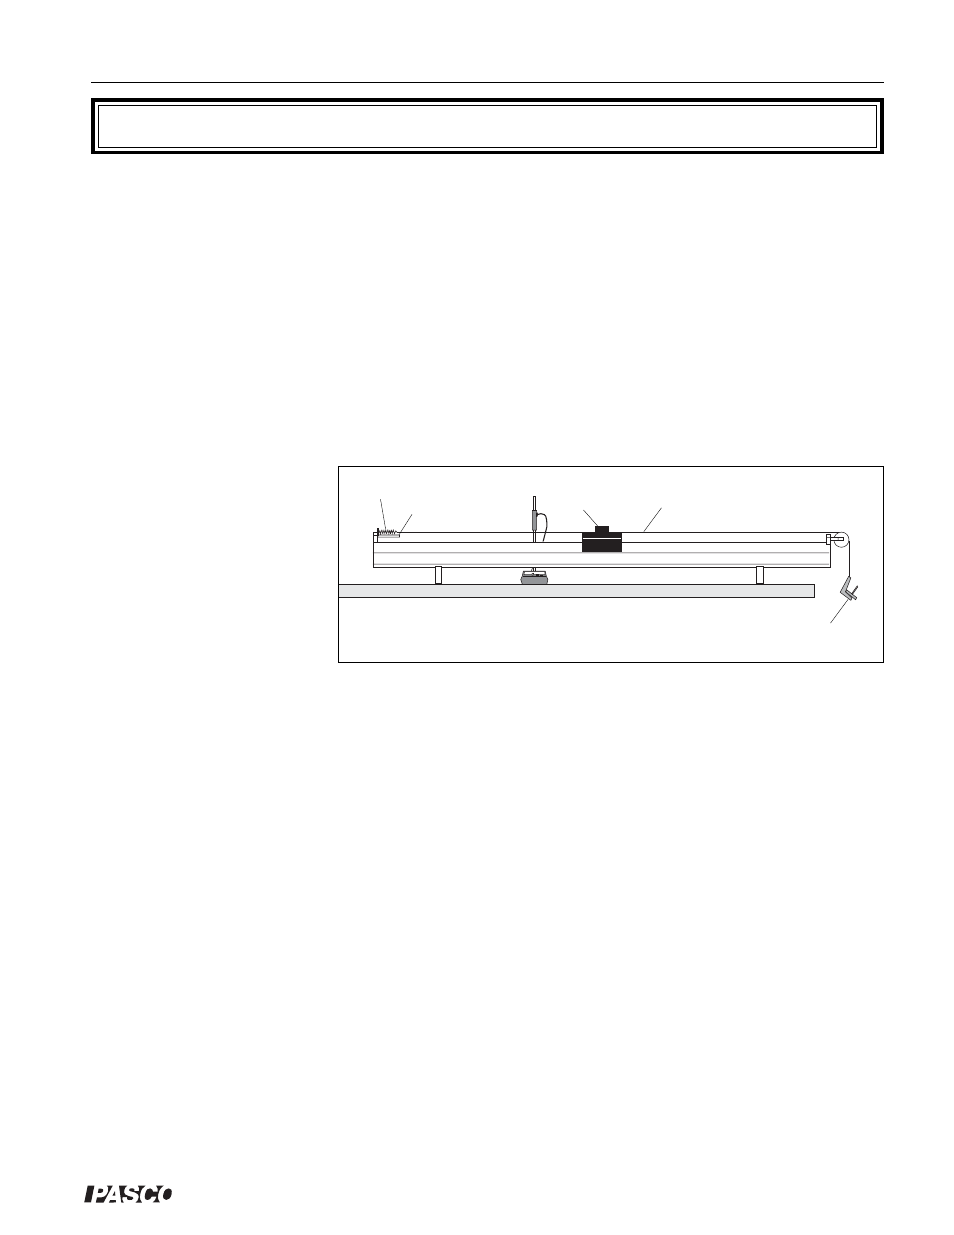
Set up the equipment as
shown in Figure 9.1, and
level the track. As shown,
attach a cardboard flag to
your glider with masking
tape. The flag can be
from 1 to 5 cm wide.
Make a platform for your
spring, so it will be sup-
ported horizontally and
will not sag. Attach the
platform securely to the end of the air track. Connect the spring to the glider with a piece of thread
so that the glider is about in the middle of the air track with the spring unstretched. Run another
piece of thread from the glider over a pulley at the end of the track and attach it to a hanger.
d
Hang masses on the hanger and determine how far the spring stretches. This is easily done using
the metric scale on the side of the air track and using the glider to monitor the distance the spring
has extended. Record the masses added and the position of the glider in Table 9.1. (The air flow
should be on while gathering this data.) Then remove the hanger and thread.
e
Measure and record m, the mass of your glider and flag, in Table 9.2. Then pass the glider slowly
through the photogate and note the position of the glider when the LED on the photogate first goes
on and again when the LED goes off. The difference between these positions is
Δd. Record Δd
on the following page.
f
Position the glider so the spring exerts no force on the glider, but the thread does not sag. Record
this glider position as x
1
. Position the photogate between the glider and the spring.
g
Pull the glider approximately 5 cm farther away from the spring. Measure the distance between
this glider position and x
1
, and record this distance as the Spring Stretch in Table 9.2.
h
Set the Photogate Timer to GATE mode and press the RESET button.
i
Hold the glider steady as you turn the air flow on. Release the glider, but catch it before it crashes
into the spring platform. Record the measured time as t
1
in Table 9.2.
Experiment 9: Elastic-Kinetic Energy
Hang weights for
calibration of spring
Flag
Spring
Platform
Thread (attached to plug at
bottom of flag)
Figure 9.1: Equipment Setup