Experiment 1: operation of the dc motor – PASCO SE-8658A PERMANENT MAGNET MOTOR User Manual
Page 11
7
012-07210A
Permanent Magnet Motor
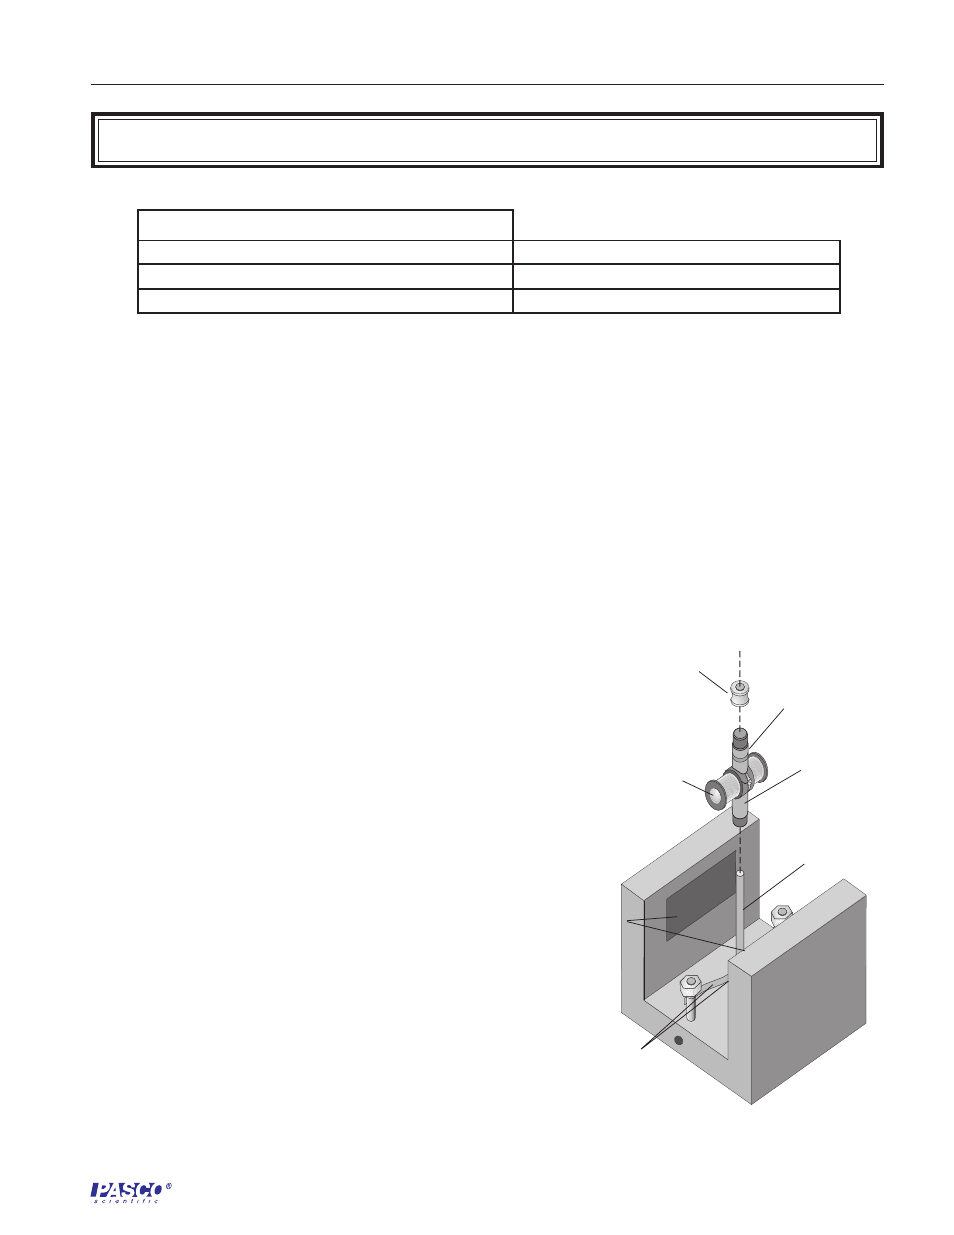
Figure 1.1
Assembly of the Permanent Magnet Motor
armature
brushes
dual slip-ring
commutator
split ring
commutator
field
magnets
shaft
retaining nut
EQUIPMENT NEEDED:
•Permanent Magnet Motor
• low voltage DC power supply, limited to 1 A
• patch cords
• multimeter
• small piece of masking tape
Purpose
The purpose of this experiment is to demonstrate the operation of the DC motor in terms of basic
concepts of electromagnetism.
Theory
The field magnets are permanent magnets possessing a north pole and a south pole that interact
with the north and south poles of the armature (an electromagnet when connected to an electric
current). Like poles repel, while unlike poles attract. The armature rotates until its north pole is
as close as possible to the south pole of the permanent magnet (and also as far as possible from
the north pole). Inertia carries the armature past this point. However, as the armature passes this
point, the commutator reverses the direction in the coils, so that the poles of the coils are suddenly
repelled by the nearby field magnets. Thus another half-turn occurs, and this process occurs again
and again.
A better explanation involves an understanding of fields.
The field magnets produce a magnetic field that passes
through the gap between the pole pieces. When current
passes through the turns of the armature in the presence
of the field, forces act to cause a torque that rotates the
armature. Inertia carries the armature past the position
of no torque to the point where the torque would force
the armature back in the other direction. However, at that
point the commutator reverses the direction of current in
the armature so the torque continues to act in the original
direction.
Setup
1. Gently lower the armature onto the shaft with the
split ring commutator down (Figure 1.1). Carefully
rotate the armature back and forth to separate the
brushes and allow the commutator to slip down
between them. If necessary, insert a pencil or similar
object down between the brushes. Use only the most
delicate force to avoid bending the brushes and
necessitating adjustments or repairs.
2. Connect the motor to the power source by one of
these methods ( Figure 1.2):
•
Insert banana plugs into the openings in the
ends of the plastic brush older; or
Experiment 1: Operation of the DC Motor