Setup, Procedure, Analysis – PASCO ME-6825A MINI LAUNCHER User Manual
Page 30: Using one ball, shoot the ball straight five times, Figure 6.2: collision accessory tee
Mini Launcher
012-05479B
®
28
Setup
➀
Clamp the Mini Launcher near one end of a sturdy table with the Launcher aimed inward toward the
table. Mount the launcher in the top hole of the bracket.
➁
Adjust the angle of the Mini Launcher to zero degrees so the ball will be shot off horizontally onto the
table. Fire a test shot to determine the range.
➂
Place a piece of butcher paper on the table. The paper must extend to the base of the Launcher.
➃
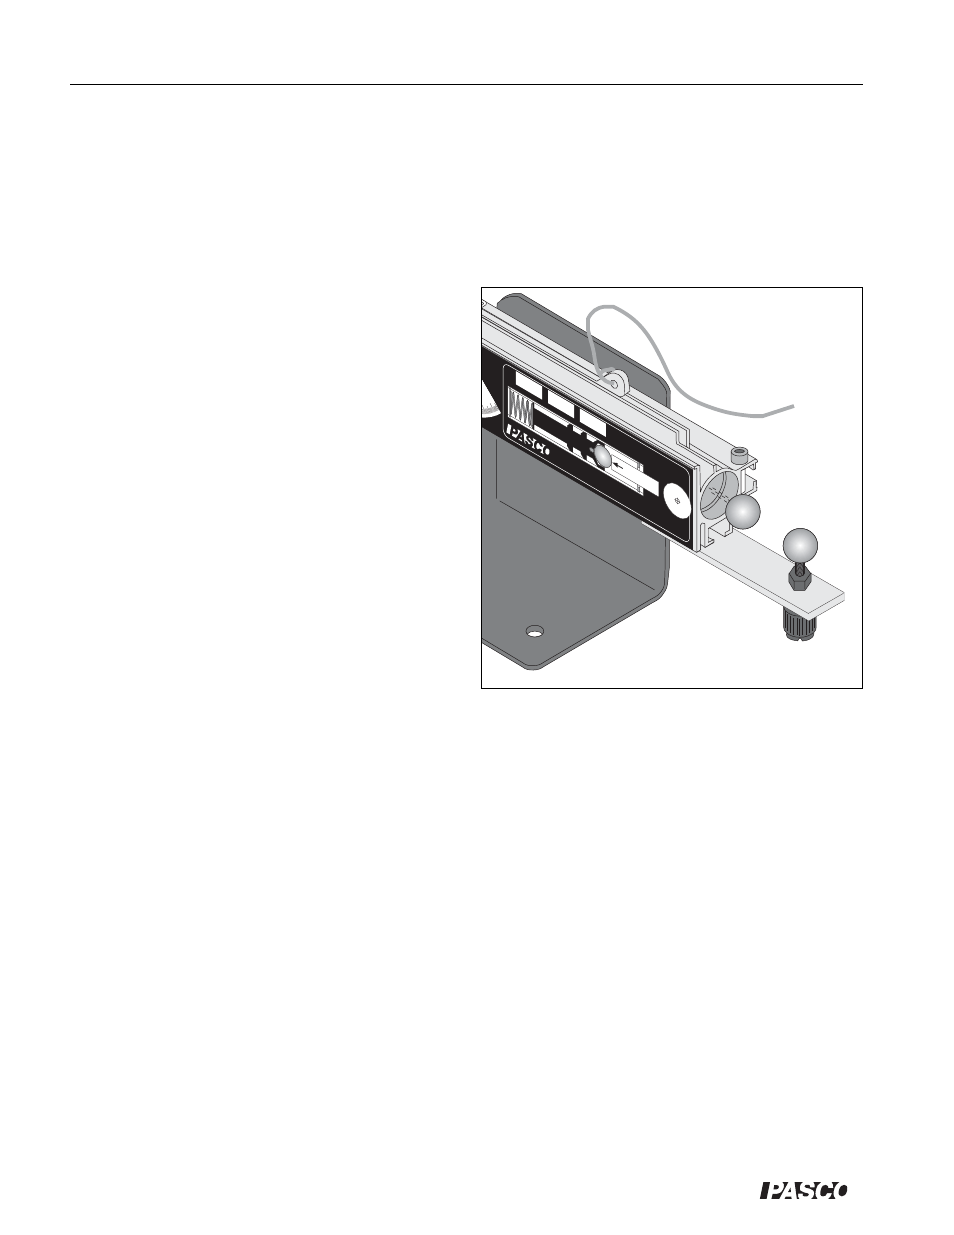
Mount the Collision Attachment on the
Launcher. See Figure 6.2. Slide the attachment
back along the Launcher until the tee is about 3
cm in front of the muzzle.
➄
Rotate the attachment to position the ball from
side to side. The tee must be located so that
neither ball rebounds into the Launcher and so
both balls land on the table. Tighten the screw
to secure the collision attachment to the
Launcher.
➅
Adjust the height of the tee so that the two balls
are at the same level. This is necessary to
ensure that the time of flight is the same for
each ball. Fire a test shot and listen to determine
if the two balls hit the table at the same time.
➆
Place a piece of carbon paper at each of the
three sites where the balls will land.
Procedure
➀
Using one ball, shoot the ball straight five
times.
➁
Elastic collision: Using two balls, load one ball and put the other ball on the tee. Shoot the ball five times.
➂
Inelastic collision: Using two balls, load one ball and stick a very small loop of tape onto the tee ball.
Orient the tape side of the tee ball so it will be struck by the launched ball, causing an inelastic collision.
Shoot the ball once and if the balls miss the carbon paper, relocate the carbon paper and shoot once
more. Since the tape does not produce the same inelastic collision each time, it is only useful to record
this collision once.
➃
Use a plumb bob to locate on the paper the spot below the point of contact of the two balls. Mark this
spot.
Analysis
➀
Draw lines from the point-of-contact spot to the centers of the groups of dots. There will be five lines.
➁
Measure the lengths of all five lines and record on the paper. Since the time of flight is the same for all
paths, these lengths are proportional to the corresponding horizontal velocities. Since the masses are also
the same, these lengths are also proportional to the corresponding momentum of each ball.
➂
Measure the angles from the center line to each of the outer four lines and record on the paper.
Push with P
en or Rod
Until Piston Clic
ks
MINI LA
UNCHER
ME-
Use 16 mm steel balls ONL
Y!
Launc
h
Position
of Ball
0 40
Thir
d Clic
k
Long Rang
e
Second Clic
k
Medium Rang
e
First Clic
k
Shor
t Rang
e
DO N
OT L
OOK
DOW
N BA
RREL
.
CAUT
ION!
OT PU
SH
PIST
ON
WITH
FINGER
!
Figure 6.2: Collision Accessory Tee