Burkert Type 2000 User Manual
Page 9
9
Assembly
→
Lubricate the nipple thread before reinstalling the actuator
(e.g. with Klüberpaste UH1 96-402 produced by Klüber).
Graphite seal
note!
damage to the seat seal or the seat contour!
→
Open the valve for control functions A and I: Pressurize the
lower pilot air port with compressed air (5 bar).
→
Observe the tightening torque when screwing the actuator into
the valve body (see table).
orifice (dn)
15
20
25
32-40
50-65
tightening
torque ± 3 [nm]
45
50
60
65
70
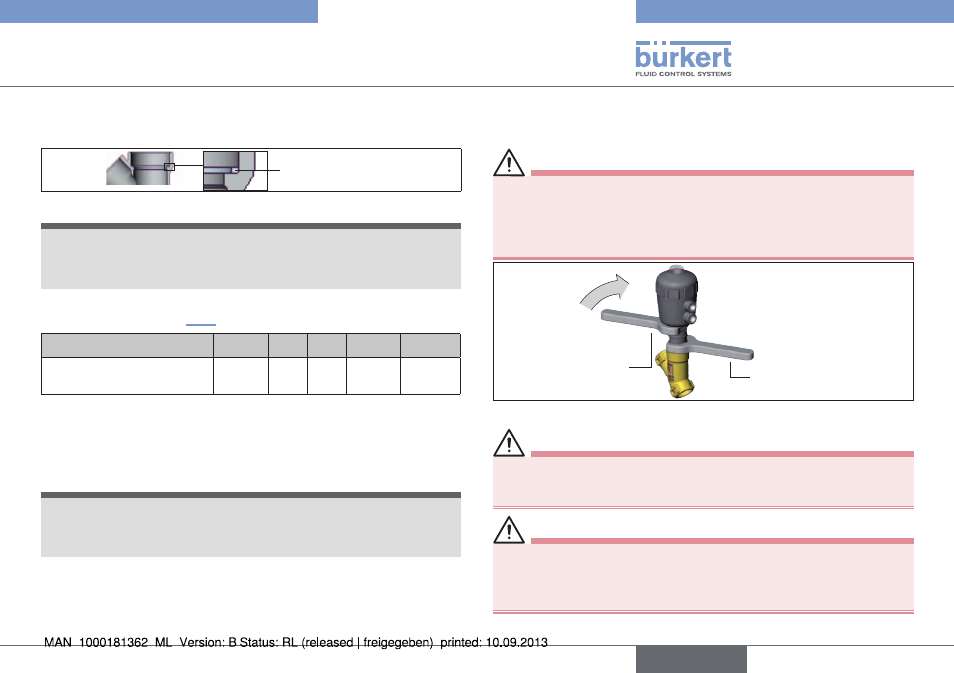
7.2. rotating the actuator
The actuator can be rotated infinitely by 360°.
→
Clamp the valve body into a holding fixture (if necessary).
note!
damage to the seat seal or the seat contour!
→
Open the valve for control functions A and I: Pressurize the
lower pilot air port with compressed air (5 bar).
→
Using a suitable open-end wrench, counter the wrench flat on
the nipple.
→
Place a suitable open-end wrench on the hexagonal bolt of the
actuator.
Warning!
risk of injury from discharge of medium and release of
pressure!
If the direction of rotation is wrong, the body interface may become
detached.
→
Turn the actuator in a clockwise direction (as seen from above).
Open-end wrench
for securing the
nipple
Open-end
wrench for
rotating the
actuator
7.3. connecting the control medium
Danger!
risk of injury from high pressure in the system!
• Turn off the pressure and vent the lines before loosening lines or
valves.
Warning!
risk of injury from unsuitable hoses!
• Use only hoses which are authorized for the indicated pressure
and temperature range.
• Observe the data sheet specifications from the hose manufacturers.
english
Type 2000