Flowline LI40-1001 PodView User Manual
Page 14
14 of 16
MN204260
Rev A
GETTING AROUND PODVIEW®
Step Eight
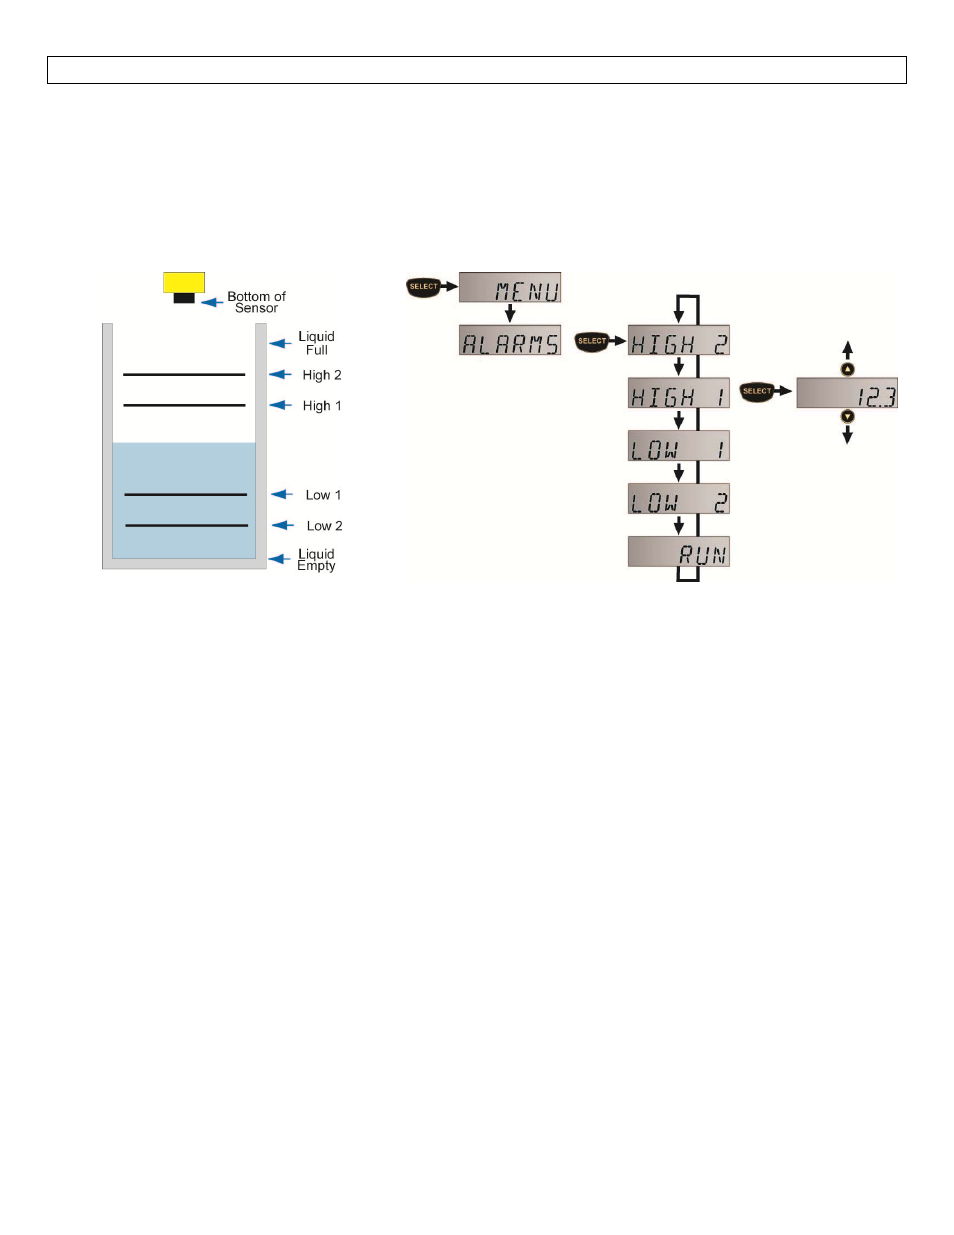
Changing an Alarm Set Point: EchoPod® sensor models with relays have (1‐4) channels. If after accessing the
MENU, ALARMS appears in the display, then at least (1) relay is configured as an alarm. The Alarm settings
may be in any combination of LOW and/or HIGH alarms (4‐HIGH, 1‐LOW & 3‐HIGH, 2‐LOW & 2‐HIGH, etc.).
Note: Prior to making any changes, we recommend that you write down all existing set point values. The
example below highlights a 2‐LOW and 2‐HIGH alarm operation with (4) set points. Use the following steps to
change your alarm settings.
Steps to change Alarm settings:
1. Hold SELECT for 5 seconds to enter the MENU.
2. Press SELECT when ALARMS appears.
3. Press SELECT when the set point (HIGH2, HIGH 1, LOW1, LOW2) you want to change appears.
4. Press the UP and DOWN buttons to increase or decrease the set point to the desired value. To scroll
faster, hold SELECT while pressing UP or DOWN.
5. To enter the set point, hold SELECT for 2 seconds.
6. To change another set point, press SELECT when the set point appears.
7. To exit the MENU, press SELECT when RUN appears.
Hints:
Never place a relays set point (High 1, Low 1) at the liquid empty or liquid full position. You should
have at least some distance or volume buffer separating them. For example, in a 500 gallon tank, the
relay set points could be placed at ≥ 10 gallons or ≤ 490 gallons.