Flowline LI40-1001 PodView User Manual
Page 12
12 of 16
MN204260
Rev A
GETTING AROUND PODVIEW®
Step Eight
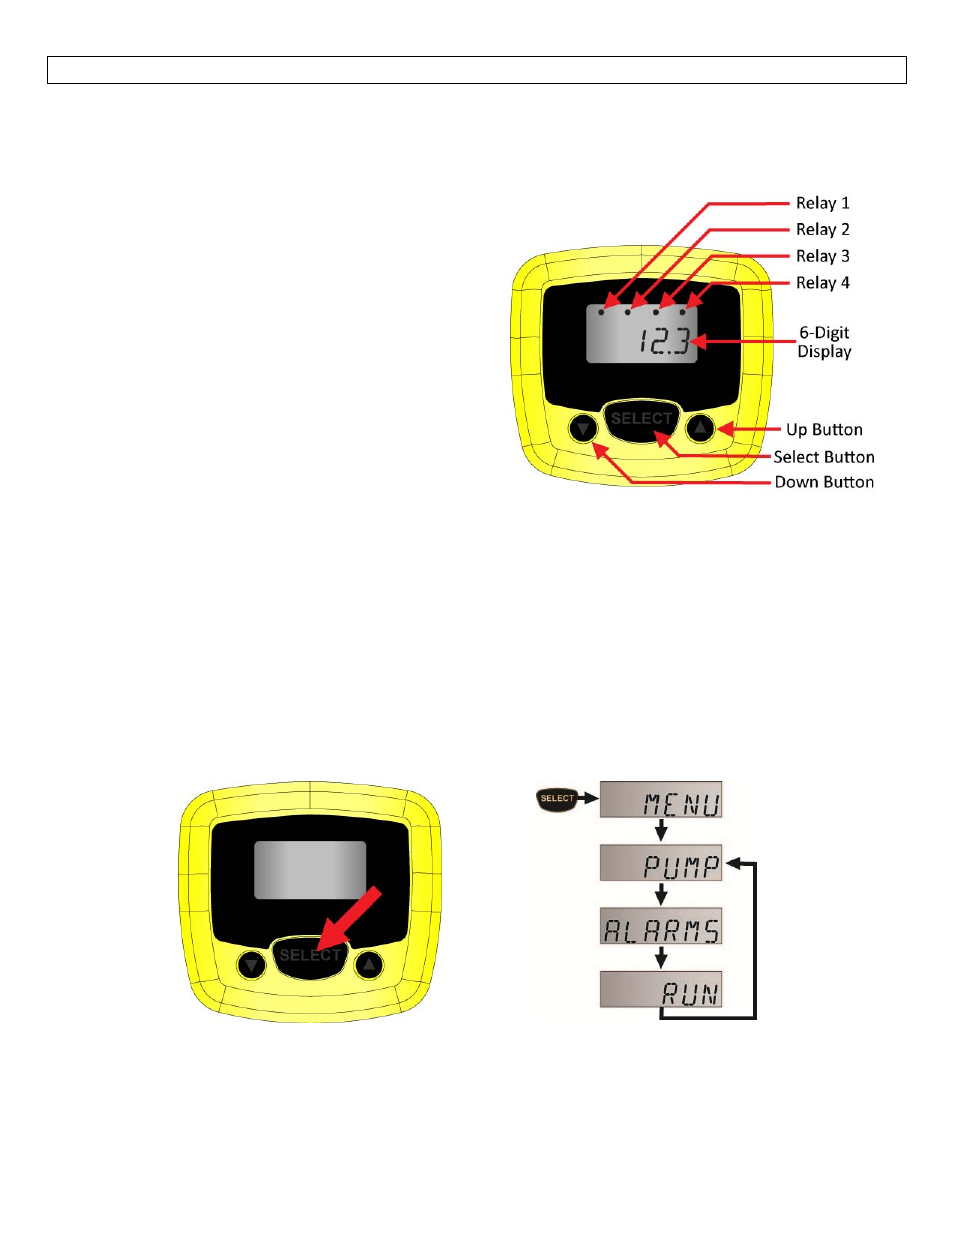
PodView® features a 6‐digit display with relay indicators and a three‐button user interface. The indicator
displays the measured value and relay status of the connected EchoPod® (if the sensor has relays and they are
configured for use).
Relay 1‐4 – Indicates when the sensor’s relay is
energized. Note: Not all EchoPod® sensor models
have relays.
o
If the EchoPod® does not have any relays,
then the indicators will remain off.
6‐digit Display – Shows the liquid level in height
(inches, cm, feet or meters) or the volume of
liquid (gallons or liters).
o
The selection of height vs. volume is set in the
WebCal® software.
Up Button – Used to increase a set point value.
Select Button – Used to enter the Menu and
accept values.
Down Button – Used to decrease a set point
value.
Note: To increase the scrolling speed of the display,
hold down the SELECT button while simultaneously
pressing the UP or DOWN button.
Entering the MENU: If desired, users can change EchoPod® relay ALARM, VALVE or PUMP ON‐OFF set points
using PodView®. To enter the menu PodView® MENU functions, press and hold the SELECT button for 5
seconds. The MENU will then scroll between the configured PUMP, ALAMRS and RUN modes. Note: If the
relays are configured for PUMPS and ALARMS, then both will appear in the menu. If the relays are configured
for Alarms only, then PUMP will not appear. If the relays are configured for PUMPS only (also for valves), then
ALARMS will not appear.
To change a pump set point value, press SELECT when PUMP appears.
To change an Alarm set point value, press SELECT when ALARMS appear.
To exit the menu and return to run mode, press SELECT when RUN appears.