Introduction – Datamax-O'Neil RL3_4 User Guide User Manual
Page 49
B-1
B
B
B
W
W
W
i
i
i
r
r
r
e
e
e
l
l
l
e
e
e
s
s
s
s
s
s
L
L
L
A
A
A
N
N
N
a
a
a
n
n
n
d
d
d
B
B
B
l
l
l
u
u
u
e
e
e
t
t
t
o
o
o
o
o
o
t
t
t
h
h
h
S
S
S
e
e
e
t
t
t
u
u
u
p
p
p
B
B
B
.
.
.
1
1
1
I
I
I
n
n
n
t
t
t
r
r
r
o
o
o
d
d
d
u
u
u
c
c
c
t
t
t
i
i
i
o
o
o
n
n
n
The printer makes IP requests at power-up, so before making a network connection to the printer consider
how your IP addressing needs to be assigned. The IP addressing of the printer can be configured in one of
two ways: Using a static IP Address or Using IP Discovery (DHCP, BootP, or RARP).
Default Network Settings:
The following table lists some of the printer’s default network setting. Any of these parameters can be
modified using the NETira CT configuration program. See section 3.3 for more information on NETira CT.
Network
Parameter
RL3
(All Firmware Versions)
RL4
(Firmware version 8_02_0050 or earlier)
RL4
(Firmware version 8_02_0051 or later)
ESSID
D-O
(None)
D-O
TCP Port:
9100
515
9100
UDP Port:
9200
515
9200
Bluetooth Name:
Printer – RL3
Printer – RL4
Printer – RL4
1) Turn the printer ON and connect it to the
computer using the serial cable.
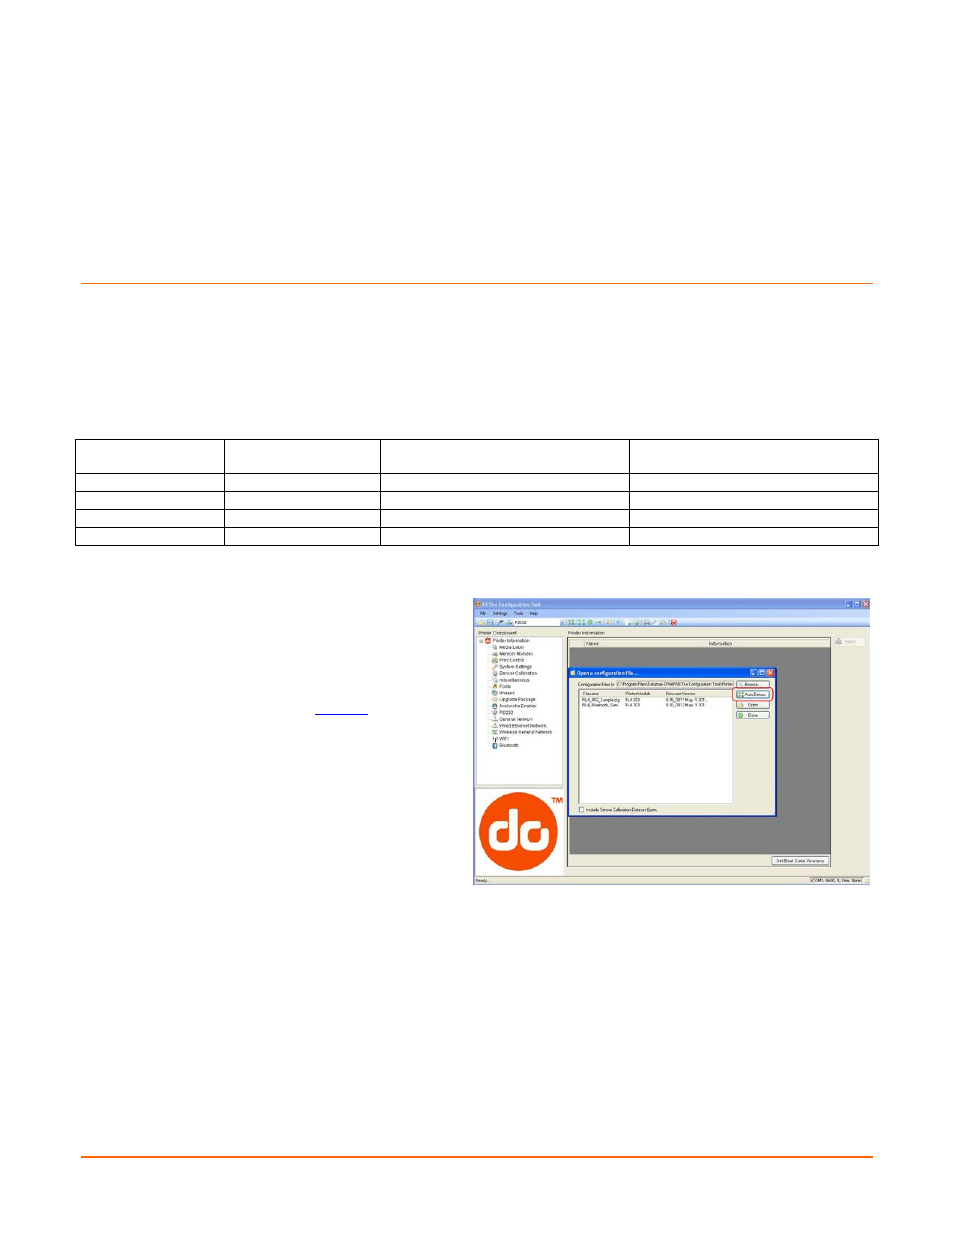
2) Install and Open the NETira CT configuration
utility application on your PC, (see section 3.3
for more information). This configuration utility
can be downloaded from o
3) Query the printer by using the ‘Auto Detect’
button. This will connect to the printer and
retrieve the setting currently stored in the
printer.
Note: The message “Done query printer”
confirms that communication process was
successfully executed.