Cable management, Height adjustment – CHIEF TS218SU User Manual
Page 12
TS218SU
Installation Instructions
12
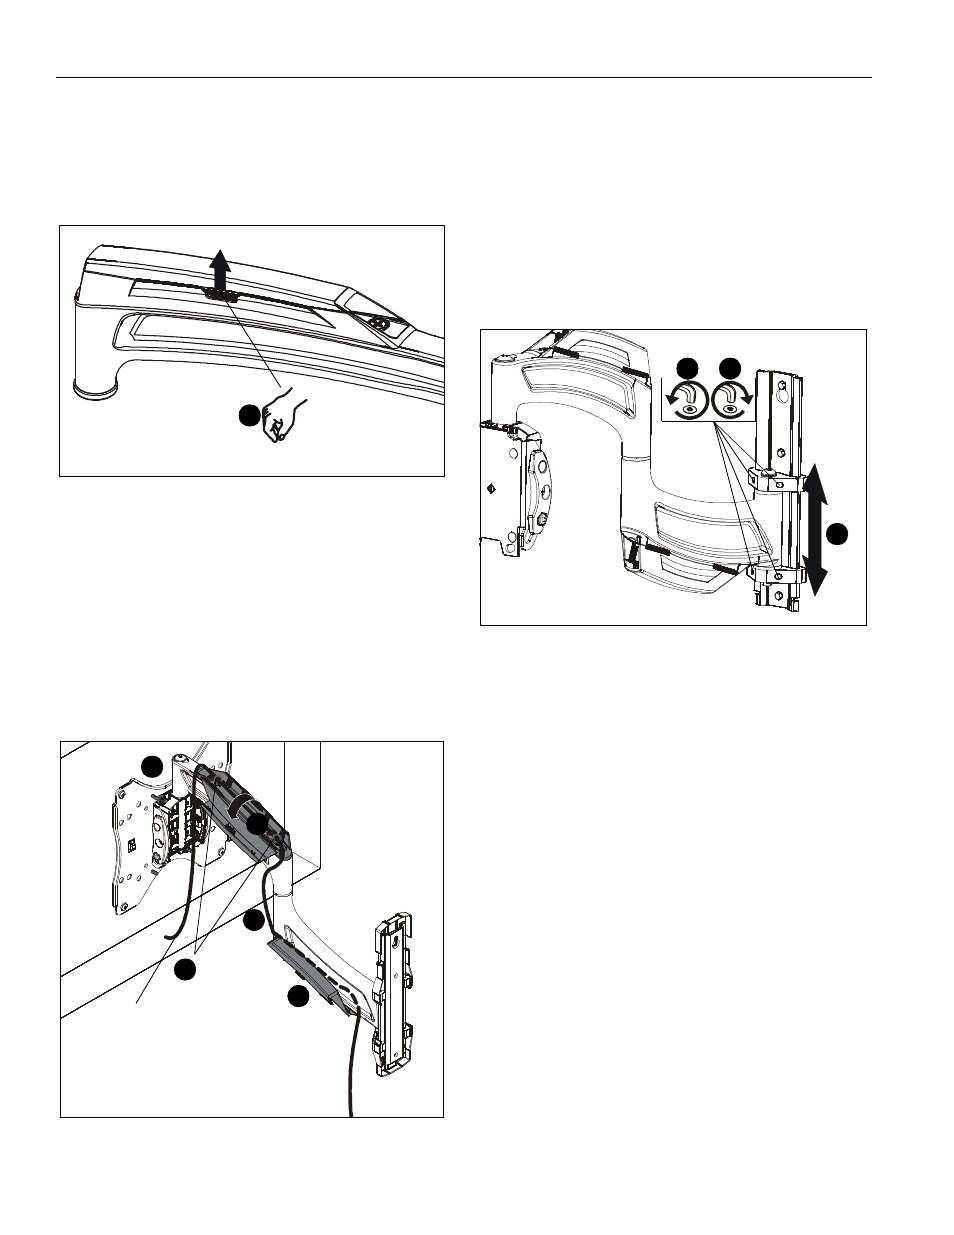
Cable Management
1.
Make all cable connections to display.
2.
Open cable management covers on upper and lower swing
arms by unhinging center tabs and lifting covers to the open
position. (See Figure 14)
Figure 14
3.
Route cables on top of upper arm. (See Figure 15)
4.
(Optional) Use cable ties (not included) to secure cables to
upper arms by threading ties around cable and through
cable tie holes on arms. (See Figure 15)
5.
Close upper cable management cover. (See Figure 15)
6.
Route cables under lower portion of swing arm. (See Figure
15)
7.
(Optional) Use cable ties (not included) to secure cables to
lower arms by threading ties around cable and through
cable tie holes on arms. (See Figure 15)
8.
Close lower cable management cover. (See Figure 15)
Figure 15
Height Adjustment
The TS218SU may be adjusted 1/2" up or down after
installation to the wall.
1.
Remove display from main assembly.
2.
Remove top and bottom covers (K and L) to expose height
adjustment screws.
3.
Use 1/8" hex key (U) to loosen four height adjustment
screws. (See Figure 16)
4.
Raise or lower mount until desired height is acheived. (See
Figure 16)
Figure 16
5.
Tighten four height adjustment screws. (See Figure 16)
6.
Reinstall top and bottom covers (K and L).
7.
Reinstall display.
2
2
3
4
cable ties
(not included)
2
6
cable (typical)
4
3
5