Cla-val – Cla-Val 250-01/605-01 User Manual
Page 16
CLA-VAL
Copyright Cla-Val 2008 Printed in USA Specifications subject to change without notice.
P.O. Box 1325 • Newport Beach, CA 92659-0325 • Phone: 949-722-4800 • Fax: 949-548-5441 • E-mail: [email protected] • Website cla-val.com
©
N-100-01 (R-12/07)
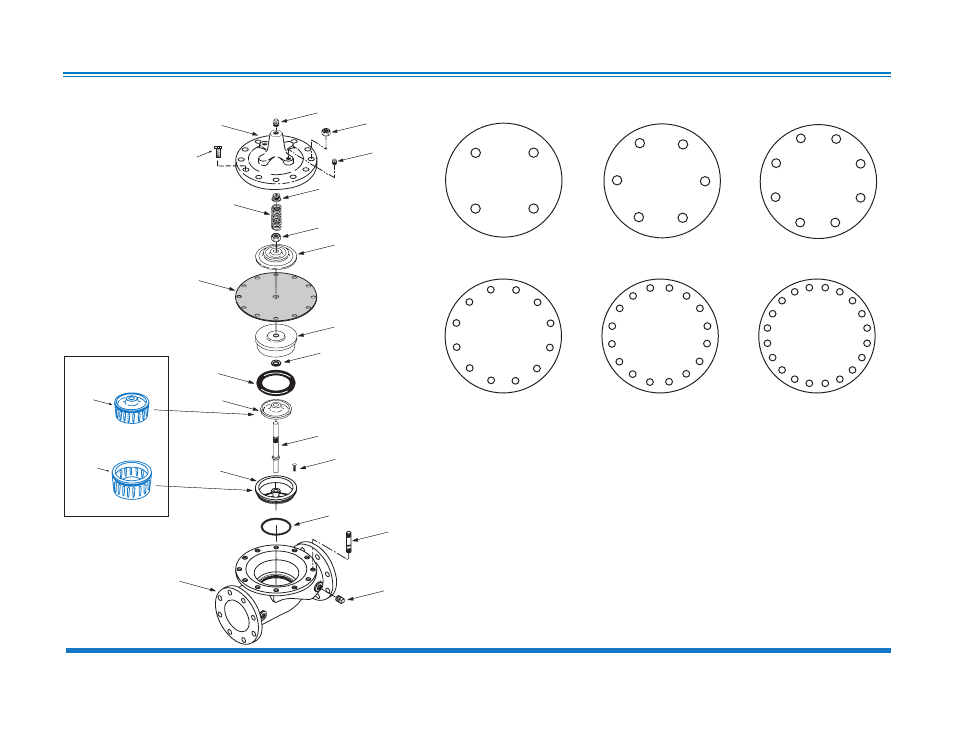
BOLT/NUT TORQUING PROCEDURES ON VALVE COVERS
4
BOLTS
6
BOLTS
8
BOLTS
12
BOLTS
16
BOLTS
20
BOLTS
4
3
2
1
6
5
4
3
2
1
8
7
6
5
4
3
2
1
0
9
8
7
6
5
4
3
2
1
12
11
10
9
8
7
6
5
4
3
2
1
16
15
14
13
12
11
10
9
8
7
6
5
4
3
2
1
20
19
18
17
16
15
14
13
12
11
Follow this procedure when reassembling MAIN Valve:
1. Tightens bolts/nuts in a “Star” or “Cross-Over” Pattern following the
numbers shown above to insure that cover seats evenly on the diaphragm
material and body.
2. Torque the bolt/nuts in three stages:
A. To approximately 10% of final torque valve.
B. To approximately 75% of final torque valve.
C. To final required torque valve.
3. Valves that are to be tested to 375 PSI or higher should be retorqued
after 24 hours.
COVER
PIPE PLUG
COVER BEARING
SPRING
STEM NUT
DIAPHRAGM WASHER
DISC RETAINER
BODY
*
SPACER WASHERS
DISC GUIDE
SEAT
PIPE PLUG
STEM
SEAT O-RING
STUD
8" and Larger
*
DIAPHRAGM
*
DISC
*
Repair Parts
Seat Screw
8" and Larger
(Globe
or
Angle)
PIPE PLUG
HEX NUT
8" and Larger
Cover Bolt
6" and Smaller
KO
DISC GUIDE
KO
SEAT
KO Anti-Cavitation
Trim Option
100-01 Hytrol Main Valve Assembly