Connecting the tlp 350cv, Step 9 - connect the external power supply, Step 10 - connect the network – Extron Electronics TLE 350 Setup Guide User Manual
Page 5: Step 11 - connect the preview inputs, A b c d
5
Connecting the TLP 350CV
NOTE:
The rest of this guide applies only to the TLP 350CV (not to the TLE 350).
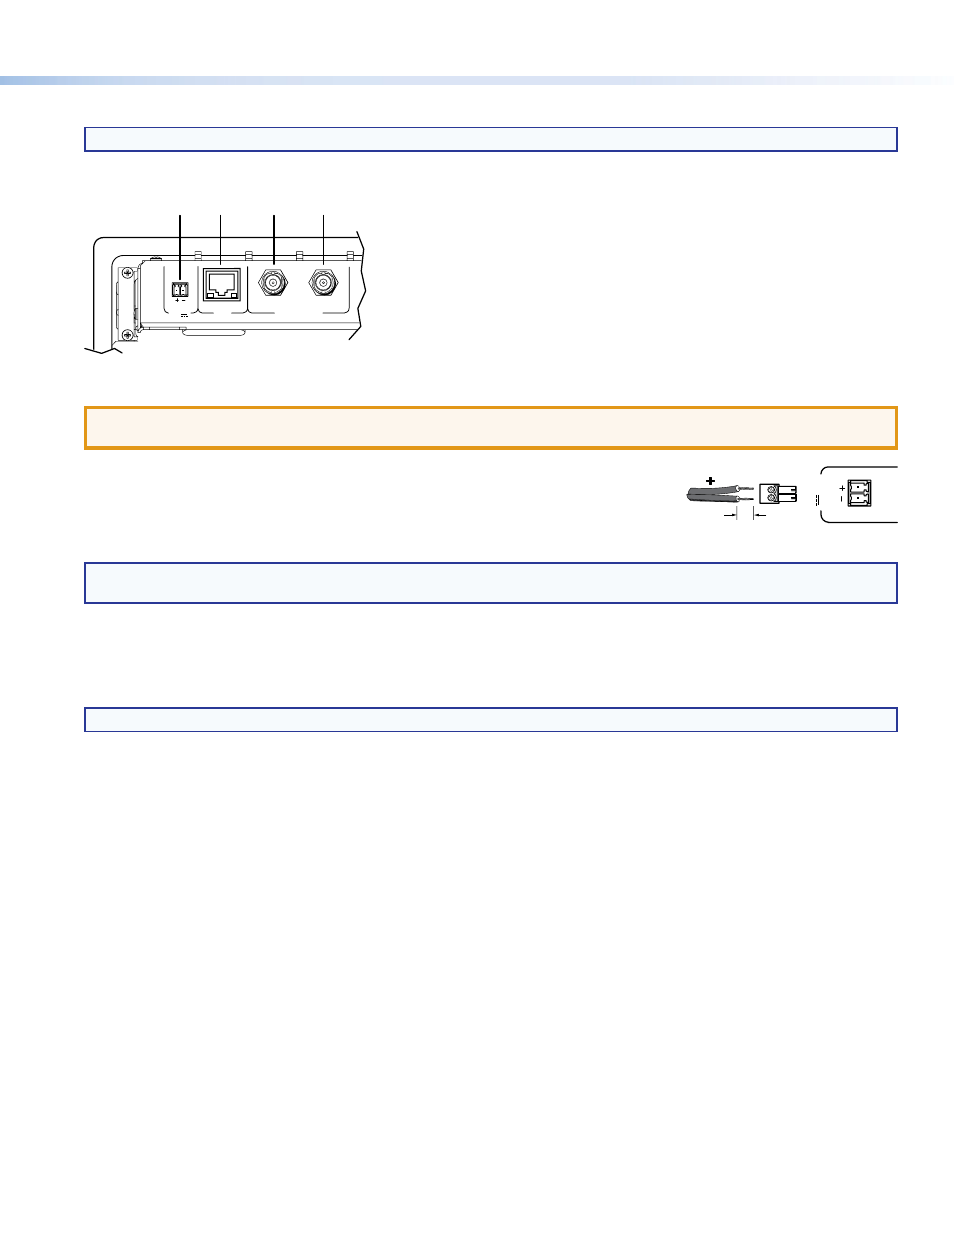
The cable connections are located in a panel on the bottom of the TLP 350CV:
POWER
12V
1.0A MAX
LAN
VID / Y
C
PREVIEW INPUT
a b
c
d
Step 9 — Connect the External Power Supply
ATTENTION:
Before connecting the power supply, read the cautions listed in the “Power Connector” section of the
TLP 350CV User Guide
Connect the two pole, 3.5 mm captive screw connector from the power supply (provided with
the unit) to the power supply socket on the rear panel (
a
). The power supply provides 12 VDC
and 1.0 A.
NOTE:
For advice about using captive screw connections, see the notes in the “Power Connector” section of the
TLP 350CV User Guide
.
Step 10 — Connect the Network
Using a standard Ethernet cable, connect the TLP 350CV to the network via the LAN port (
b
). The TLP 350CV must be
connected to the same network environment as the assigned IP Link controller.
NOTE:
To configure the TLP 350CV, connect it directly to a PC with an Ethernet crossover cable.
Step 11 — Connect the Preview Inputs
Two BNC connectors carry video from a composite or S-video source allowing a TLP 350CV user to preview video from that
source. Composite video is connected to Vid/Y (
c
). For S-video, the luma signal is connected to Vid/Y (
c
) and chroma to C (
d
).
Step 12 — Power on the TLP 350CV for the First Time
Power on all the devices connected to the TLP 350CV. When the 12 VDC power supply is switched on, the TLP 350CV will boot
up and, if a graphical user interface (GUI) has been designed and loaded onto the touchpanel, that screen will be displayed. If a
GUI has not been loaded, a plain blue screen will be displayed.
a
External power supply connector
b
LAN and PoE connector
c
Composite or S-video luma signal
d
S-video chroma signal
-
3/16"
(5 mm) Max.
PO
WER
12V
1.0A MAX