Mounting, Retractors under the table, Mounting retractors under the table – Extron Electronics Cable Cubby 1400 User Manual
Page 5: Horizontal or angular mounting
5
Cable Cubby 1200 and 1400 • Installation Guide (Continued)
Under the table, adjust the side clamps on the enclosure.
Mounting Retractors Under the Table
Horizontal or Angular Mounting
For installation details, see the Cable Retractor
Setup Guide available online at
www.extron.com
.
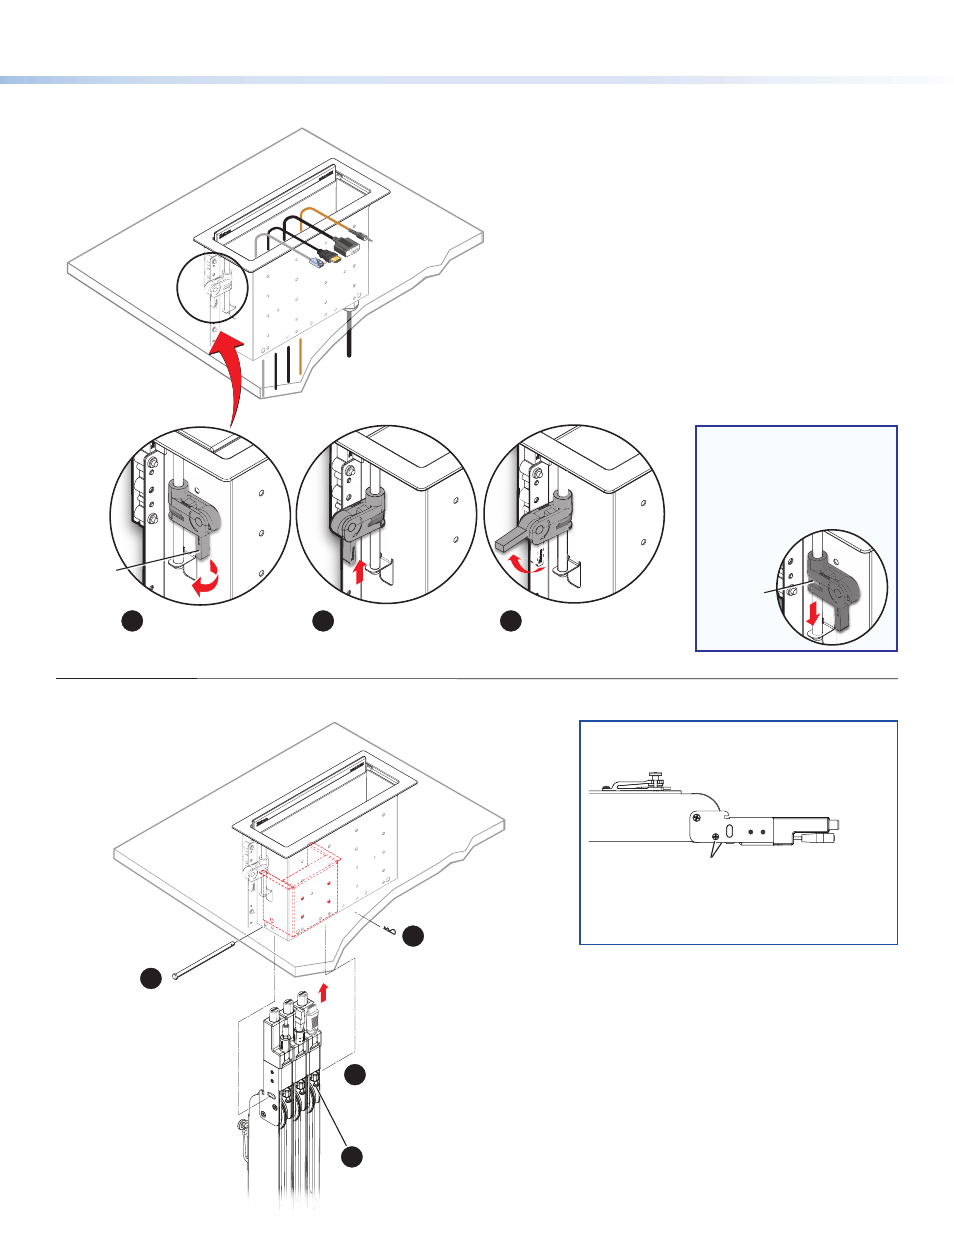
Insert the pin through the
retractor mounting hole on
the side of the Cable Cubby
and retractor assembly.
Secure the clip on the pin.
Insert retractors into
the retractor bracket.
Secure the locking screw on each
retractor. Do not overtighten.
For horizontal or angular mounting, remove
these orientation screws (front and back),
then follow the steps shown at left.
Rotate the side clamp
outward and ensure that
the lever is down.
Slide the clamp all the
way up against the bottom
of the table.
Ensure the Cable Cubby
is firmly seated in the table.
Raise the lever to secure
the Cable Cubby.
Lever
2
1
3
2
3
1
4
NOTE:
To lower the side
clamp, turn the lever
down, then press and
hold the locking plate
while sliding down the
clamp.
Locking
plate
Insert the pin through the
retractor mounting hole on
the side of the Cable Cubby
and retractor assembly.
Secure the clip on the pin.
Insert retractors into
the retractor bracket.
Secure the locking screw on each
retractor. Do not overtighten.
For horizontal or angular mounting, remove
these orientation screws (front and back),
then follow the steps shown at left.
Rotate the side clamp
outward and ensure that
the lever is down.
Slide the clamp all the
way up against the bottom
of the table.
Ensure the Cable Cubby
is firmly seated in the table.
Raise the lever to secure
the Cable Cubby.
Lever
2
1
3
2
3
1
4