Oceed to, Step 2 — install the modules, Mounting the cable cubby in the table – Extron Electronics Cable Cubby 1400 User Manual
Page 4: Mount the cable cubby flush with the table
4
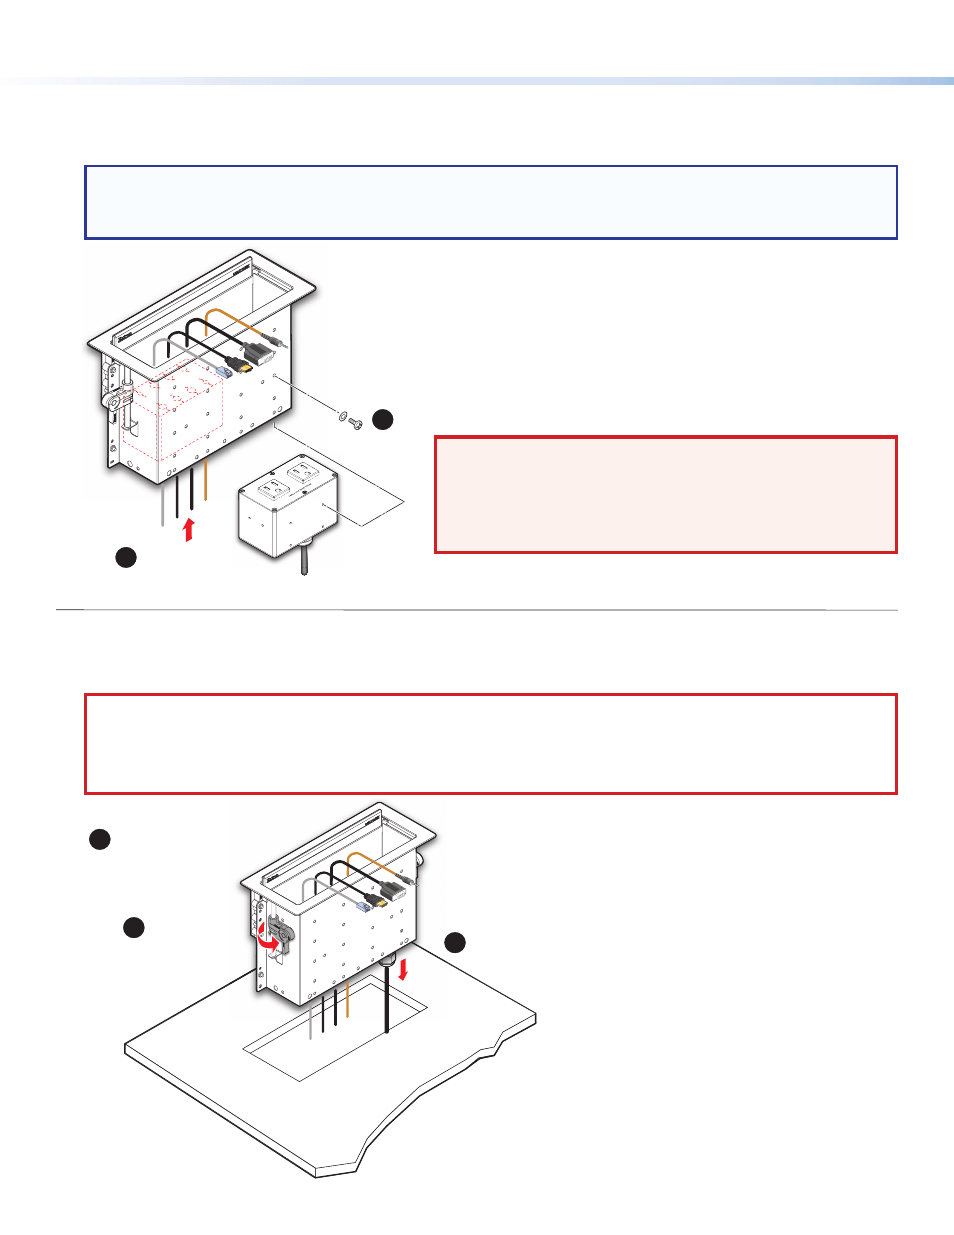
Mounting the Cable Cubby in the Table
Mount the Cable Cubby flush with the table.
CAUTION:
The flanged edges of the top of the surface enclosure are sharp. These edges are also soft and may be easily
nicked or bent. Exercise caution when handling the enclosure to prevent personal injury or damage to the enclosure.
ATTENTION:
Les extrémités à brides du haut de la surface du boîtier sont aiguisées. Ces extrémités sont aussi lisses
et peuvent facilement être coupées ou pliées. Soyez prudents lorsque vous manipulez le boîtier afin d’éviter de
l’endommager ou de vous blesser.
Step 2 — Install the Modules.
Determine where the connectivity modules and power module will be installed in the Cable Cubby. The modules may be installed
on the left or right side of the enclosure and at various heights.
NOTE:
•
Ensure that there is enough room above the modules for the Cable Cubby lid to close completely.
•
Use a screwdriver to secure the modules with the screws.
WARNING: Risk of Electric Shock.
To ensure proper electrical
grounding, use the provided #6-32 mounting screws with the star
washers.
AVERTISSEMENT: Risque de choc électrique.
Afin d’assurer
une mise à la terre correcte, utilisez les fixations de mise à la terre
#6-32 et les rondelles en étoile fournies.
Remove the plastic strips and
film on the surface of the
Cable Cubby.
Ensure that the
side clamps are
seated against the
enclosure.
Lower the Cable Cubby into the hole to test the fit.
If necessary, carefully enlarge the opening.
Secure the modules using four of the provided mounting screws and star washers.
Insert the modules
into the Cable Cubby.
2
1
2
1
3