Mounting the cable cubby – Extron Electronics Cable Cubby 200 User Manual
Page 14
Cable Cubby 200 • Installation
9
Secure cables w/ zip ties
to holes in rear of
Cable Cubby.
Power Cord
Connect to AV
Device or System
1. Test the Fit
a.
Remove the plastic strips on finished surfaces
of the Cable Cubby.
ATTENTION: Potential damage to
property. Do no use
isopropyl alcohol or other
solvents to clean the Cable
Cubby. Strong solvents will
ruin some finishes.
b.
Carefully lower the Cable Cubby into the hole to
test the fit. If necessary, remove the enclosure
and carefully enlarge the opening.
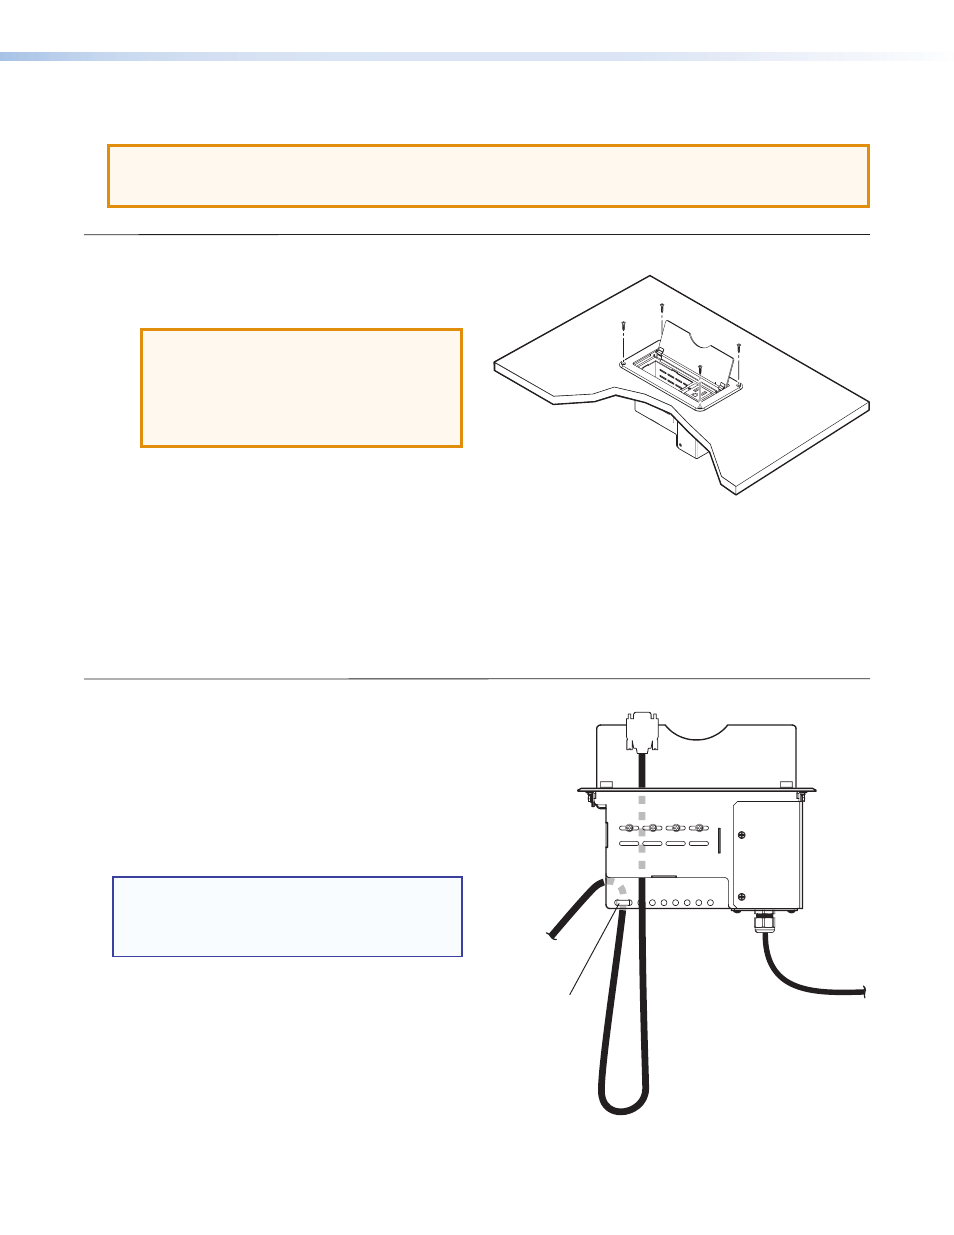
2. Fasten the Cable Cubby to the Table
a.
Drill 1/8 inch (3 mm) pilot holes 1/2 inch
(12 mm) deep into the table using the mounting
holes at each of the four corners of the unit.
b.
Use the four included 6-32 x 1/2 inch screws to
fasten the Cable Cubby to the table.
3. Dress the Cables
a.
Under the table, dress the cables to prevent
snags or tangles. Allow at least 36 inches
(0.9 m) of cable loop for each cable and secure
the cables behind the flange on the underside
of the unit.
b.
Connect cables to the AV system and connect
the AC power cord.
NOTE: The Extron Cable Retractor provides
a convenient way to dress cables (see
www.extron.com
for Cable Retractor
part numbers).
Mounting the Cable Cubby
ATTENTION: Potential damage to property. The flanged edges of the top of the surface enclosure are
sharp and soft, making them easy to nick or bend. Handle the enclosure with care to prevent
personal injury and to avoid damaging the enclosure.