Preparing the table, Prepare the, Routing template – Extron Electronics Cable Cubby 200 User Manual
Page 11: E is to be installed (see, Prepare the table, With a router
Cable Cubby 200 • Installation
6
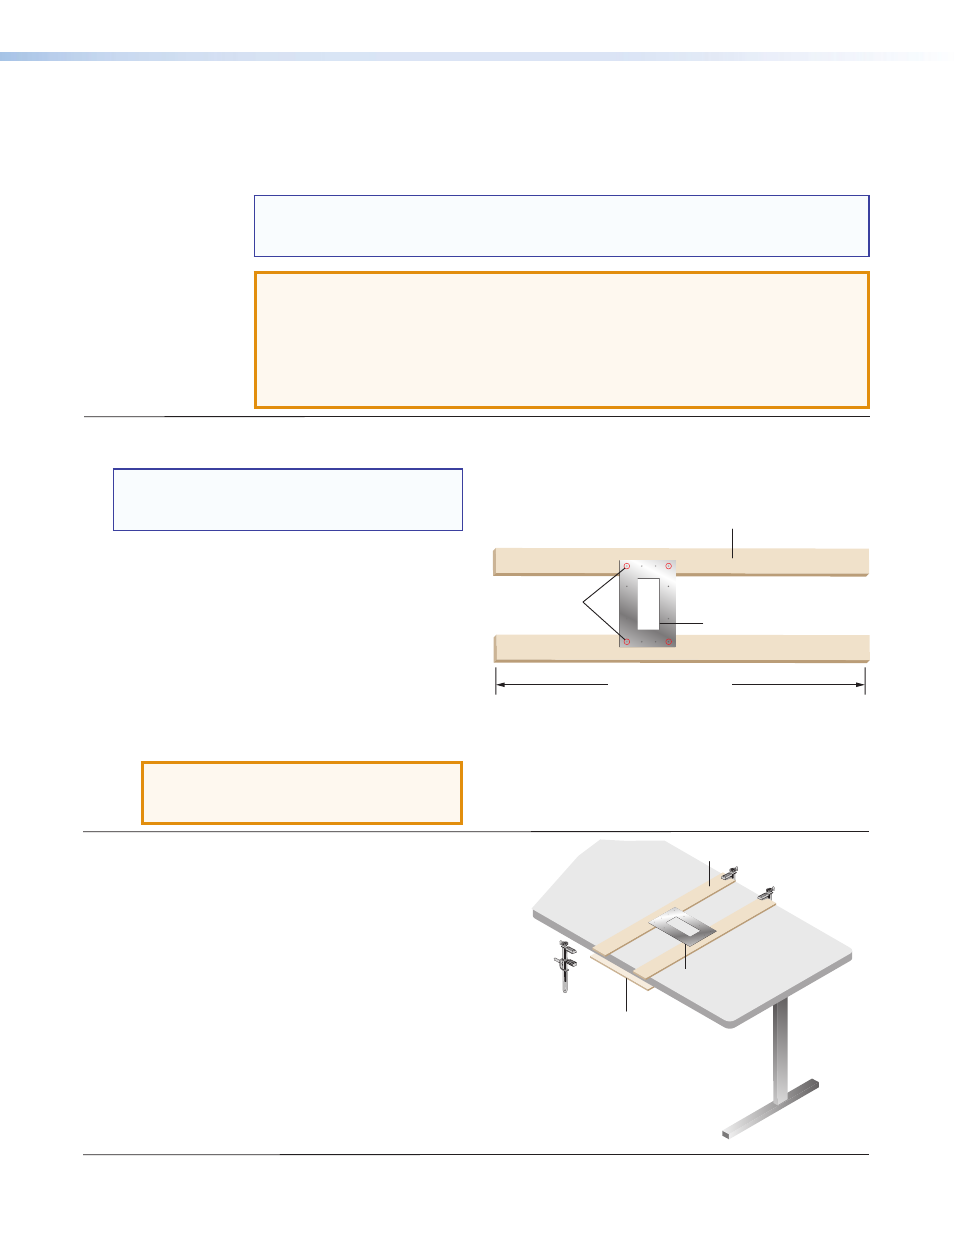
1. Prepare the Routing Template
NOTE: Save and reuse the metal routing
template for installing additional Cable
Cubby 200 models.
a.
Cut 1/2 inch x 4 inch strips of soft, finished
lumber to a length that is long enough to span
the edges of the mounting surface.
b.
Place the template over the strips so that the
opening reaches the desired mounting location
and the strips span the surface.
c.
Using at least four mounting screws, secure the
mounting template to the lumber so that the
cut-out coincides with the desired orientation of
the enclosure.
ATTENTION: Potential damage to
property. Protruding screws
will scratch the table.
2. Prepare the Table with a Router
a.
Mark the desired mounting location on the
tabletop. Ensure the enclosure will face the
desired direction.
b.
Place the mounting template assembly on the
mounting surface with the lumber strips against
the table surface and centered on the marked
location. If necessary, use a square to ensure
that the template is properly positioned. Extron
is not responsible for improperly positioned
Cable Cubby models.
c.
Secure the assembly to the table with
C-clamps. Use an additional lumber strip
underneath the tabletop to buffer it from the
C-clamps.
Preparing the Table
Extron recommends cutting the hole in the table with the Extron metal routing template (see
“
” on page
11 for part numbers).
NOTE: The hole can be also cut with a CNC wood router or a paper cut-out template
(available on the Extron website,
e not
recommended.
ATTENTION: Potential damage to property.
•
Exercise care to prevent scarring or damaging the furniture.
•
The opening in the table should be cut only by licensed and bonded
craftspeople.
•
The routing templates for various Cable Cubby models are not
interchangeable. Using the wrong template will produce an improper fit.
1/2” x 4” Soft, Finished
Lumber
Width of Mounting Surface
CABLE CUBBY 200
CABLE CUBBY 200
USER
AC
CESS
4 Screws Min.
Routing Area
1/2” x 4” Soft, Finished
Lumber
Clamps (4)
Sandwich Table
Between Soft Lumber
CA
BL
E CU
BB
Y 20
0
CAB
LE
CUB
BY
20
0
USE
R AC
CE
SS
Routing Template