Asus P5N32-SLI SE Deluxe User Manual
Page 164
6 - 4
6 - 4
6 - 4
6 - 4
6 - 4
C h a p t e r 6 : N V I D I A
C h a p t e r 6 : N V I D I A
C h a p t e r 6 : N V I D I A
C h a p t e r 6 : N V I D I A
C h a p t e r 6 : N V I D I A
®
®
®
®
®
S L I ™ t e c h n o l o g y s u p p o r t
S L I ™ t e c h n o l o g y s u p p o r t
S L I ™ t e c h n o l o g y s u p p o r t
S L I ™ t e c h n o l o g y s u p p o r t
S L I ™ t e c h n o l o g y s u p p o r t
6.
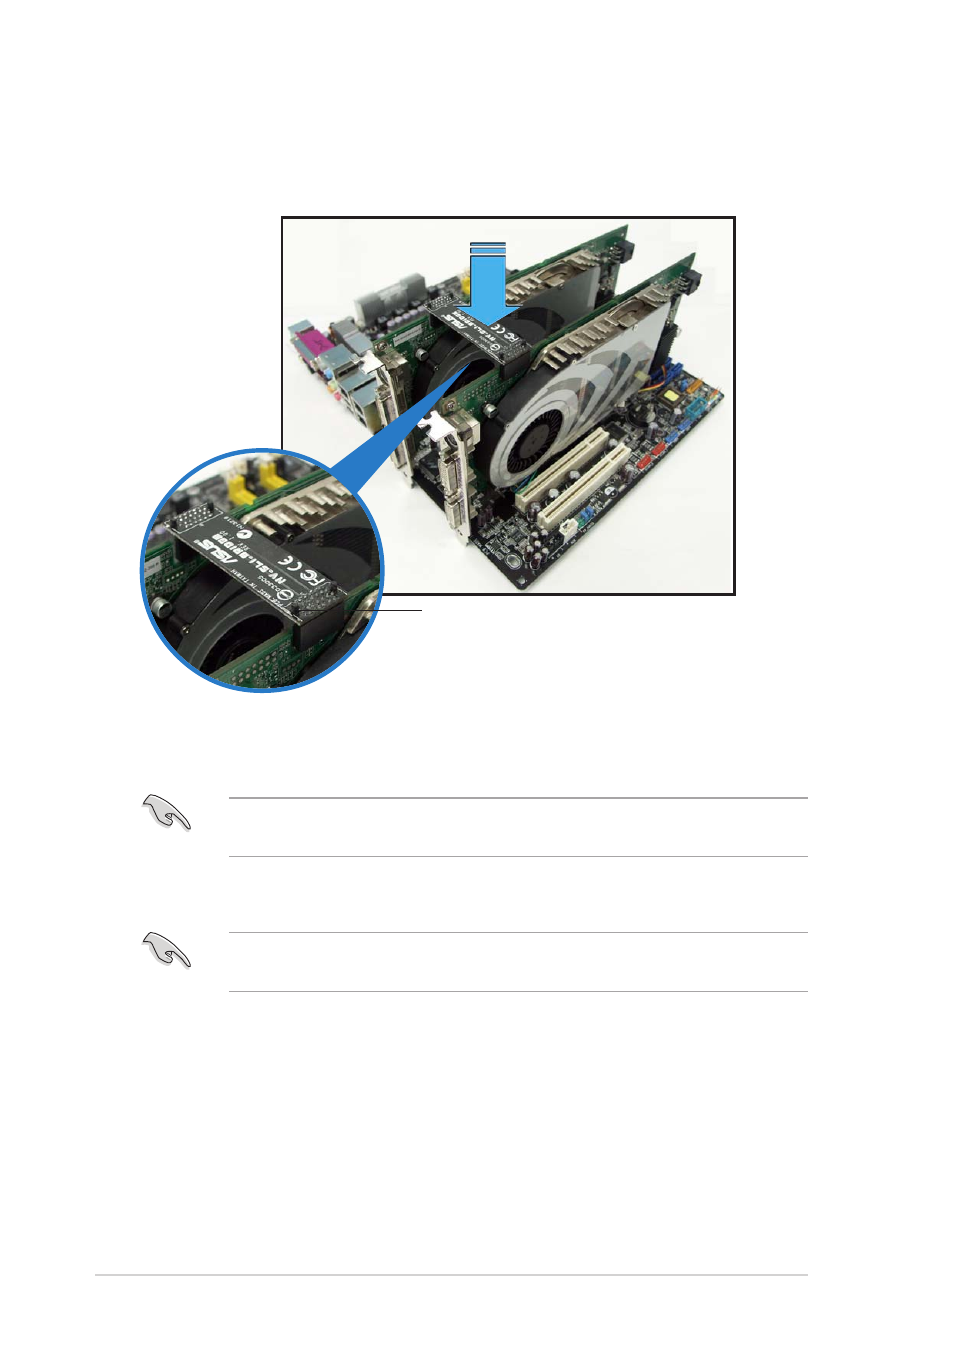
Align and insert the retention bracket into the slot then secure it with
a screw.
Make sure that the retention bracket firmly supports the two graphics
cards.
5.
Align and insert the SLI connector to the goldfingers on each graphics
card. Make sure that the connector is firmly in place.
S L I c o n n e c t o r
S L I c o n n e c t o r
S L I c o n n e c t o r
S L I c o n n e c t o r
S L I c o n n e c t o r
7.
Connect a V G A c a b l e
V G A c a b l e
V G A c a b l e
V G A c a b l e
V G A c a b l e or a D V I - I c a b l e
D V I - I c a b l e
D V I - I c a b l e
D V I - I c a b l e
D V I - I c a b l e to the graphics card/s.
We recommend to install an additional chassis fan for better thermal
environment.