Iii. installation – Asus P2B-DS User Manual
Page 21
ASUS P2B-D/P2B-DS User’s Manual
21
CPU
III. INST
ALLA
TION
III. INSTALLATION
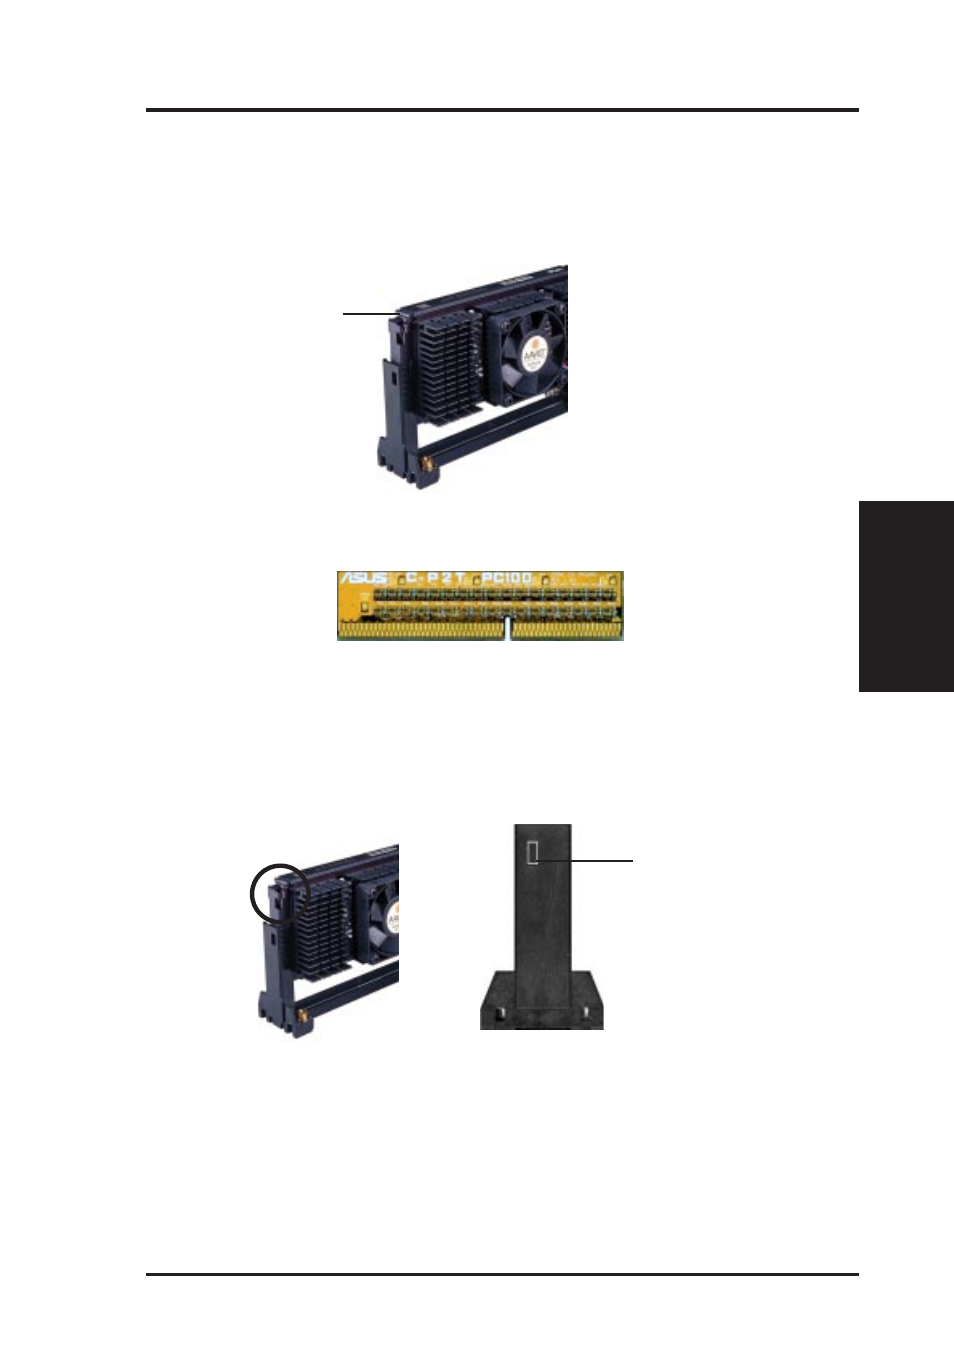
3. Insert the SEC Cartridge: Push the SEC cartridge’s two locks inward until
you hear a click (the preceding picture shows the locks in the outward position
and inward in the picture below). With the heatsink facing the motherboard’s
chipset, press the cartridge gently but firmly until it is fully inserted. (NOTE:
The procedures shown here are for installing the AAVID heatsink with fan.)
IMPORTANT: If you are installing only one processor, you must terminate the empty
slot with the ASUS C-P2T PC100 CPU termination card to maintain signal strength.
ASUS C-P2T PC100 CPU Termination Card
IMPORTANT:
Use only the ASUS C-P2T PC100 CPU termination card (Rev. 1.02
or later) to terminate the empty slot.
Push lock inward
5. Connect the Thermal Sensor Cables: If you purchased the specially designed
ASUS Smart Fans (ASUS S-P2FAN), which come with a thermal sensor built
inside the CPU fan, or purchased separately the thermal sensor cables (ASUS
P2T-Cable), you can connect the P2T-Cables to your motherboard’s thermal sen-
sor connectors. See the next page for information on ASUS Smart Thermal So-
lutions.
4. Secure the SEC Cartridge: Secure the SEC cartridge in place by pushing the
SEC cartridge locks outward so that the lock protrudes through the retention
mechanism’s lock holes.
Lock protrudes
through hole
when cartridge
is secured