Asus P5W User Manual
Page 167
ASUS P5W
5-
5. When done, press
dialogue box appears to confirm the action. Press
press
Pressing
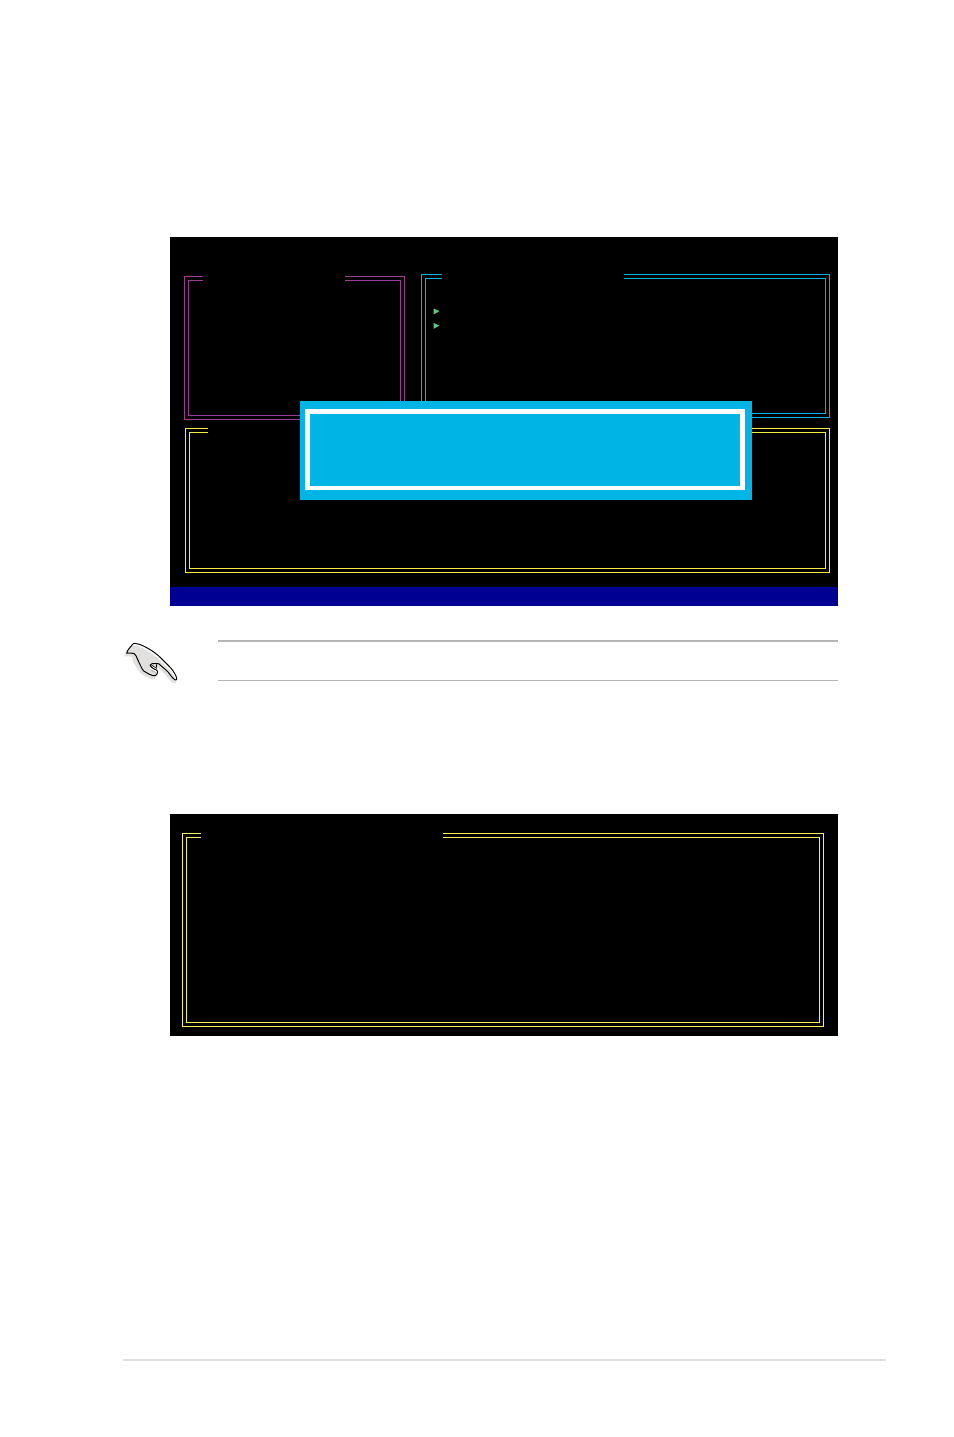
6. The following screen appears, displaying the relevant information about the
RAID set you created.
[RAID Disk Drive List]
Model Name RAID Level Capacity Status Members(HDDx)
RDD0: JRAID
0-Stripe
XXX GB
Normal 01
JMicron Technology Corp. PCI-to-SATA II/IDE RAID Controller BIOS v0.97
[Hard Disk Drive List]
Model Name
Capacity
Type/Status
HDD0: HDS722516VLSA80 164 GB
Non-RAID
HDD1: HDS722516DLA380 164 GB
Non-RAID
[RAID Disk Drive List]
[Create New RAID]
Name: JRAID
Level: 0-Stripe
Disks: Select Disk
Block: 128 KB
Size : 319 GB
Confirm Creation
Create RAID on the selected HDD (Y/N)? Y
- P5B Premium Vista Edition (188 pages)
- P5B (140 pages)
- P5B (56 pages)
- P5KPL-VM/1394/SI (94 pages)
- M2N68-CM (28 pages)
- P5GD1-VM (88 pages)
- P5AD2 Premium (8 pages)
- P5GD1-VM (92 pages)
- P5AD2-E Premium (2 pages)
- DELUXE A7N8X-E (114 pages)
- P5KPL-AM SE (40 pages)
- P5KPL-AM SE (38 pages)
- P5KPL-AM SE (62 pages)
- P4S8X-X (64 pages)
- P5K-VM (98 pages)
- K8V-X SE (82 pages)
- M2N68-AM SE2 (40 pages)
- P4P800 SE (125 pages)
- P4P800 SE (16 pages)
- DELUXE SERIES M3A32-MVP (176 pages)
- P5AD2 Deluxe (148 pages)
- M4A79 Deluxe (122 pages)
- A7V266-E (108 pages)
- Application Manual (8 pages)
- Application Manual (2 pages)
- Application Manual (6 pages)
- Application Manual (9 pages)
- Application Manual (3 pages)
- Application Manual (1 page)
- Application Manual (5 pages)
- Application Manual (11 pages)
- Application Manual (10 pages)
- Application Manual (4 pages)
- M4A88T-I DELUXE (70 pages)
- M4A88T-I DELUXE (44 pages)
- RAMPAGE IV GENE (1 page)
- P9X79 (156 pages)
- P9X79 DELUXE (2 pages)
- P8H61-M PLUS V3 (64 pages)
- A85XM-A (78 pages)
- M4A78L-M LE (64 pages)
- M2N68-AM (62 pages)
- M2N68-AM (38 pages)
- M2N68-AM (96 pages)
- Blitz Extreme (188 pages)