Asus ESC1000 Personal SuperComputer User Manual
Page 163
ASUS ESC1000
6-41
Exit Express Gate. Click the Yes button to enter the operating system
you installed on the hard disk drive.
Power Off. Click the Yes button to turn off the computer.
Getting on the Internet
In the first time of using Express Gate, or if Internet doesn’t seem to be working,
you have to manually configure network settings.
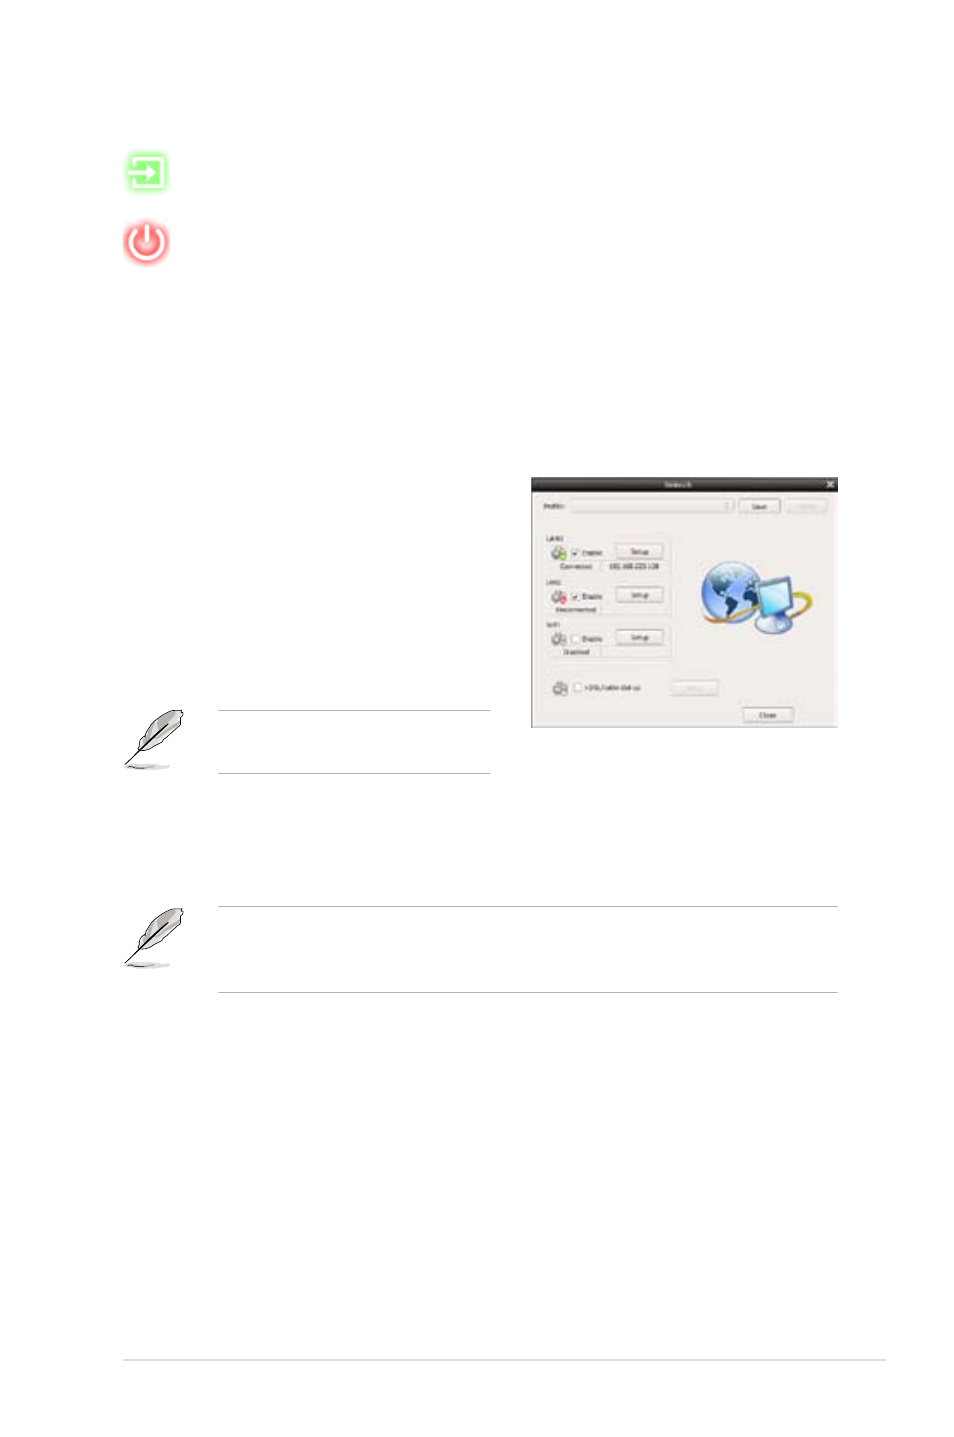
To configure network settings
1. Click Configuration Panel in the
LaunchBar.
2. In the Configuration Panel, click
Network.
3. Make the proper network configurations.
Each network interface is enabled
immediately when you check the box
next to it.
The number of the LAN ports may
differ from motherboards.
•
LAN settings:
If you use a network cable connected to a home router (which is then
connected to your DSL/cable modem), enable every LAN port(s). Express
Gate will automatically use whichever port is connected.
If you plug the network cable into a different port while Express Gate is running
(e.g. move the cable from LAN1 to LAN2), you may need to restart Express
Gate in order for it to detect the change.
If you computer automatically obtains network settings via DHCP, you don’t
need to click Setup for any LAN port. Otherwise, click Setup to configure the
static IP settings manually.
•
WiFi settings (Only the onboard WiFi modules are supported):
If your motherboard supports wireless network, click Setup for the WiFi
option. In the WiFi tab of the Advanced Network Settings box, enter the
name of your wireless access point in the SSID field. If your wireless access
point has security enabled, select the corresponding security algorithm
from the drop-down list (e.g. WEP or WAP) in the Encryption Type field,
and enter the password. Click OK to enable WiFi and establish the wireless
connection.