2 prepare the amplifier, 3 install the pip, Into the amplifier – Crown Audio IQ-PIP-USP2_CN User Manual
Page 12
IQ-PIP-USP2/CN
Page 12
IQ-PIP-USP2/CN Reference Manual
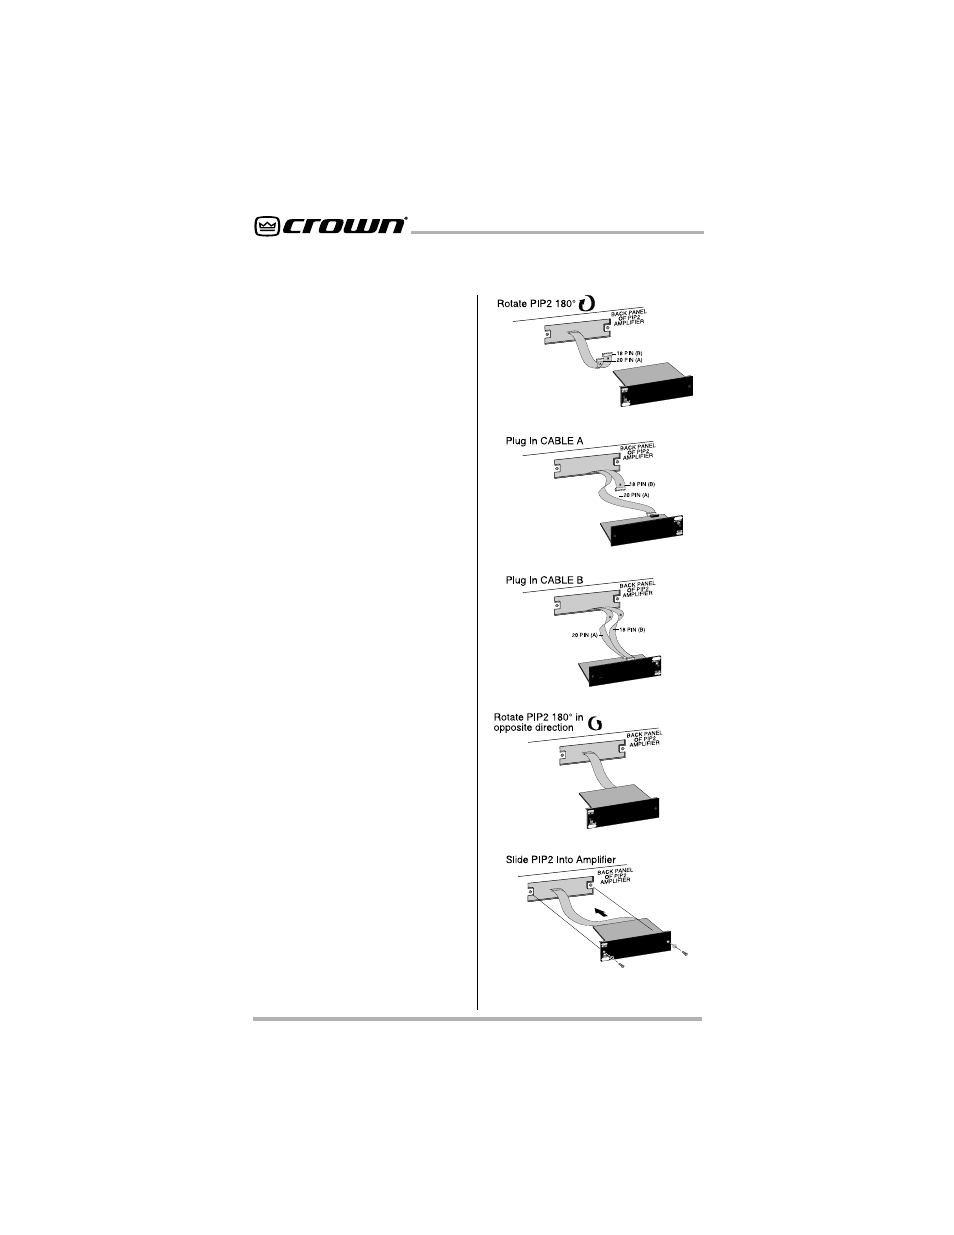
Figure 3.2 Installing the
IQ-PIP-USP2/CN
3.2 Prepare the Amplifier
3. Turn down the level controls
(full
counterclockwise) and
turn off
the amplifier.
4. Disconnect the amplifier’s
power cord.
5. Remove the existing
PIP
from
the amplifier back panel
(two
screws). This may involve
disconnecting the
PIP
from a PIP2
input adapter. If a PIP2 input
adapter is already present,
remove the ribbon cables from the
adapter.
3.3 Install the PIP
into
the Amplifier
6. Carefully ground yourself to the
chassis of the amplifier
before
installing the IQ-PIP-USP2/CN. It is
a good idea to maintain ground
contact between yourself and the
amplifier while inserting the
module into the amplifier.
7. Install the IQ-PIP-USP2/CN into
the amplifier:
Turn the IQ-PIP-
USP2/CN over so that you can
clearly see the two ribbon-cable
connectors located on the
underside of the circuit board (see
Figure 3.2). Connect the two input
ribbon cables of the amplifier. The
20-pin cable (A) should be
connected first, then the 18-pin
cable (B) should be connected.
reserved for special use. An
address of “0” (zero) places the
unit in “stand alone” mode. This
special mode disables the IQ bus
port, preventing communication
with the IQ System.