Installation procedure – Swanstone RM-58 - Installation User Manual
Page 20
3.
If the back wall measurement is 47 to 51 inches, cut
the extension panel in half and install one half of the
panel overlapping each corner panel. The back
panel will be installed between the two panel halves.
4.
Trial fit the cut extension panels and back panel.
Make sure there is at least 1 inch of panel overlap at
each edge.
5.
Refer back to Step 1 through Step 4 of the Back
Panel section for instructions on applying silicone
adhesive and installing extension panels and back
panel.
Refer to the Temporary Bracing section for information
on bracing to hold the panels in place until the silicone
adhesive is completely set (usually 24 hours). This will
allow proper curing of the silicone adhesive.
6.
Install temporary bracing to hold the wall panels in
place until the silicone adhesive cures.
7.
After the temporary bracing is removed, refer to the
Caulking section for information on applying color
coordinated caulk to joints and seams.
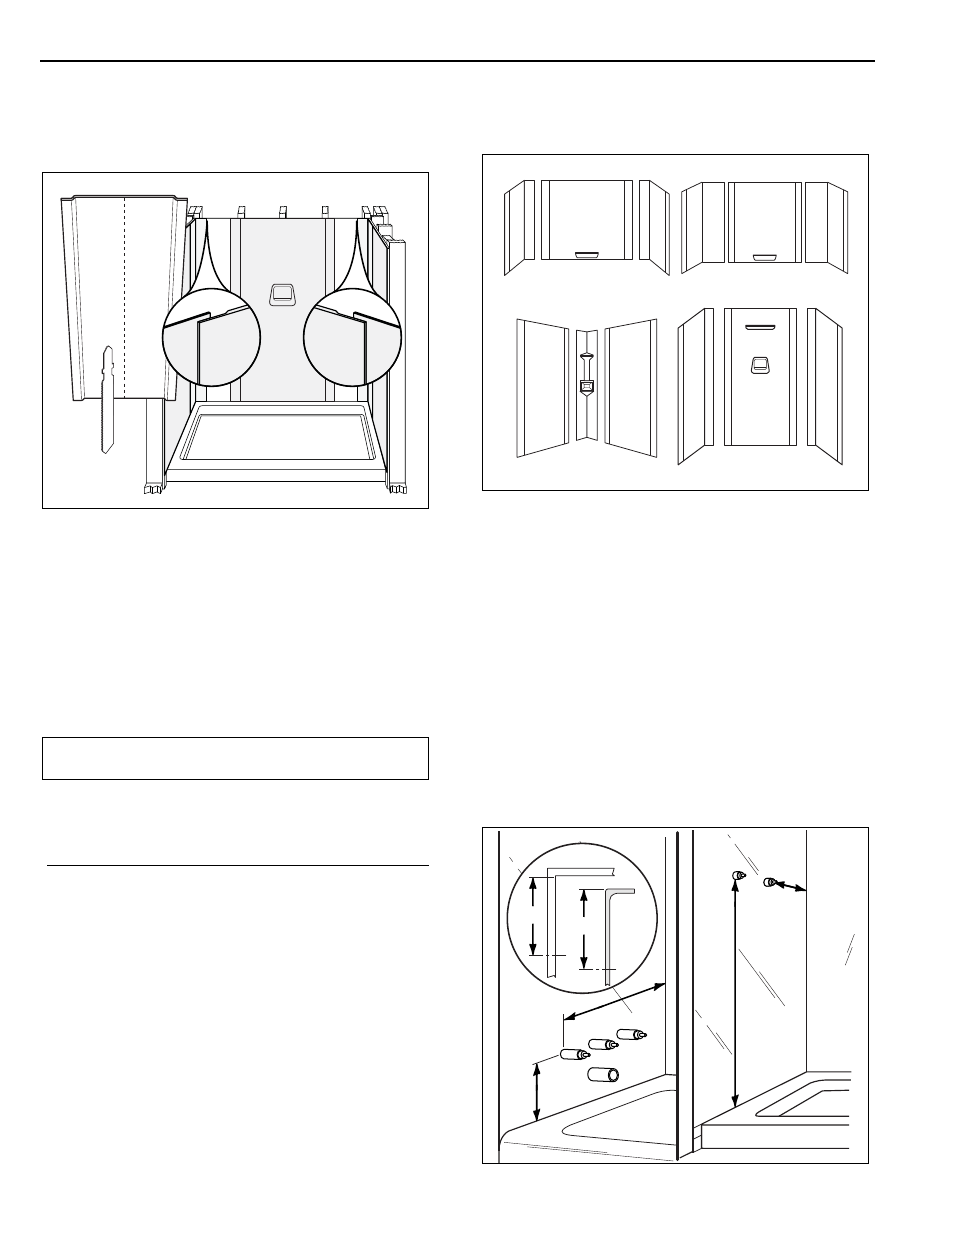
Wall Kits With Corner Side Panels -
RM-58, HA-58, SW-7032, and
SW-NEO-DTF
Corner-Side Panels
Many corner side panels are designed to fit a certain
way. Check for identification tags on the back of the
panels. Molded in shelves must be installed with the flat
surface facing up. Corner-side panels without tags or
molded in features may be interchangeable.
1.
Select the corner side panel that will be cut for the
plumbing fixture outlets.
2.
Measure the openings for faucet(s), bathtub spout,
and/or shower head. Measure the height up from
the ledge of the bathtub or shower floor ledge.
Measure out from the back wall
A
A
HA-58
RM-58
SW-NEO-DTF
SW-7032
IMPORTANT NOTICE
The Swan Corporation
20
800-325-7008
Installation Procedure