Warning, Arm tension adjustment – Peerless-AV WL-ESA763PU-200 - Installation User Manual
Page 24
24 of 25
ISSUED: 08-24-12 SHEET #: 180-9034-2 10-30-12
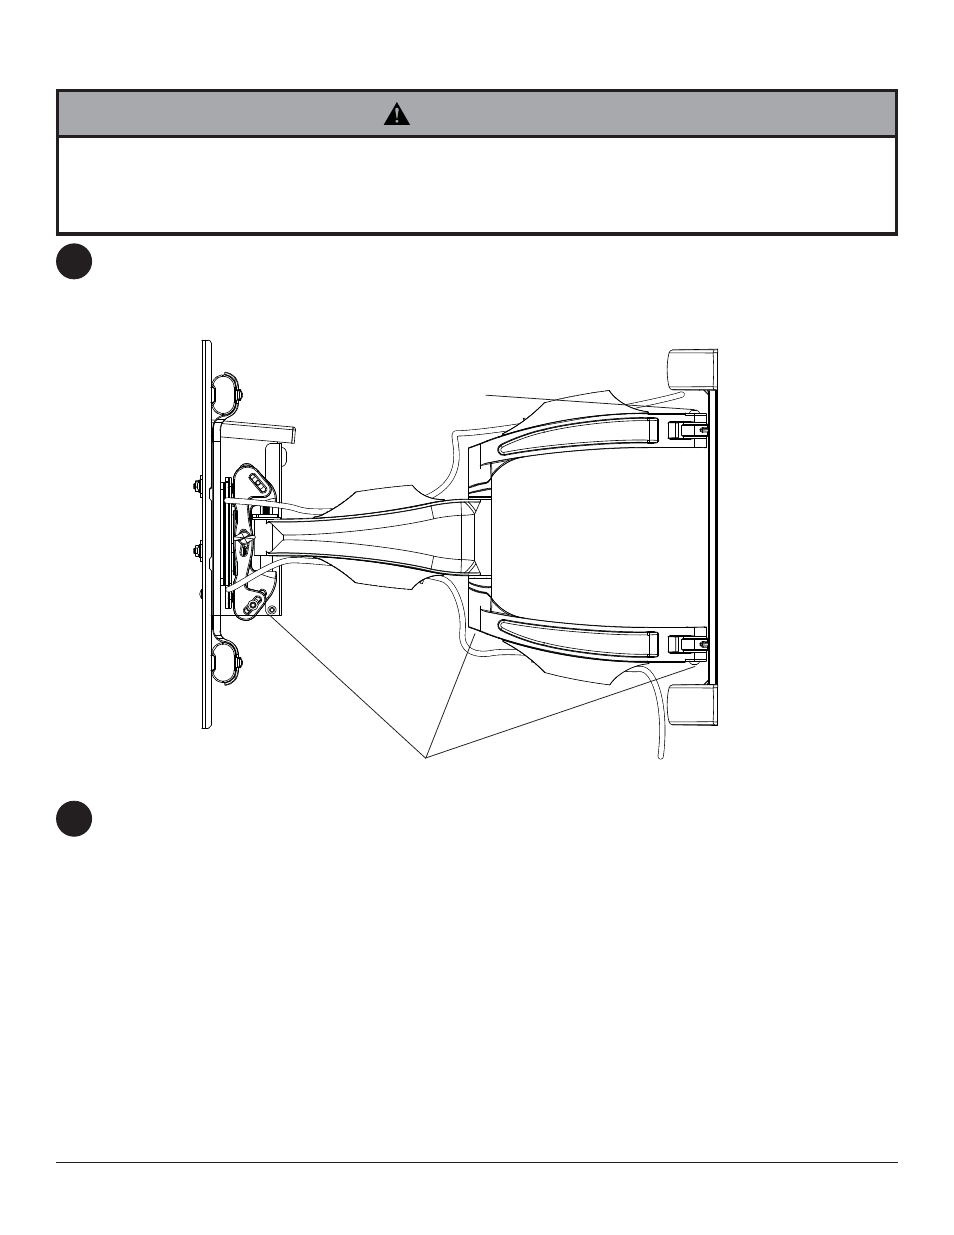
If more or less tension is desired in the arm pivot points, do the following:
• To increase tension, turn socket screw clockwise with 5mm allen wrench (I). NOTE: Tighten screws to
50 in • lbs (5.6 N.m.) maximum torque.
• To reduce tension, turn socket screw counter-clockwise with 5mm allen wrench (I). NOTE: Do not turn more
than half a turn.
Plug extension cord into power source.
To complete the installation of your wireless mount, please refer to the HD Flow™ User's Manual and the HD
Flow™ Install Guide included.
22
23
• Do not remove screw or loosen screw until it is no longer engaged with the mount. Doing so may cause the display
to fall.
• If screws become loose over time, tighten screws as necessary. Tighten screws to 50 in • lbs (5.6 N.m.) maximum
torque.
WARNING
TENSION SCREWS
TENSION SCREW
Arm Tension Adjustment
© 2012 Peerless Industries, Inc.
Peerless-AV® is a registered trademark of Peerless Industries, Inc. All rights reserved.
All other brand and product names are trademarks or registered trademarks of their respective owners.