Rough Country 683X User Manual
Page 8
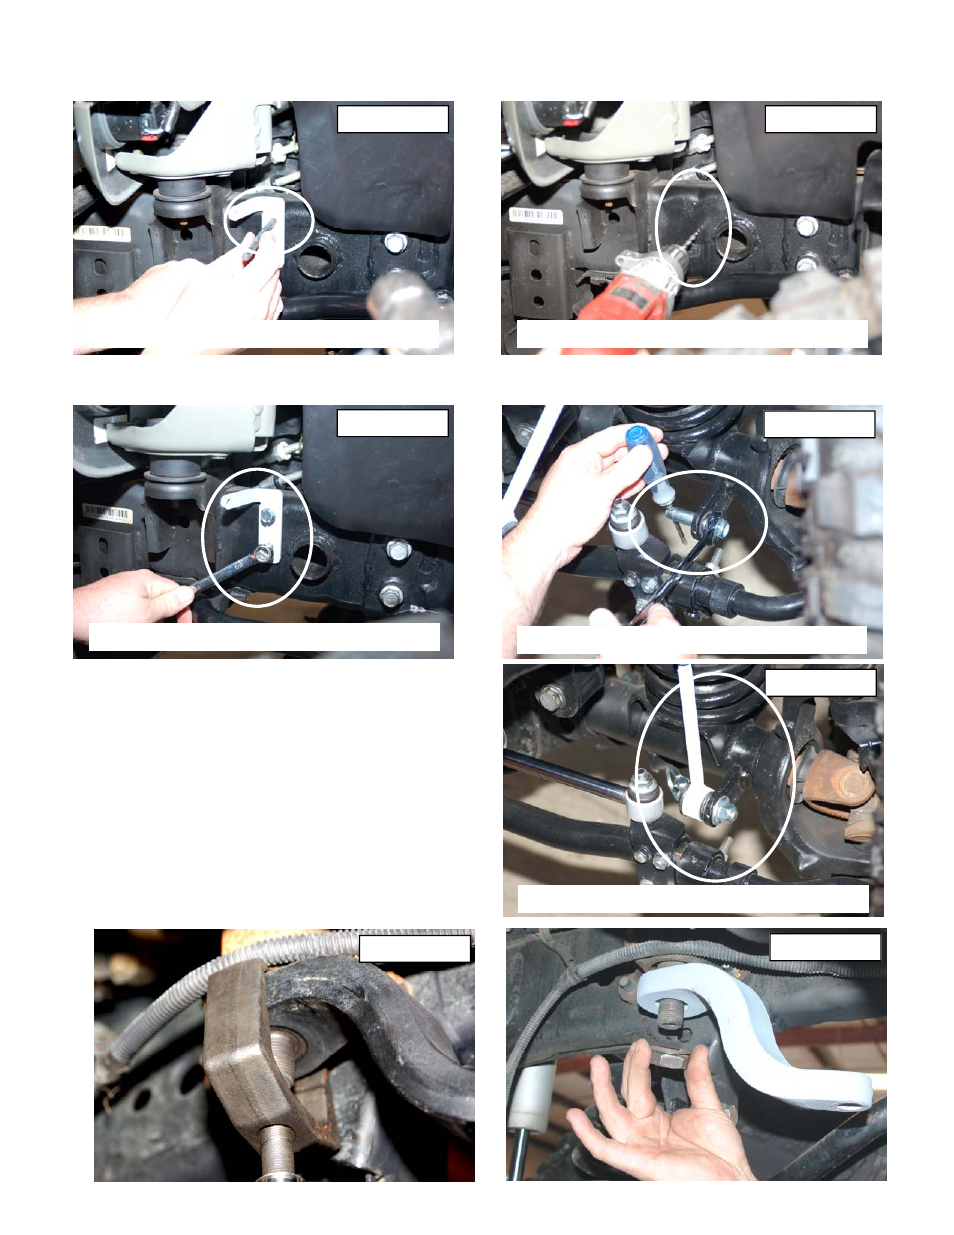
37. Mark the holes to be drilled and remove the bracket from the frame. See Photo 23.
38. Drill the two holes per side using a 17/64” drill bit. See Photo 24. Be sure to only drill through the outside
39. Install the frame bracket with the supplied 5/16” self tapping bolts (2 per bracket) using a 1/2” wrench. See Photo 25.
40. Install the supplied mounting pin as shown in Photo 26 and tighten using 19mm socket / wrench.
41. Swing the new sway bar link down and secure on the
mounting pin using the supplied quick disconnect pin. See
Photo 27.
42. Using a 21mm socket remove the tie rod end from the pit-
man arm. Remove the pitman arm nut using a 33mm
socket.
43. Using a pitman arm puller, remove factory pitman arm.
See Photo 28.
44. Install the new pitman arm with the stock hardware an us-
ing a 33mm socket. See Photo 29. Reinstall the drag link
on
the new pitman arm with the stock nut and using a 21mm
wrench.
45. Reinstall the front tires/wheels
,
using a 19mm deep well
socket. Lower the vehicle to the floor.
Photo 25
Tighten 5/16” self tapping bolts
Photo 23
Photo 24
Center punch holes
Drill Holes using a 17/64” drill bit
Install mounting pin on the axle
Photo 26
Link shown installed on pin
Photo 27
PHOTO 29
PHOTO 28