Rough Country 1272BOX4 User Manual
Page 4
FRONT INSTALLATION
1. Place the truck on a clean level surface and set the parking brake. Chock the rear wheels. Using a floor jack raise
the front of the truck and support the frame rails with jack stands. Never work under an unsupported vehicle. Using a
7/8” deep well socket remove the front wheels.
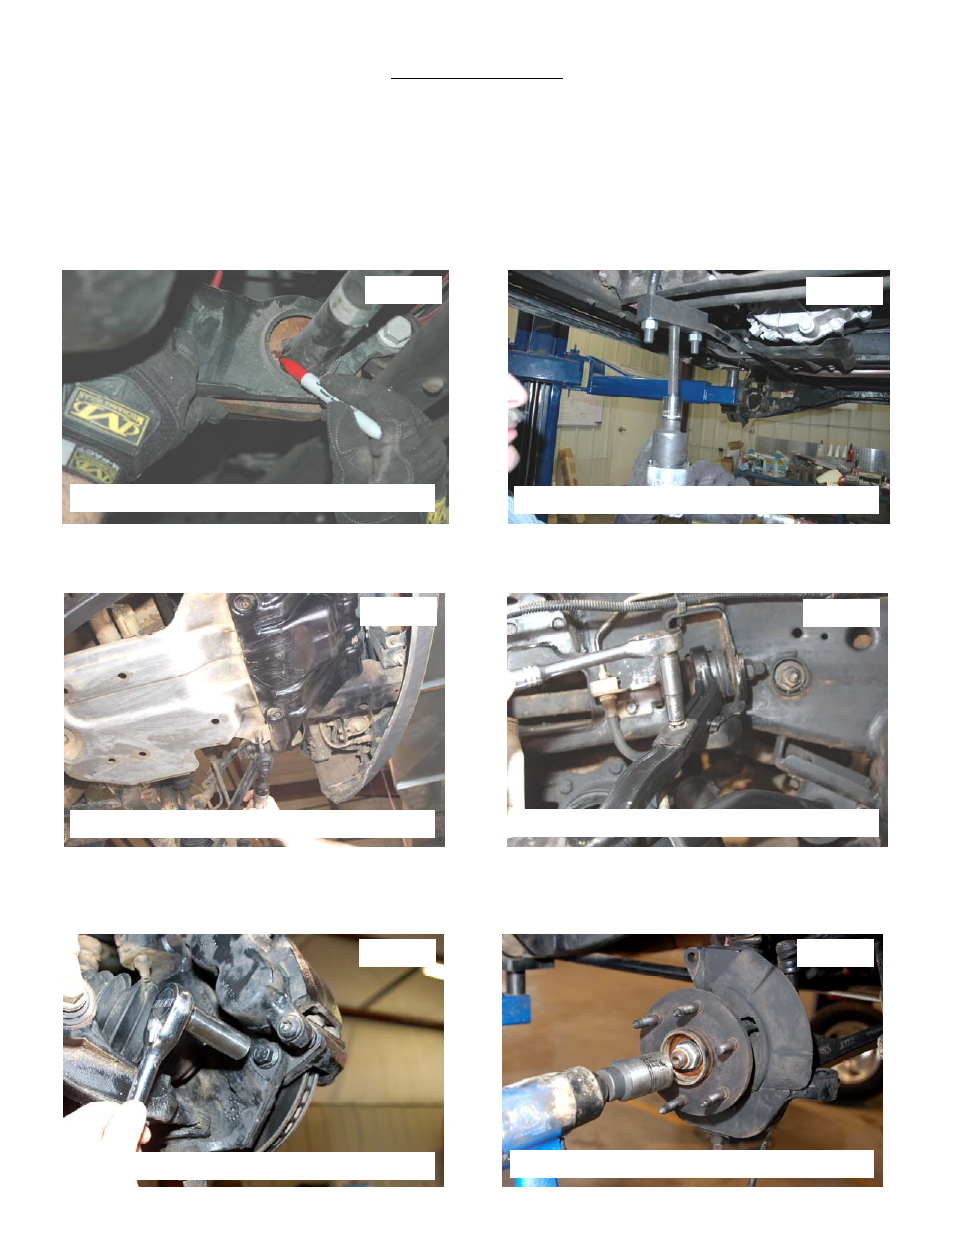
2. Locate the torsion bar adjuster bolt on the bottom of the rear cross member, measure the threads showing on the
torsion bar adjuster bolt. Mark the position of the torsion bars on the control arm and torsion bar key. Mark both the
drivers side and passenger side. See Photo 1.
3. Using a torsion bar tool, relieve the pressure from the torsion bar adjuster bolt and remove the bolt and threaded
block. See Photo 2.Warning: Be extremely careful when loading and unloading the torsion bars; there is a tremen-
dous amount of stored energy in the bars. Keep you hands and body clear of the adjuster arm assembly and the
puller tool in case anything slips or breaks.
4. Using a 15 mm socket remove the factory lower skid plate. See Photo 3.
5. Starting on the drivers side use a 10mm socket to remove the brake line from the upper control arm and knuckle.
Unplug the ABS wire from the frame rail. See Photo 4.
6. Using a 18mm socket unbolt the brake caliper and rotor. Secure the brake caliper out of harms way. See Photo 5.
7. Using a 35 mm socket remove the CV nut from the knuckle. See Photo 6. Remove the tie rod from the stock
knuckle using a 18mm wrench. Strike the side of the knuckle where the tie rod mounts to dislodge the tapered tie rod
end. Retain the stock hardware for reuse.
Photo 1
Photo 2
Photo 3
Photo 4
Photo 5
Photo 6
Mark torsion bar and torsion bar keys
Remove torsion bar keys
Remove the skid plate
Remove the brake line from the upper arm
Remove the brake caliper bracket
Remove the spindle nut