Rough Country 1272BOX4 User Manual
Page 10
REAR INSTALLATION
1. Chock the front wheels and jack up the rear of the vehicle. Support the vehicle with jack stands. Remove the tires/
wheels using 7/8” deep well socket.
2. Remove the factory shocks using a 21mm wrench and discard.
3. Support the rear axle with a floor jack and remove the factory u bolts.
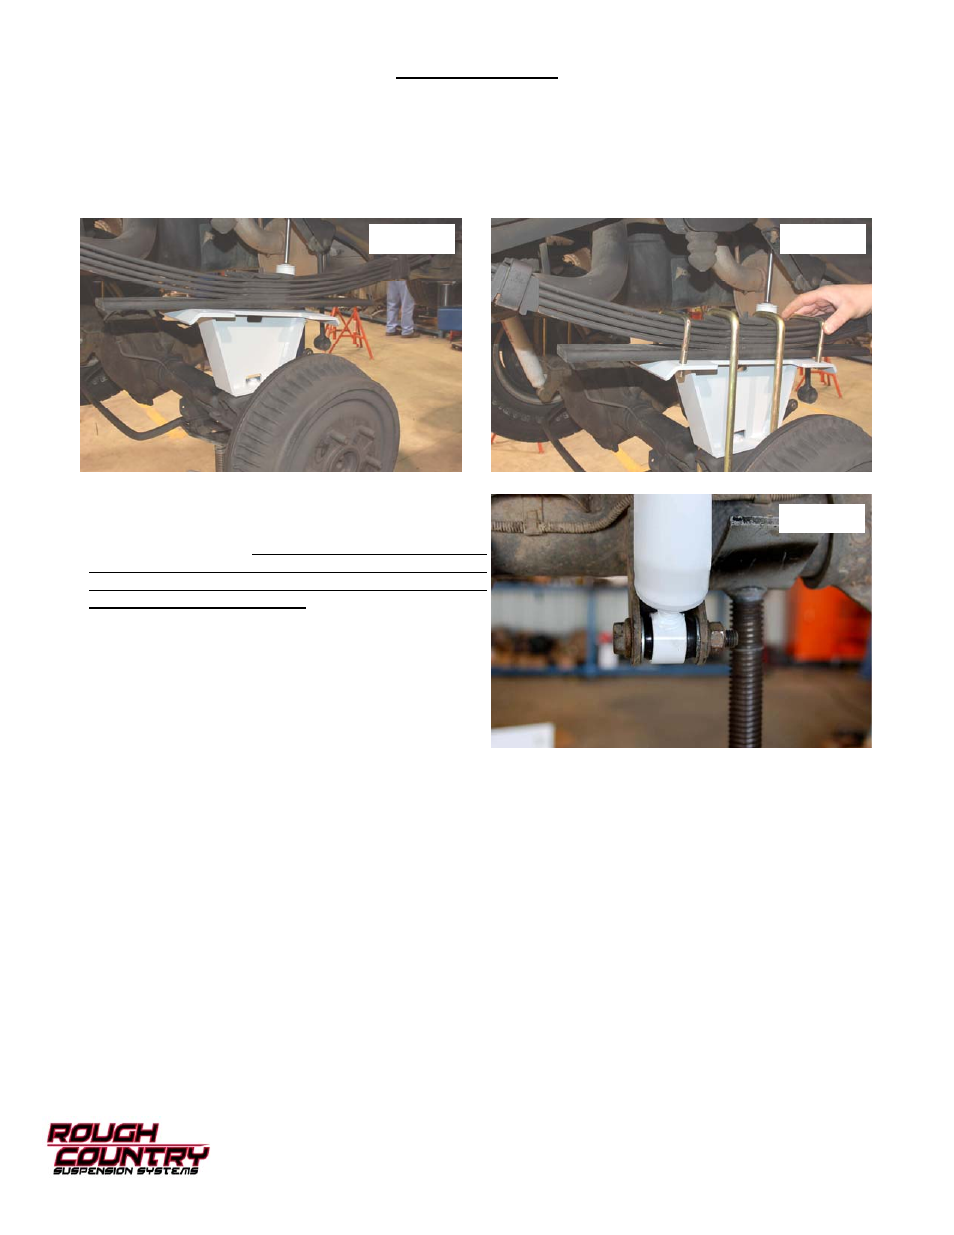
4. Install the block on the axle and make sure the block and axle pin align. See Photo 32.
5. Install the supplied 7/16” u-bolts, washers, and nuts on the leaf springs, securing the block to the springs. Do not
tighten at this time. See Photo 33.
6. Grinding may be required on the driver side e-brake
bracket on the lower shock mount. If needed grind
the threads to make sure there is no interference with
the shock absorber. This must be done if there is
interference with the shock. Failure to complete this
modification may damage the shock absorber body
and void all shock warranties.
7. Assemble the shocks part # 658556 with supplied
bushings /sleeves and install the new shocks with the
factory bolts and nuts using a 21mm wrench. See Photo
34. Note: The rear shock is a slim bore design due to
limited clearance between the shock body and the axle
tube.
8. Install the wheels and tires. Tighten lug nut to factory
specifications using crossing pattern. Lower the vehicle to
the ground.
9. Tighten the lug nuts to 85 ft lbs.
Photo 32
Photo 34
Photo 33