Rough Country 262.22 User Manual
Page 8
35. Trim tie rod ends as per instructions on last page and install on the knuckle. Tighten using a 21mm wrench.
36. Install the strut in the upper strut tower using the supplied 3/8” nuts, washers & lock washers. Tighten using a 9/16”
wrench.
37. Install the lower part of the strut in the factory location on the lower control arm with the supplied 10mm x 55mm bolts,
nuts /washers. Tighten using a 17mm” wrench.
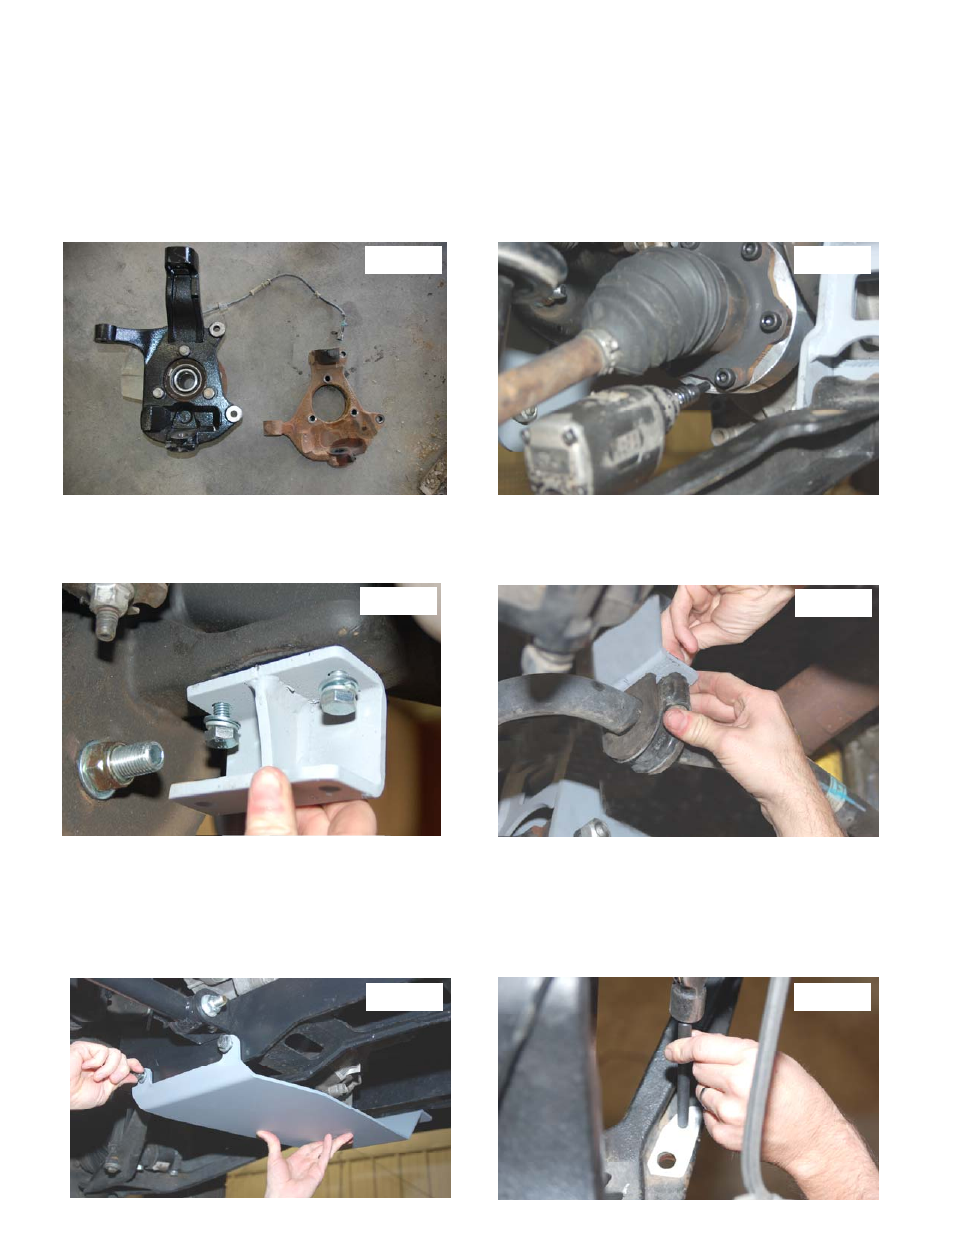
38. On the factory knuckles, remove the bearing assembly using a 15mm wrench and install in the new knuckle. Tighten
hardware. See Photo 24.
39. Install the knuckles on the lower ball joint with the factory hardware and tighten using a 18mm wrench
40. Position the axle shafts in the knuckle and tighten the factory nut using a 35mm socket. Torque to 155 ft-lbs.
41. Install the CV spacer as shown in Photo 25 between the shaft and the differential. Secure with the supplied 10mm x
65mm allen bolts using 8mm allen socket. Use Loctite on the bolt threads and torque to 45ft. Lbs using a crossing pattern.
42. Install the sway bar drop brackets with the 10mm x 35mm bolts, lock washers, and flat washers using a 17mm wrench.
Tighten hardware. See Photo 26.
43. Install the sway bar on the sway bar drop brackets with the stock bolts and supplied 10mm nuts & washers. Tighten using
a 17mm wrench. See Photo 27.
44. Reinstall the drive shaft on the differential with the stock hardware using a 11mm wrench. Note clocking marked during
disassembly.
45. Install the skid plate as shown in Photo 28 with the supplied four 3/8” x 1” bolts, flat washers and lock washers on the front
and rear cross member. Tighten using a 9/16 wrench. Tighten cross member hardware using a 24mm wrench.
46. Using the supplied template on last page of instructions as a guide, mark and drill the lower control arm using a 11/16” drill
bit to relocate the sway bar end link. See Photo 29. After drilling, install the sway bar end link with the stock hardware and
tighten.
Photo 24
Photo 25
Photo 27
Photo 29
Photo 26
Photo 28