Rough Country 481.20 User Manual
Page 3
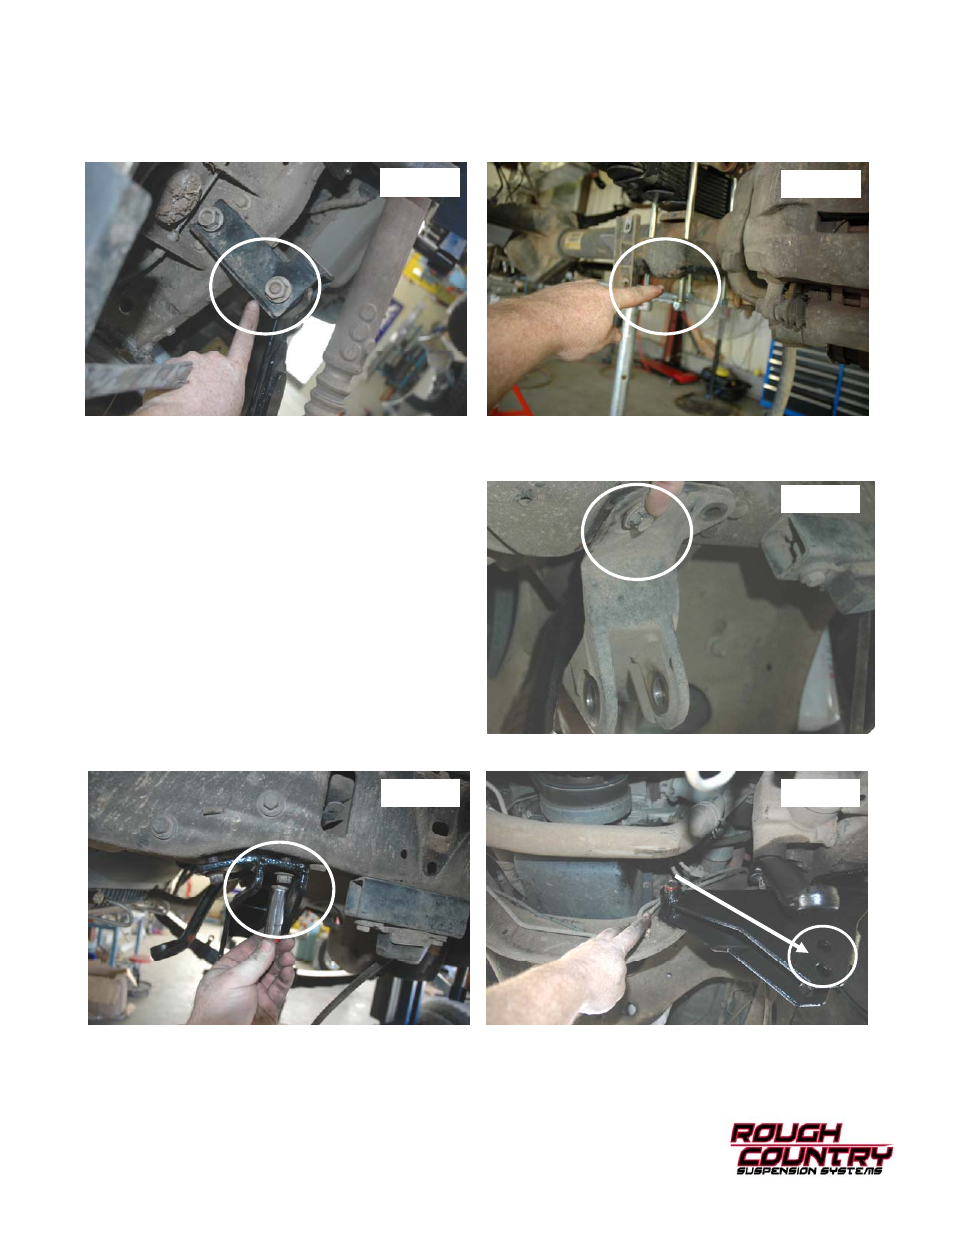
14. Position the rear of the spring in the spring shackle and install the factory nut from the inside, facing outward. Install
the factory nut, but do not tighten at this time. The spring eyebolts will be tightened later when the weight of the vehi-
cle is on the springs. See PHOTO 5.
15. Position the u-bolt plate and bottom u-bolt cradle and install the supplied u-bolts. Snug up u-bolts, but do not tighten.
See PHOTO 6.
16. Repeat steps on passengers side of vehicle.
17. Using a 22mm socket tighten u-bolts to 99 ft/lb.
18. Using a 15mm socket remove the factory track bar, re-
tain hardware for re-use. Install the new track bar
bracket # 94002001 in the original track bar bracket loca-
tion, using a 15mm socket. Reuse the factory fasteners.
Torque to factory specs. Attach the upper end of the
track bar to the bracket using the supplied 5/8” x3 1/2”
bolt and nyloc nut. The track bar sleeve clearance is tight
for this bolt and it might require some light taps with a
hammer to seat fully, use caution not to damage the bolt
threads. The bolt should be installed from the front to
rear and hand tighten only. It will be fully tightened in a
later step.
19. Using a 15mm socket, install the new track bar bracket #
94002008 in the original track bar bracket location. Re-
use the factory fasteners. Torque to factory specs. See
PHOTO 7,8, and 9.
19. Using a 32mm socket, attach the upper end of the track bar to the new bracket in the upper hole for the 4” lift, lower
mounting hole for the 6” lift—see PHOTO 9. Using the factory hardware. Insert the bolt from the front to the rear
and hand tighten only, it will be tightened in a later step.
Photo 5
Photo 6
Photo 7
Photo 8
Photo 9