Rough Country 372.20 User Manual
Page 3
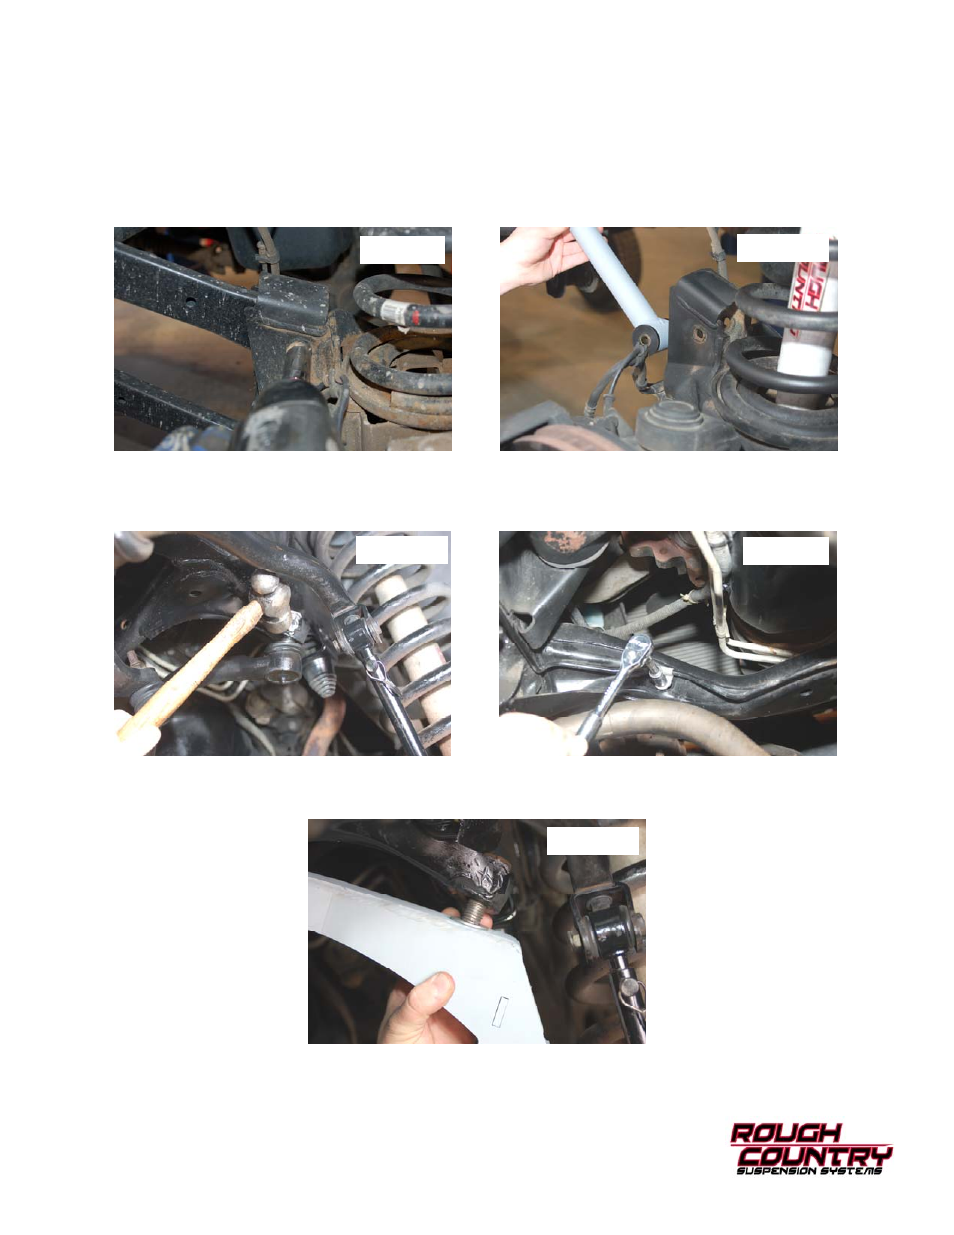
11. Remove the upper suspension arm nut and bolt at the axle a shown in Photo 6. Remove the nut and bolt at the
frame and remove the upper suspension arm. Repeat this step for the opposite side of the vehicle. Note: save
bolts, nuts and washers for later installation.
12. Attach the grease fittings provided to the new Rough Country upper suspension arms using a 3/8" wrench. Note:
install one 90º fitting and one straight fitting into the upper suspension arms. Insert the two bushing halves into
the upper suspension arm and press in the upper suspension arm sleeve provided.
13. Install the upper suspension arms in place of the stock upper suspension arms as shown in Photo 7. Slight prying of
the mounts may be necessary for arm installation. Install the original front and rear suspension arm bolt and slightly
tighten the nuts.
14. Remove the track rod from the bracket on the frame by removing the cotter key and using a 21mm wrench. Strike
the bracket as shown in Photo 8 to dislodge the stock track rod.
15. Remove the brake line from the frame clip using a 13mm wrench. This is done to allow room for the new track bar
bracket to mount to the frame. See Photo 9.
16. In-
stall the new track rod bracket in stock mount with flat washer in between the bracket and the stock mount as shown
with supplied 18mm x 70mm bolt, washer/nut. Tighten using a 1 1/16 wrench. See Photo 10.
Photo 6
Photo 7
Photo 8
Photo 9
Photo 10