Rough Country 488.20 User Manual
Page 4
18. Remove the factory sway bar link bracket from the top of the frame using a 15mm wrench and reposition it under the
frame. Tighten sway bar bracket hardware.
19. Assemble the bushings / sleeves in the front bent sway bar links.
20. Using a 18mm socket, and 15mm wrench, attach the upper ends of the supplied bent sway bar links to the stock
brackets as shown using the supplied 12MM X 115MM bolt, large washers and nuts. See Photo11.
21. Swing the sway bar up to meet the sway bar link and install using the supplied 12mm x 90mm bolts/washers & nuts.
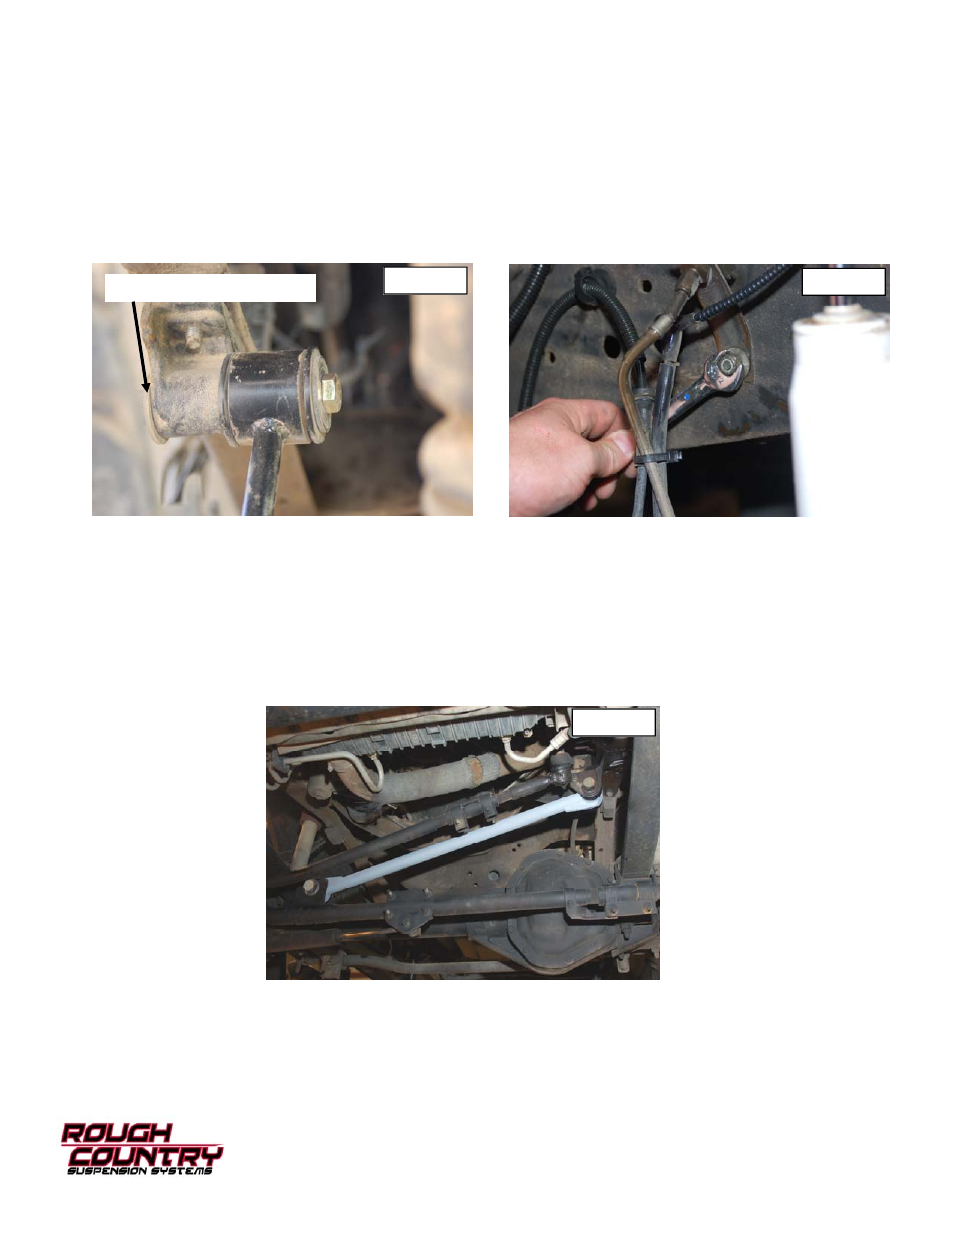
22. Remove the stock brake line from the hard line on the frame rail.
23. Remove the brake line from the brake caliper.
24. Install the new brake line on the hard line and on the caliper with factory bolts using the supplied brake line crush
washers. Secure the brake line bracket that was removed in step 10 on the frame rail using a 1/2” wrench. See
Photo 12.
25. Install the new brake line on the caliper with factory hardware.
26. Be sure to bleed the brake system after the front and rear lines have been replaced.
27. Install tire/wheels and torque to factory specifications
28. Raise the vehicle and remove the jack stands. Lower the vehicle to the ground and tighten all spring hardware.
29. Install the new Rough Country shock absorbers part #650341 hydro / 650377 nitro with supplied hardware.
30. To reattach the new track bar it will be necessary for two people to perform this task. With the vehicle running, turn
the steering wheel until the track bar aligns, install factory bolt and torque to factory specification. See Photo 13.
31. Reinstall front bumper at this time re-using the factory hardware.
32. Proceed to the carrier bearing drop instructions and pitman arm installation instructions.
Photo 12
Photo 11
Photo 13
Large washer installs here