Rough Country 488.20 User Manual
Page 3
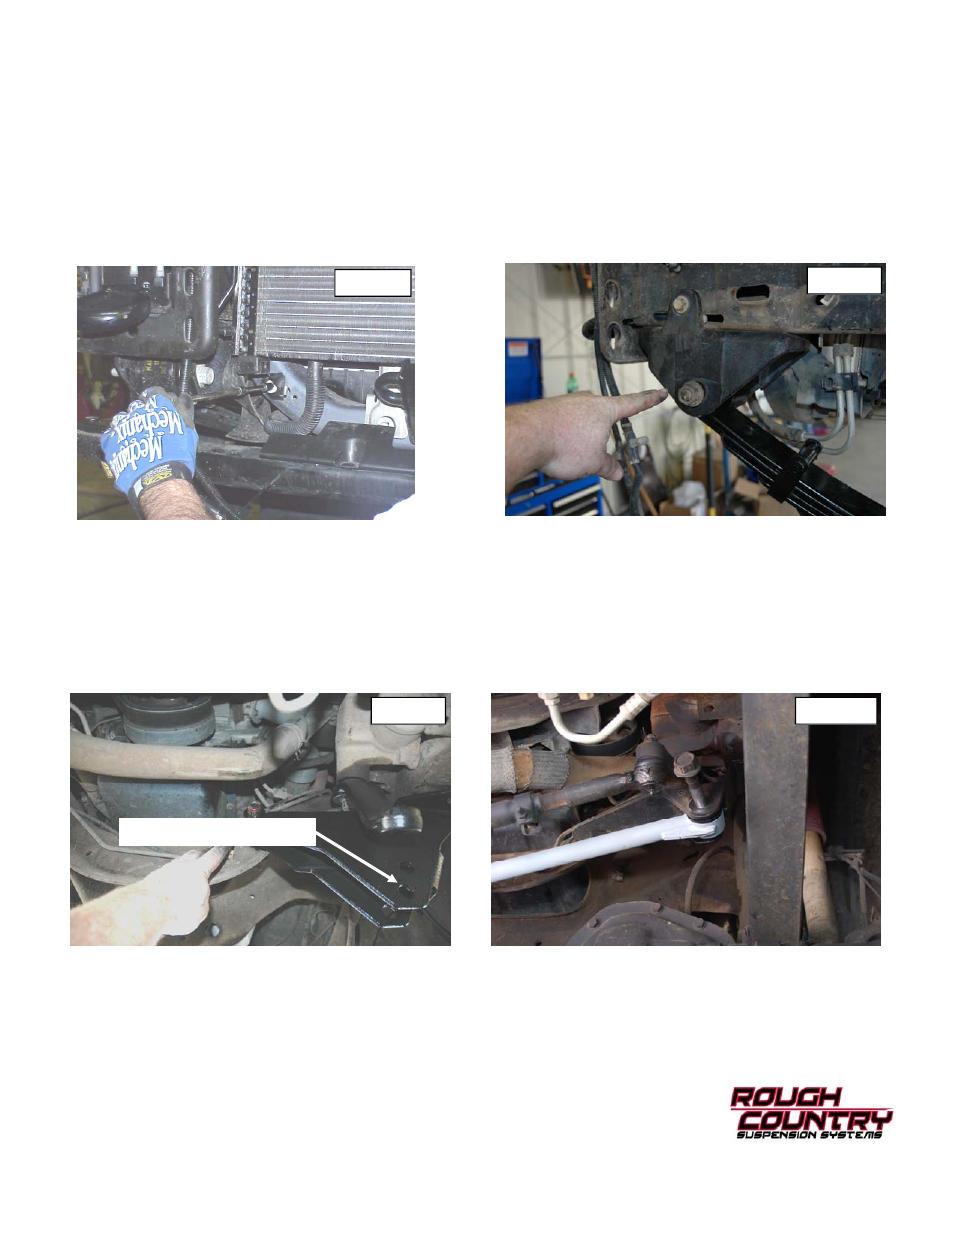
8. The radiator cooler lower mounts will have to be removed to allow the cooler to move outward to gain access to the
front spring bolts. Remove bolts on both sides of cooler as shown in Photo 7 (Passenger Side Shown). Retain the
factory hardware for reuse.
9. Remove the leaf spring bolts from the shackle and frame mount using a 21mm and 24mm wrench and retain hard-
ware for re-use. Reattach the transmission cooler to the factory location using the factory hardware.
10. Remove the brake line bracket from the axle using a 1/2” wrench to allow slack in the line.
11. Remove the sway bar links from the frame and sway bar using a 18mm & 15mm wrench. Retain the stock hardware
for reuse.
12. Remove the axle u-bolts using a 22mm socket and lower the axle /springs & brackets down. Do not lower beyond
the limit of the brake lines. Lower the axle down and remove the stock springs. Retain the stock leaf spring bolt /
hardware.
13. Locate the new Rough Country front leaf springs part # 8073and install in the stock frame mount location and the
shackle mount with the factory hardware. See Photo 8. Do not tighten at this time.
14. Jack up the front axle to meet the leaf springs making sure the center pin is aligned and install the supplied 9/16” x 3
1/8” x 11 1/2” u-bolts.
15. Install the new track bar bracket in the original track bar bracket location. Reuse the factory fasteners. Torque to fac-
tory specs. See Photo 9.
16. Using a 30mm socket, attach the upper end of the track bar to the new bracket in the lower hole using the factory
hardware. See Photo 10. Insert the bolt from the front to the rear and hand tighten only, it will be tightened in a later
step. Do not install the track rod on the axle at this time..
17. Using a 18mm socket and wrench, install the front shock absorbers in the factory location, part # 650328 hydraulic/
650380 gas charged shock using hardware included in kit. Tighten the upper shock nut and lower bolt to 75 ft/lbs.
Photo 7
Photo 8
Photo 9
Install track rod bolt here
Photo 10