Rough Country RC609 User Manual
Page 4
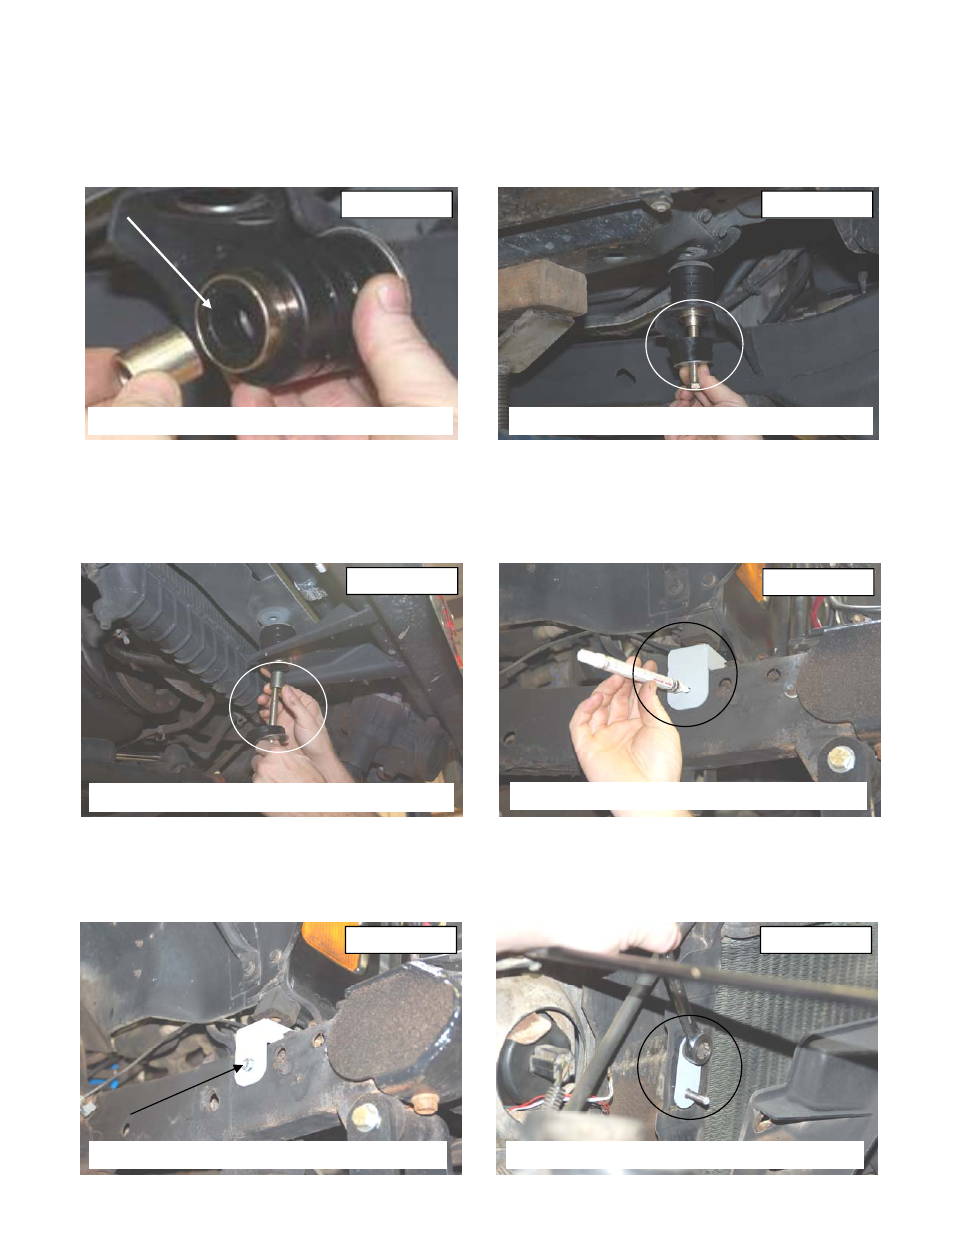
11. Install the supplied crush sleeve in the new body bushings with the smaller inner diameter hole. See Photo 7.
12. Install the bushings in the 3 side body locations marked 1 in the Diagram 1.
13. Remove the stock 2 rear most body bushings and center front body bushing marked 2 in Diagram 1.
14. Insert the supplied large diameter body bushings in the 2 rear most mounts and center front mount.
15. Repeat for opposite side.
16. Apply thread locker to the supplied 1/2” x 4 1/2” bolts and install the lower bushing / crush sleeve and washer on the
3 side body mounts. See Photo 8. Do not fully tighten at this time.
17. Install the lower bushing / crush sleeve and washer in the 4 rear mounts. Apply thread locker to the supplied 7/16” x
4” bolts and install. Do not tighten at this time.
18. Apply thread locker and install the 7/16” x 4” bolts, washer and crush sleeve in the front center mount. See Photo 9.
Do not tighten at this time.
19. Install the new front bump stop extension under the bump stop on radiator core support. Using the bracket as a tem-
plate mark hole to be drilled. See Photo 10.
20. Drill a 1/4” hole in frame and secure using the supplied 5/16” x 1” self tapping bolt and a 13mm socket to tighten.
See Photo 11. Do not over tighten the bolt. Repeat for the opposite side.
21. After all body puck are in tighten all bolts. 19mm socket for the 1/2” bolts and 16mm for the 7/16” bolts.
22. Install the 1/4” clinch studs into radiator drop bracket using hammer and small socket
23. Install the four radiator fan shroud drop brackets using stock hardware. See Photo 12.
Photo 8
Photo 9
INSTALL BUSHINGS WITH NEW HARDWARE
INSTALL CENTER BOLT & BUSHINGS
Photo 10
MARK THE HOLE TO BE DRILLED
Photo 7
INSTALL CRUSH SLEEVE IN BUSHING
Photo 12
INSTALL THE SHROUD BRACKETS
Photo 11
INSTALL THE SUPPLIED 5/16” X 1” BOLT