Rough Country RC609 User Manual
Page 3
INSTALLATION INSTRUCTIONS
1. Disconnect the negative battery cable using 1/2” wrench.
2. Remove the plastic jeep cover from front of vehicle using a 3/8” wrench and the metal plate that secure the brake
line.
3. Disconnect air intake from air filter housing and from throttle body. Depending on year remove coolant reservoir and
power steering reservoir from fan shroud.
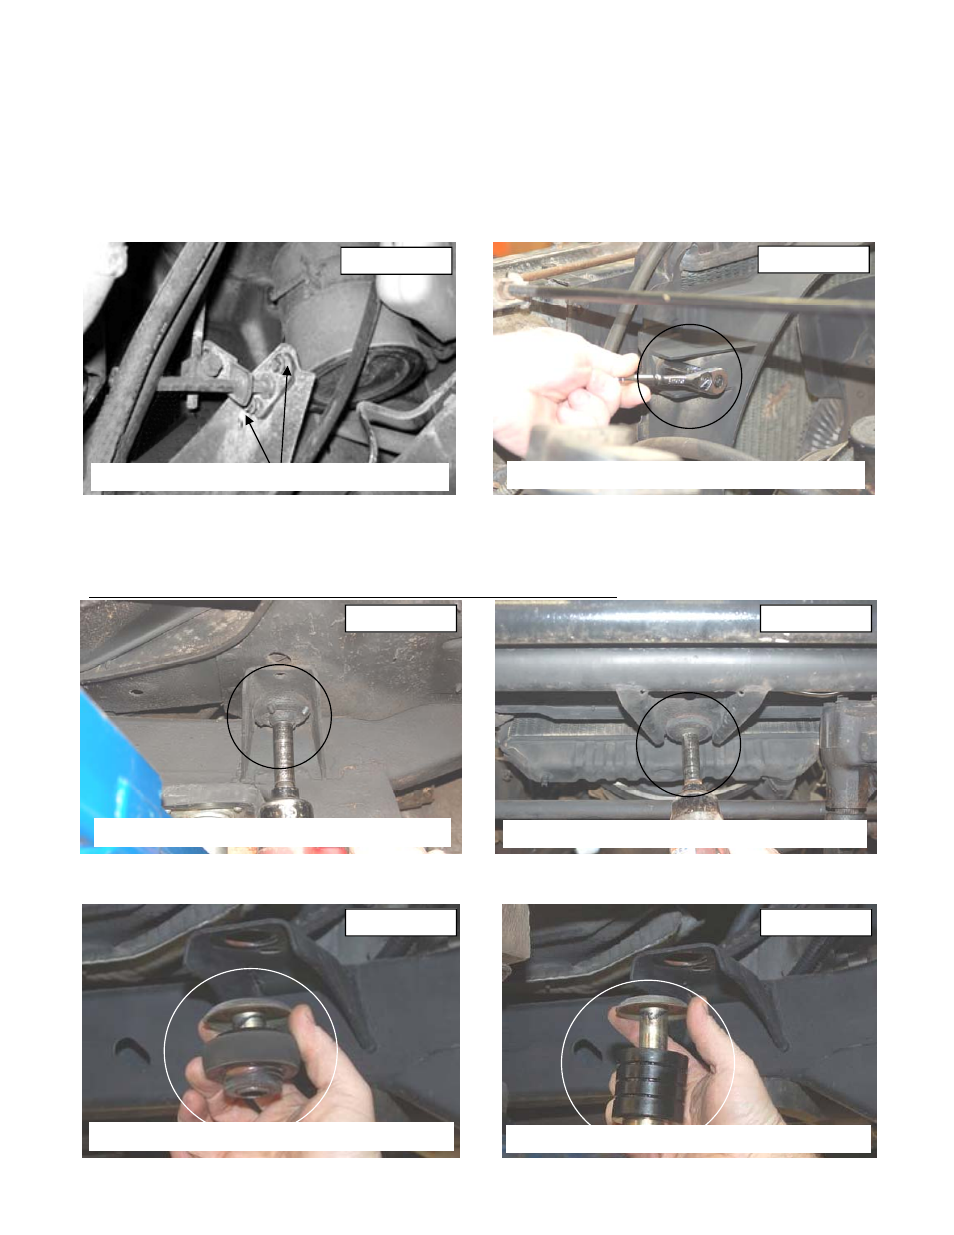
4. (AUTO TRANSMISSION ONLY) Remove the linkage on the frame to allow the body to be moved up by removing
the two bolts and remove the cotter pin securing it to the engine bracket. Allowing the shifter cross shaft to hang
freely. Retain hardware for reuse. See Photo 1.
5. Remove the 4 bolts from radiator shroud using a 13mm socket. See Photo 2.
6. Loosen all eleven body mount bolts using 5/8” socket. There is one in center of grill, three under each door, two
above rear axle and two at each rear corner. See Photo 3.
7. Only remove bolts on one side at a time. Front center bolt must be remove for both sides. See Photo 4.
8. Using floor jack or jack stand and a wood block raise body from frame only enough to safely install the body puck.
Take Caution not to over extend wires, brake lines, cables and steering shaft.
9. Remove the steel cup / sleeve from the stock body bushings. See Photo 5 The steel cup/ sleeve will be reused.
10. Reinstall the steel cup / sleeve from the stock body bushing in the new body bushing. See Photo 6.
Photo 2
Photo 3
REMOVE THE SHROUD HARWARE
LOOSEN ALL BODY MOUNTS
Photo 4
REMOVE FRONT CENTER SUPPORT BOLT
Photo 5
Photo 6
REMOVE THE STOCK BODY BUSHINGS
INSTALL CUP/SLEEVE IN NEW BUSHING
Photo 1
AUTO ONLY—REMOVE SHIFTER BRACKET