Rough Country 1062 User Manual
Page 3
12. Place the winch plate assembly in between the frame rails of the Jeep and align holes in the frame. In this step it
does help to have someone hold the winch plate steady to allow the bolts to be inserted. Helpful Hint: Two bolts-one
on each side can be inserted in the front of the plate to temporarily hold the plate in position on the frame.
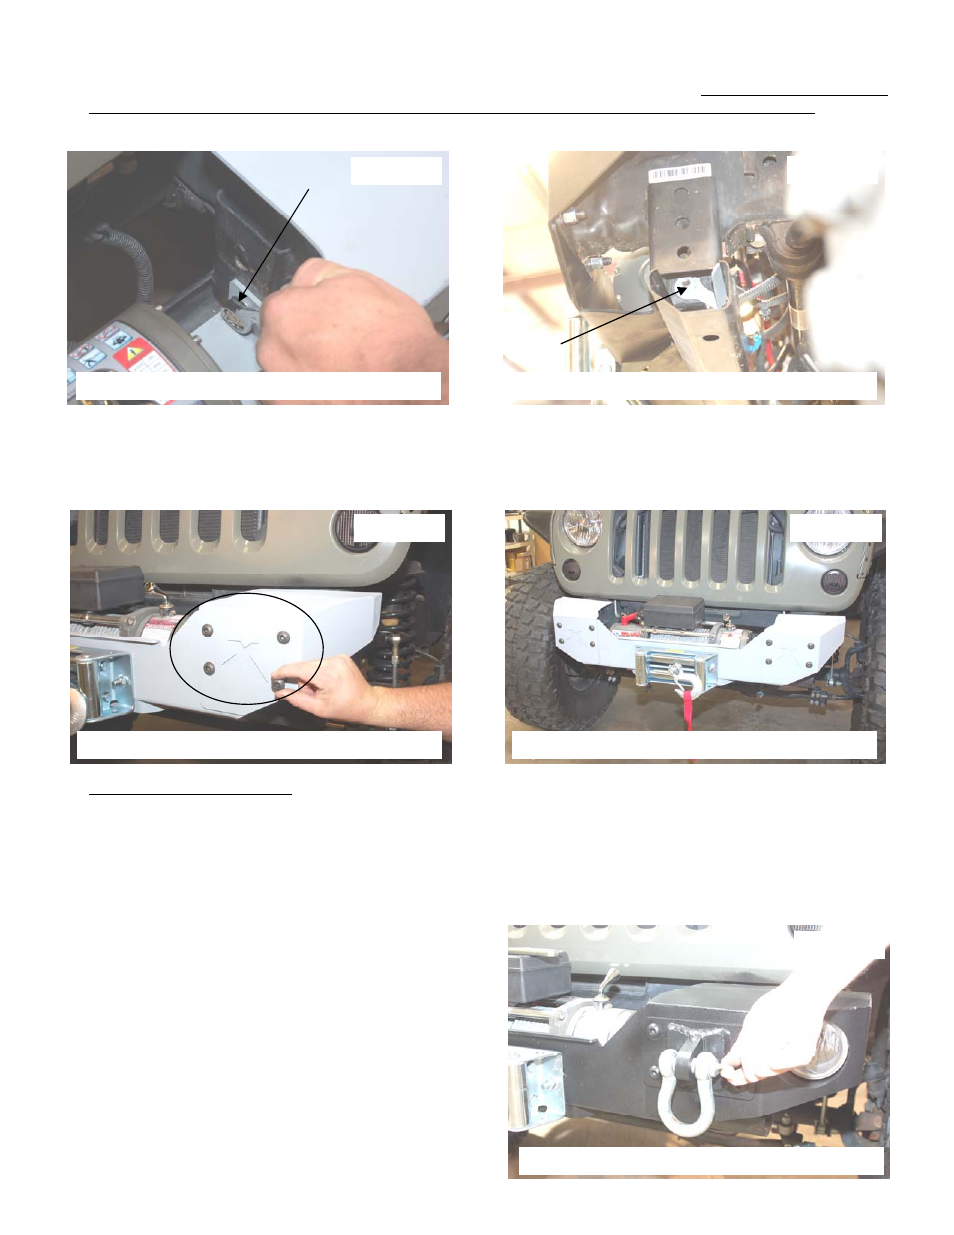
13. Install the supplied 1/2” x 1 1/2” bolt through the winch plate and through the frame as shown and secure with the
supplied flag nut. Tighten using a 3/4” wrench. See Photo 7 & 8.
14. If installing the optional d-ring mount at this time, place the mount on the plate and install the supplied button head
bolts and lock nuts on the front of the bumper and tighten using a 8mm allen wrench & 3/4” wrench. See Photo 9.
15. Install d-rings if mounts installed.
16. Route winch power / ground cables away from moving or sharp edges and install to battery.
17. Photo 10 shows winch installed.
18. If the 1062 kit was purchased’ Remove the fog lights from the factory bumper and install in the Light Mount caps with
the supplied 10x24 nuts in the 1062 kit. Tighten hardware.
19. Reroute the wiring hardness and reinstall on the fog lights. NOTE: It may be necessary to extend the wiring if the
wiring hardness is too short to reinstall on the fog lights. In that case longer wires may be added in to extend the har-
ness. Be sure to weather proof the connection when complete.
Photo 7
Photo 8
Photo 9
Photo 10
INSTALL 1/2” x 1 1/2” BOLTS
INSTALL FLAG NUTS FOR 1/2” X 1 1/2” BOLTS
INSTALL BUTTON HEAD BOLTS / NUTS
SHOWN INSTALLED WITH WINCH
OPTIONAL D-RING MOUNT INSTALLATION INSTRUCTIONS #1046 ( See Above)
1. Install with the supplied hardware included with the winch
plate as instructed above. See Photo 11 for a completed
view.
Photo 10
ASSEMBLY SHOWN