Rough Country 900.20 User Manual
Page 4
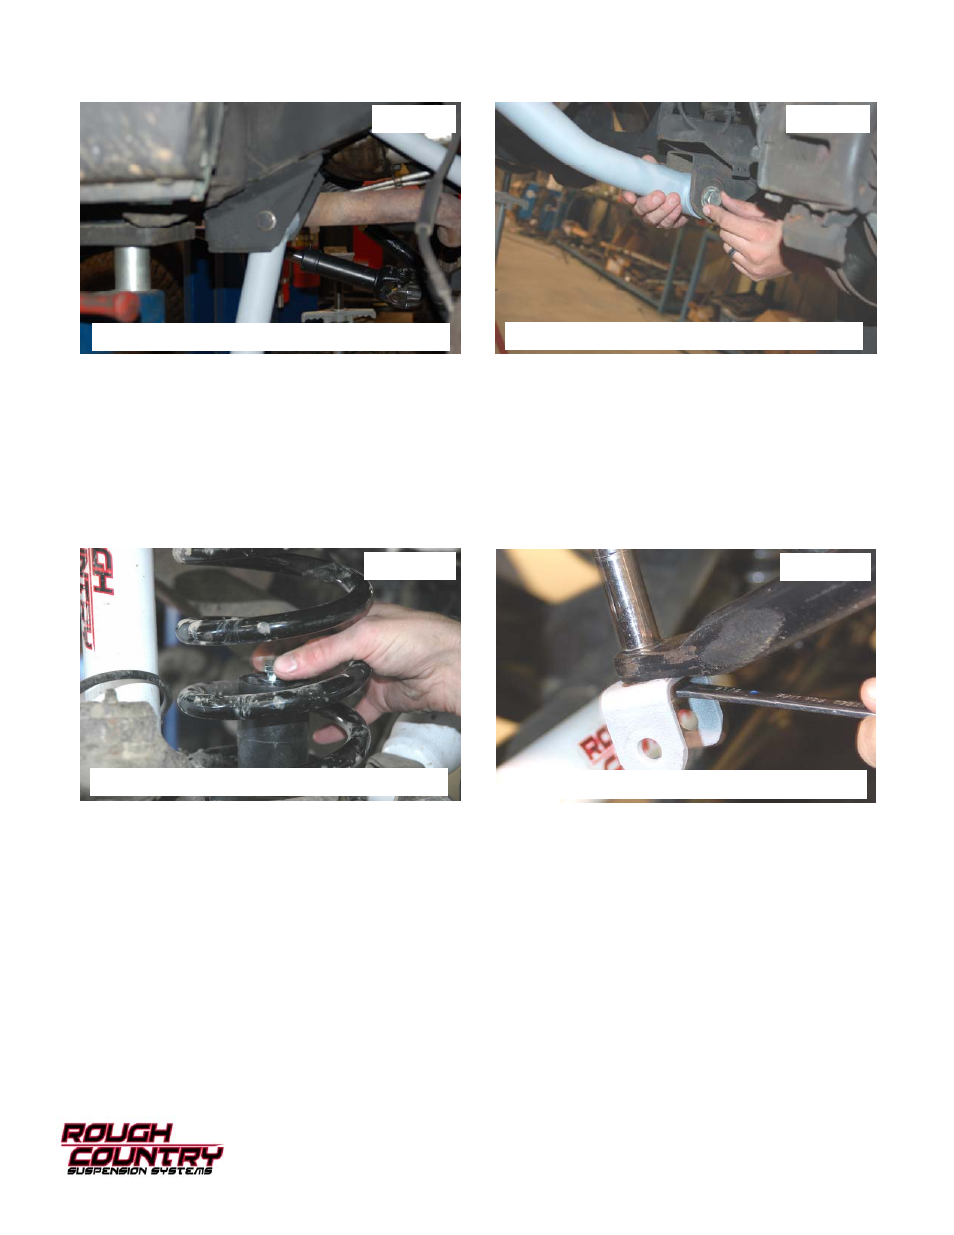
11. Install the lower control arm in the frame mount with the stock hardware. Do not tighten at this time. See Photo 7.
12. Install the lower control arm in the axle mount with the stock hardware. Do not tighten at this time. See Photo 8.
13. Drill the center of the coil seat using a 11/32” drill bit and install supplied 3/8” x 3.5” self tapping bolt from 1687 bag2
using a 9/16” wrench. screw bolt into the center of the coil spring plate to tap a hole for the bump-stop to be installed
in the next step.
14. Install the new coil spring, with the nylon bump-stop and bolt from the above step in coil. A coil spring or strut com-
pressor will be needed to install the new coil spring. Install the new spring into the upper and lower coil spring seat.
Make sure the coil spring is seated properly on the coil seat, by rotating the spring until the pigtail end fits into the
spring pocket. Using a 9/16” wrench secure the bump-stop back in place. See PHOTO 9. Install the coil spring clip
using a 13mm wrench. Torque to 16ft/lbs.
15. Install the new sway bar hoop on the sway bar where the stock link was secured, using the supplied 3/8” x 1 1/4” bolt
large OD flat washer and flange lock nut. See PHOTO 10.
PHOTO 7
PHOTO 8
PHOTO 10
INSTALL THE LOWER CONTROL ON FRAME
INSTALL THE ARM ON THE AXLE
INSTALL THE BUMPSTOP IN THE COIL
INSTALL THE UPPER SWAY BAR BRACKET
PHOTO 9