Rough Country 1106 User Manual
Page 2
INSTALLATION INSTRUCTIONS
1. Chock the rear wheels.
2. Jack up the front of the vehicle and support with jack stands on the frame just rearward of the lower control arm
mounts.
3. Place a jack under the axle and lightly support the weigh of the axle.
4. On 2012 models the heat shield on the passenger side upper arm will need to be removed. The heat shield will not
be reused. Remove shield at this time.
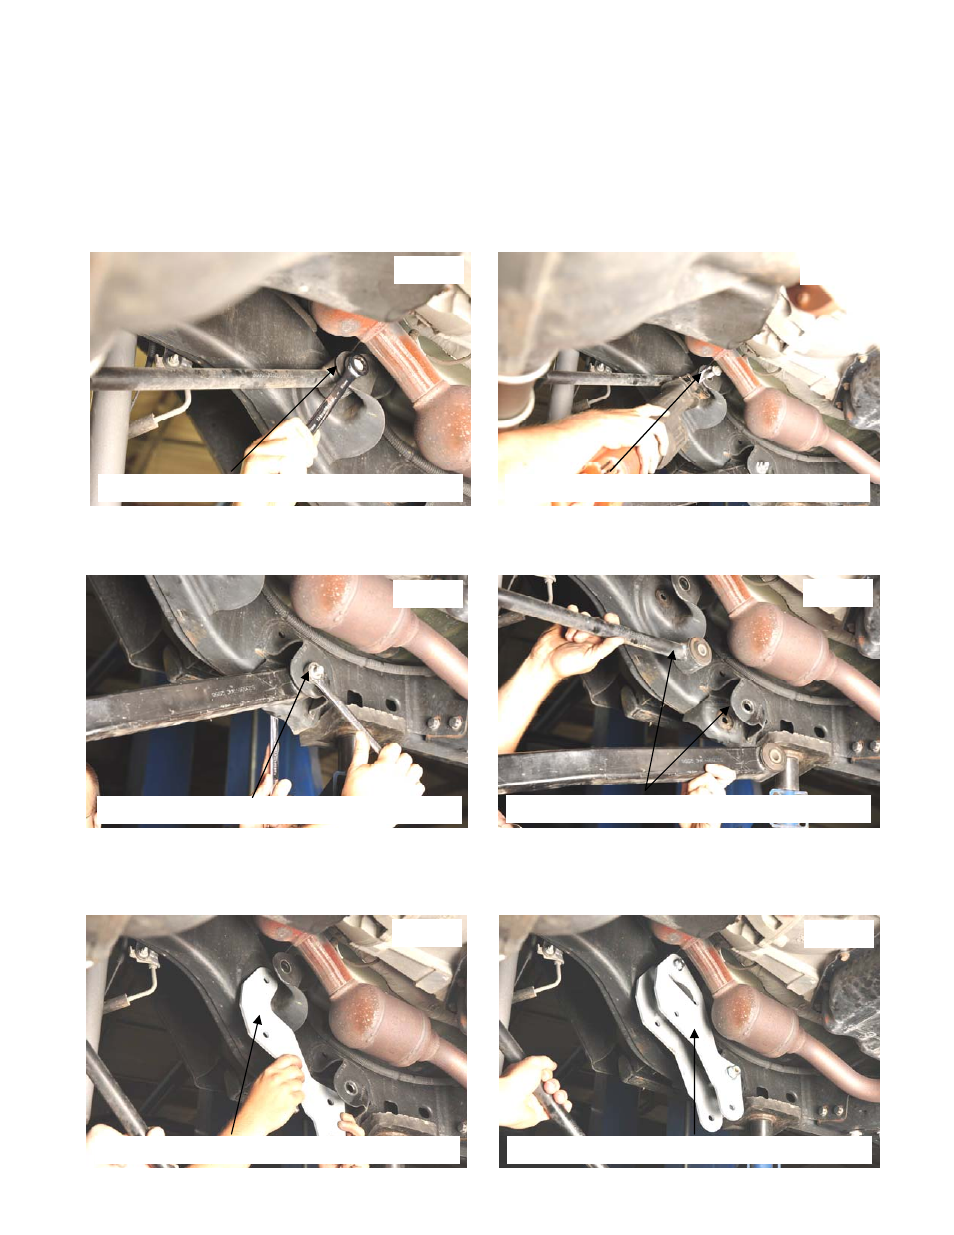
5. Loosen the upper control arm bolt on the frame and from the axle using a 18mm wrench. See Photo 1. Retain the
axle hardware as it will be reused.
6. To remove the upper control arm the frame bolt must be cut. See Photo 2. Cut the bolt as shown.
7. Loosen and remove the lower control arm hardware from the axle and frame using a 21mm wrench. Retain the fac-
tory hardware. See Photo 3.
8. Remove the upper and lower control arms from the vehicle. See Photo 4.
9. Place the outer frame bracket as shown on the frame mounts as shown in Photo 5.
10. Install the inner frame bracket with the supplied crush sleeves and secure with the 14mm x 110mm bolt, washers
and lock nut on the lower mount and the supplied 12mm x 90mm bolt, washers and flange lock nut on the upper
mount. Do not tighten at this time. See Photo 6. The bracket with the slot is the inner bracket.
Photo 1
Photo 2
Photo 3
Photo 4
Photo 5
Photo 6
LOOSEN THE UPPER ARM HARDWARE
CUT THE UPPER BOLT
LOOSEN THE LOWER ARM HARDWARE
REMOVE THE ARMS
PLACE THE OUTER BRAKET IN MOUNTS
PLACE THE INNER BRACKET AND SECURE